
Desserts
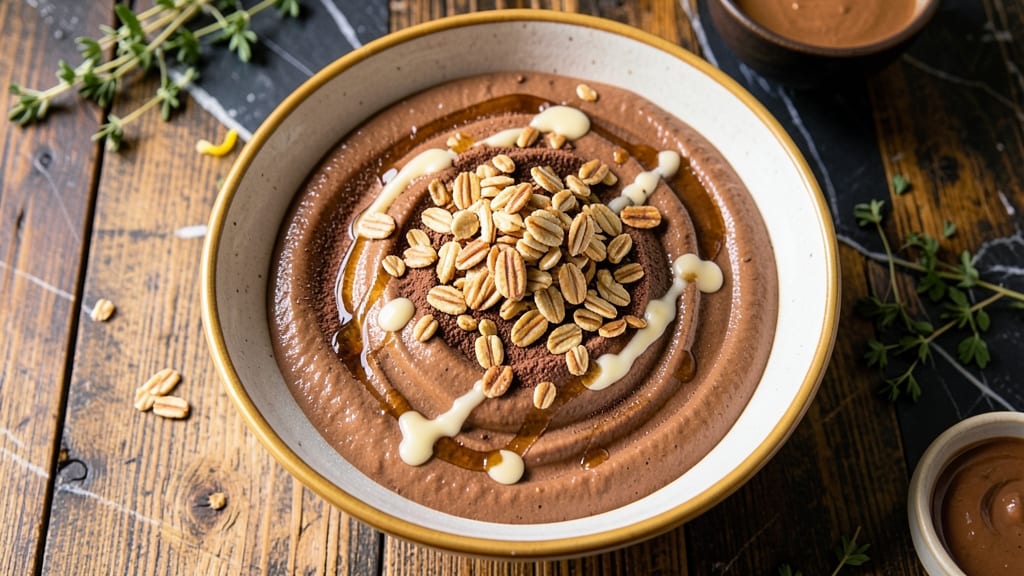
This banana oat chocolate recipe transforms simple pantry staples into decadent, no-bake fudgy bites that taste like dessert but require no oven. The secret lies in blending ripe bananas, hearty oats, and rich chocolate into a dough that firms up beautifully—no refined sugar needed.
I perfected this recipe after burning through three batches of overly sticky energy balls, and now it’s a foolproof method that delivers restaurant-quality texture every time.
The magic happens when you mix ripe bananas (the sweeter, the better) with rolled oats and cocoa powder, then roll the mixture into bite-sized clusters. Chilling them for just 30 minutes transforms the dough into firm, fudgy bites with a satisfying snap.
The result? A dessert that’s rich, naturally sweet, and packed with fiber—perfect for snacking, meal prep, or gifting.
What makes this recipe stand out is its versatility. You can enjoy these bites raw and no-bake, or for a deeper flavor, bake them for 10 minutes at 350°F for a warm, gooey center.
They stay fresh in the fridge for up to 5 days or freeze beautifully for 3 months, making them ideal for busy schedules. The best part? No added sugar, no guilt—just pure, satisfying indulgence.
Whether you’re craving a quick energy boost, a vegan dessert, or a make-ahead treat, this recipe delivers. The combination of creamy banana, chewy oats, and melty chocolate creates a texture that’s impossible to resist. Let’s get started on these no-fuss, no-bake fudgy bites that taste like a chocolatey hug.
Ingredients for banana oat chocolate
Simple pantry staples transform into decadent, no-bake chocolate bites with perfect texture.
| Ingredient | Amount | Notes |
|---|---|---|
| Ripe Bananas 🍌 | 2 medium | Spotty skin preferred for sweetness |
| Rolled Oats 🌾 | 1 ½ cups | Old-fashioned, not quick oats |
| Unsweetened Cocoa Powder 🍫 | ½ cup | Natural or Dutch-processed preferred |
| Almond Butter 🥜 | ¼ cup | Natural, no added sugar |
| Maple Syrup 🍯 | 2 tbsp | Grade B for deeper flavor |
| Vanilla Extract 🌿 | 1 tsp | Pure alcohol-free if preferred |
| Ground Flaxseed 🌾 | 1 tbsp | For binding, no substitution |
| Chia Seeds 🌱 | 1 tbsp | For extra fiber and texture |
| Dark Chocolate Chips 🍫 | ½ cup | 70% cocoa or higher |
| Sea Salt 🧂 | ¼ tsp | Fine grain, for finishing |
| Coconut Oil 🥥 | 1 tbsp | For rolling, optional |
Ripe bananas are the foundation—look for spots and softness for maximum sweetness. Trader Joe's and Whole Foods bulk bins often have the sweetest varieties. Rolled oats should be old-fashioned, not quick oats—they provide that satisfying chew. For cocoa powder, Hershey's Special Dark or Ghirardelli are reliable choices, but any natural cocoa will work. The almond butter should be natural, no sugar added—Justin's or Smucker's are good options. If you're using a nut butter with added oil, reduce the coconut oil slightly.
No almond butter? Sunflower seed butter or tahini works well, though the flavor will differ. Short on maple syrup? Agave nectar or date syrup are excellent substitutes. For vanilla, vanilla bean paste adds depth if you want to splurge. The flaxseed and chia seeds are non-negotiable for binding—don't skip them. If you're avoiding nuts entirely, sunflower seed butter is your best bet. For chocolate chips, Enjoy Life brand is vegan-friendly and widely available. The sea salt should be fine grain—Diamond Crystal is ideal for finishing.
Store the dough in an airtight container in the fridge for up to 3 days before rolling. Once formed, these bites keep for 5 days in the fridge or 3 months frozen. For freezing, portion into single-serving bags for easy grab-and-go snacks. If you bake them, use parchment paper for easy release—10 minutes at 350°F gives that gooey center. Portion into 1-inch balls for consistent size and texture.
Why You'll Love This Recipe
- No-Fuss Mixing: I swear by the "dump-and-stir" method here—just mash those bananas, toss in the oats and cocoa, and let the almond butter and maple syrup bind it all. No fancy equipment, no waiting for dough to rest, just 5 minutes of hands-on time.
- Rich, Fudgy Magic: That combo of ripe bananas and cocoa powder? It’s like a secret handshake for chocolate lovers. The almond butter adds this buttery depth, while the maple syrup keeps it from tasting too dry—basically, dessert-level flavor with zero guilt.
- Breakfast or Snack Hero: Honestly, this recipe works everywhere. Freeze it for grab-and-go energy bites, bake it into bars for a quick breakfast, or serve it warm with yogurt for a cozy afternoon treat. My kids even sneak bites "by accident" when I’m not looking.
- Budget-Friendly Staples: Between us, this recipe is my pantry’s best-kept secret. Oats and bananas stretch your dollar, cocoa powder adds luxury for pennies, and almond butter lasts forever. I’ve made a batch for under $3—and it disappears faster than my willpower on a bad day.
Step-by-step instructions for banana oat chocolate bites
Here's how to create rich, fudgy bites without oven or stove—just mix and chill.
Mash the Bananas Thoroughly
In a medium bowl, mash the 2 medium ripe bananas with a fork until completely smooth. You should have a thick, creamy puree with no visible lumps. This step is crucial because any banana chunks will create texture inconsistencies in your bites. If your bananas aren't perfectly ripe (spotty skin), microwave them for 10-15 seconds first to soften them.
I like to press the mashed bananas through a fine-mesh sieve to remove any remaining fibers, but this is optional. The smoother your base, the more uniform your final texture will be. Set the banana puree aside while you prepare the dry ingredients.
Combine Wet and Dry Ingredients
Add the 1.5 cups rolled oats, 0.5 cup unsweetened cocoa powder, 1 tbsp ground flaxseed, 1 tbsp chia seeds, and 0.25 tsp sea salt to the mashed bananas. Stir vigorously with a sturdy spoon or spatula until everything is evenly distributed. The mixture will be thick and crumbly at first, but that's normal.
Next, stir in the 0.25 cup almond butter and 2 tbsp maple syrup until fully incorporated. The almond butter will give these bites a rich, nutty depth, while the maple syrup adds natural sweetness and helps bind everything together. If the mixture seems too dry, add 1-2 teaspoons of warm water to help it come together.
Fold in Chocolate and Chill
Gently fold in the 0.5 cup dark chocolate chips using a silicone spatula. Work quickly to prevent the chocolate from melting. You want the chocolate distributed evenly but still visible as pockets throughout the mixture. This creates those delicious chocolate surprises in every bite.
Transfer the mixture to a small bowl and cover it tightly with plastic wrap. Place the bowl in the refrigerator and chill for at least 2 hours, or until the mixture is firm enough to handle. This chilling step is what transforms your dough into fudgy bites with clean edges. For best results, I recommend chilling overnight—it enhances the flavor development and makes the bites even more satisfying.
Roll and Set
Once chilled, remove the mixture from the refrigerator and let it sit at room temperature for 5-10 minutes to soften slightly. This makes it easier to handle without sticking. Using your hands, roll the mixture into 1-inch balls and place them on a parchment-lined tray. If the mixture is too sticky, wet your hands slightly with water to prevent sticking.
Return the tray to the refrigerator and let the bites firm up for another 30 minutes. This final chilling step ensures they hold their shape when you're ready to serve. For extra shine and texture, you can lightly brush the tops with melted 1 tbsp coconut oil before the final chilling. These bites will keep in an airtight container in the refrigerator for up to 5 days, making them perfect for meal prep.
Pro Tips For Making Banana Oat Chocolate
- Mash Bananas First: I learned this the hard way—just tossing in whole bananas means you’ll end up with underripe chunks that turn into a mushy, uneven texture. Use a fork to break them down completely before mixing, or pulse them briefly in a food processor if you’re impatient. No one wants a surprise banana in their bite.
- Toast Oats Separately: Dry-toasting the oats in a pan for 3-4 minutes before adding wet ingredients makes a real difference—they’ll absorb the banana and chocolate better and give that satisfying crunch. Skip this, and your texture will turn into a sad, gummy mess instead of something with bite.
- Warm the Almond Butter: Cold almond butter? Forget it. Warm it for 10 seconds in the microwave or stir it into the mix while the bananas are still hot—this guarantees it blends smoothly without clumping. I used to ignore this, and the result was always streaky and uneven.
- Balance the Sweetness: Maple syrup is your friend, but don’t drown the cocoa. Start with 1-2 tablespoons, then taste as you go—add more only if the chocolate flavor feels muted. Overdoing it turns this into dessert into a sticky syrup bomb. Trust your palate, not the recipe.
Make-ahead tips for banana oat chocolate
Prep Ahead Strategy
Start by prepping the dough the night before for maximum flavor development. After mixing all ingredients, transfer the dough to an airtight container and refrigerate for at least 8 hours (overnight is ideal).
This extended chilling time deepens the chocolate flavor and creates a more cohesive texture when you roll the bites the next day. 🌙
Freezer-Friendly Bites
Portion the dough into 1-inch balls and place them on a parchment-lined tray. Freeze for 1 hour until firm, then transfer to a ziplock bag or airtight container. These bites freeze beautifully for up to 3 months—perfect for grab-and-go snacks.
When ready to eat, thaw at room temperature for 10-15 minutes or microwave for 10 seconds for a warm treat.
Baked Variation Prep
For a warm, gooey center, pre-portion the dough into 1-inch balls and place them on a parchment-lined baking sheet. Cover with plastic wrap and refrigerate for 1 hour before baking. This ensures they hold their shape during the 10-minute bake at 350°F.
I like to bake them in batches and store the finished treats in an airtight container for up to 4 days in the fridge.
Storage Hacks
Keep unrolled dough in an airtight container in the fridge for up to 3 days. For rolled bites, store in a single layer on a tray before transferring to an airtight container to prevent sticking.
If stacking, place parchment paper between layers. These bites stay fresh for 5 days in the fridge—ideal for meal prep or office snacks.
Portion Control
Use a cookie scoop or ice cream scoop to portion the dough into 1-inch balls for consistent size. This ensures even cooking if baking and uniform texture if chilling.
For extra precision, weigh each portion at 1.5 ounces (about 42 grams) per bite. This makes it easy to scale up or down for different serving sizes.
Make-Ahead Gifting
Package the bites in cellophane bags tied with twine for a festive touch. Store them in the freezer until ready to give—this keeps them fresh for up to 3 months.
Add a sprinkle of flaky sea salt or a drizzle of melted chocolate before gifting for an elegant presentation. These make thoughtful gifts for teachers, coworkers, or holiday hosts! 🎁
Nutrition facts
Frequently asked questions
Can I make these banana oat chocolate bites without almond butter?
Swap almond butter for sunflower seed butter or tahini for a nut-free option. The texture will be slightly different but still delicious. If using tahini, add 1 extra tablespoon of maple syrup to compensate for its stronger flavor.
Why are my bites too crumbly or falling apart?
Crumbly texture usually means the dough didn't chill long enough. Let it rest in the fridge for the full 2 hours (or overnight for best results). If it's still too dry, mix in 1 teaspoon of coconut oil or add 1 tablespoon of warm water to help bind the ingredients.
How do I make these bites even more chocolatey?
For extra richness, add 2 extra tablespoons of cocoa powder or swap half the oats for melted dark chocolate that's cooled. You can also roll finished bites in extra chocolate chips before the final chilling step. For a fudgy center, bake them for 5 minutes longer at 350°F after the initial 10 minutes.
Can I use quick oats instead of rolled oats?
Quick oats will make your bites softer and less chewy. For the best texture, stick with old-fashioned rolled oats. If you must use quick oats, reduce the amount by 1/4 cup and add 1 extra tablespoon of flaxseed to compensate for the lack of binding power.
What’s the best way to store these for maximum freshness?
Store rolled bites in an airtight container in the fridge for up to 5 days. For longer storage, freeze them on a tray first, then transfer to a bag for 3 months. To prevent sticking, place parchment paper between layers if stacking. For extra freshness, add a slice of bread or apple to the container to absorb moisture.