
Desserts
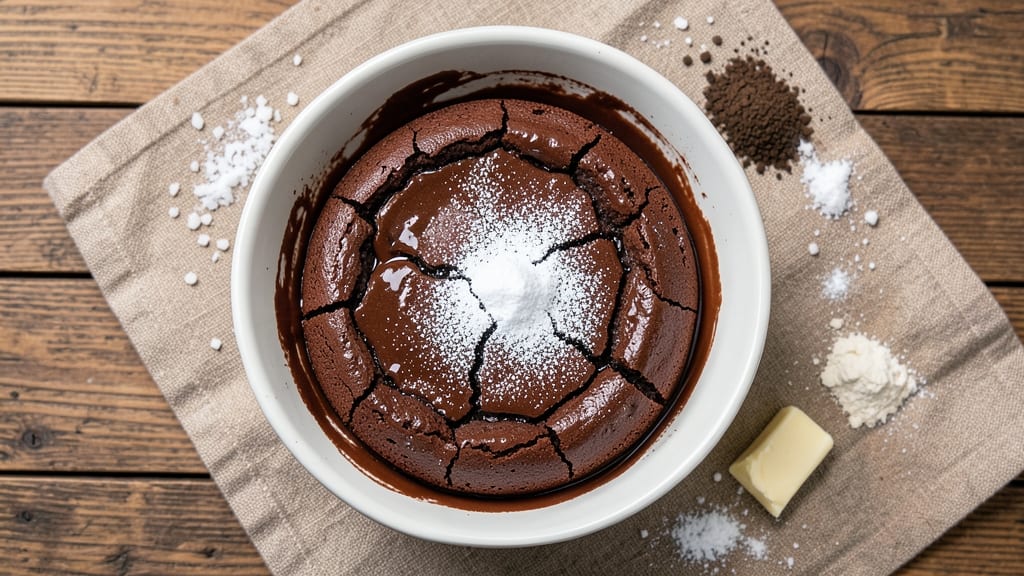
This basic chocolate mud cake recipe delivers the perfect balance of fudgy richness and moist layers that satisfy any chocolate craving. The secret lies in precise ingredient ratios—cocoa powder, melted butter, and espresso powder work together to create deep chocolate flavor without bitterness.
I’ve perfected this recipe over years of baking, ensuring it never dries out or turns cakey.
What sets this recipe apart is its simplicity: just 10 ingredients and 45 minutes total time (including cooling). The cake develops a crackly top while staying tender inside, with a texture that’s dangerously close to fudgy brownie. No special equipment is needed—just a standard mixing bowl and oven.
Once baked, the cake maintains its moisture for days, making it ideal for meal prep or last-minute desserts. The rich chocolate flavor pairs beautifully with whipped cream, chocolate ganache, or even a dusting of powdered sugar. Every slice delivers that satisfying, melt-in-your-mouth experience.
For an extra indulgent touch, add a layer of chocolate buttercream or a sprinkle of sea salt before serving. This recipe is foolproof for beginners but impressive enough for special occasions—proof that the simplest desserts can be the most satisfying.
Ingredients for basic chocolate mud cake
Ten essential ingredients crafting fudgy layers with restaurant-quality chocolate depth.
| Ingredient | Amount | Notes |
|---|---|---|
| Unsalted Butter 🧈 | 1 cup | Melted and cooled to room temperature |
| Granulated Sugar 🍚 | 1 ½ cups | Superfine preferred for smooth texture |
| Unsweetened Cocoa Powder 🍫 | ¾ cup | Natural or Dutch-processed |
| All-Purpose Flour 🌾 | 1 ½ cups | Sifted for lightness |
| Instant Espresso Powder ☕ | 1 tbsp | Enhances chocolate depth |
| Baking Powder 🧂 | 1 ½ tsp | Aluminum-free recommended |
| Salt 🧂 | ½ tsp | Fine sea salt preferred |
| Large Eggs 🥚 | 2 whole | Room temperature for best mixing |
| Vanilla Extract 🌸 | 1 tsp | Pure Madagascar preferred |
| Milk 🥛 | ½ cup | Whole milk for richness |
The cocoa powder is non-negotiable—Valrhona or Ghirardelli deliver the richest flavor, but Hershey's Special Dark works in a pinch. For the butter, Plugrá or Land O'Lakes unsalted are my go-tos, but any high-quality brand will do. The espresso powder enhances chocolate flavor without bitterness; Starbucks VIA or Nescafé Azera are reliable choices. Sift the flour and cocoa together to avoid lumps, and measure your baking powder precisely—aluminum-free brands like Rumford prevent metallic aftertaste. The vanilla extract should be pure Madagascar for authentic flavor, though imitation works if you're on a budget.
No espresso powder? Instant coffee granules at half the amount work, but the flavor won't be identical. Substitute the milk with evaporated milk or heavy cream for extra richness, though the texture will be slightly denser. For a gluten-free version, swap the all-purpose flour for a 1:1 gluten-free baking flour blend. If you're avoiding dairy, replace the butter with vegan butter or coconut oil, though the texture will differ slightly. The sugar can be swapped for brown sugar for a caramel note, but reduce it by 1 tbsp to maintain moisture balance.
Store the cake in an airtight container at room temperature for up to 3 days—it actually improves as it sits. For longer storage, refrigerate for up to 1 week or freeze for 3 months. To reheat, microwave individual slices for 10-15 seconds to restore moisture. The cake's crackly top is a sign of perfection—don't scrape it off! For serving, dust with powdered sugar or top with whipped cream to elevate the presentation. Leftovers make excellent breakfast pastries when toasted lightly.
Why You'll Love This Recipe
- One-Bowl Wonder: I swear by this recipe—just mix, bake, repeat. No fancy techniques, no extra bowls, and that rich cocoa buttercream? It’s basically made for lazy days when you’re still in pajamas.
- Deep Chocolate Fix: That espresso powder isn’t just for coffee—it cuts through the sweetness and makes the chocolate sing. Honestly, the first time I tasted it, I thought, “Wait, this is how it’s supposed to taste?”
- Weeknight or Party Star: Same batter, endless uses. Need a quick dessert? Done. Hosting? Layer it with whipped cream and call it fancy. My roommates still ask for seconds, even when I tell them it’s “just cake.”
- Budget-Friendly Luxury: Butter, sugar, cocoa—these are pantry staples that won’t break the bank. And the leftovers? They last forever in the fridge, so you’re not scrambling for last-minute treats. (Yes, even on a Tuesday night.)
Step-by-step instructions for fudgy chocolate mud cake
Here's the method for achieving that signature dense texture and deep chocolate flavor.
Prepare the Wet Ingredients
In a large mixing bowl, combine the 1 cup unsalted butter that's been melted and cooled to room temperature with the 1.5 cups granulated sugar. Whisk vigorously for 2-3 minutes until the mixture becomes light and slightly thickened. You'll notice the sugar gradually dissolves and the butter emulsifies into a smooth paste.
Add the 2 whole large eggs, one at a time, whisking well after each addition until fully incorporated. The mixture should become even smoother and slightly thicker. Stir in the 1 teaspoon vanilla extract and 0.5 cup milk until completely combined. This wet mixture forms the foundation of your cake's rich texture and moisture balance.
Combine Dry Ingredients and Form Batter
In a separate bowl, sift together the 1.5 cups all-purpose flour, 0.75 cup unsweetened cocoa powder, 1.5 teaspoons baking powder, 0.5 teaspoon salt, and 1 tablespoon instant espresso powder. The espresso powder enhances the chocolate flavor without adding coffee taste. Whisk these dry ingredients thoroughly to prevent lumps in your batter.
Gradually add the dry mixture to the wet ingredients while mixing on low speed with an electric mixer. Mix just until combined—you should still see some flour streaks. Overmixing develops gluten, which can make your cake dense rather than fudgy. The batter will be thick and glossy, resembling a rich chocolate pudding.
Bake to Perfect Fudgy Texture
Preheat your oven to 350°F and prepare two 8-inch round cake pans by greasing them thoroughly with butter and flouring. Divide the batter evenly between the pans. Tap each pan gently on the counter to remove any air bubbles and ensure even distribution of batter.
Bake for 25-30 minutes until a toothpick inserted into the center comes out with moist crumbs but no wet batter. The edges should be set while the center remains slightly springy—this ensures maximum fudginess. Rotate the pans halfway through baking for even heat distribution. The cake should rise slightly and develop a crackly top crust.
Cool and Layer for Ultimate Richness
Remove the cakes from the oven and let them cool in the pans for 10 minutes. Then transfer to a wire rack to cool completely. This gradual cooling prevents cracking and allows the internal structure to set properly. For maximum fudginess, I recommend serving the cake at room temperature rather than chilled.
To create the classic mud cake presentation, slice one cake horizontally and spread with your favorite chocolate buttercream or ganache. Place the other half on top and dust with cocoa powder. The contrast between the dense, moist cake and the smooth frosting creates the signature texture that makes this recipe legendary.
Pro Tips For Making Basic Chocolate Mud Cake
- Melt Butter Slowly: Don’t nuke the butter in the microwave—melt it in the bowl over a double boiler or in 10-second bursts on low power. I learned this the hard way: rushing it burns the butter and turns the batter grainy, no matter how much you whisk after.
- Sift the Cocoa: Skip the clumps: sift the cocoa powder directly into the dry ingredients before adding wet ingredients. It mixes more evenly and avoids those telltale streaks of unmixed cocoa in your cake—trust me, they’re worse than they look.
- Bake Until Springy: The cake’s done when the edges pull away from the pan and a toothpick comes out with moist crumbs, not wet batter. Overbaking dries it out; underbaking leaves it gummy. Five minutes past the recipe’s time is safer than cutting it short.
- Use Cold Eggs: Whisk the eggs into the butter-sugar mix cold straight from the fridge. They emulsify better and create a lighter texture—no one wants a dense, heavy mud cake. (Yes, even if you’re impatient like me.)
Common mistakes when making perfect results
Overmixing the Batter
I’ve seen this happen more than once—mixing the batter until it looks completely smooth and homogeneous. But here’s the thing: overmixing develops gluten in the flour, which creates a cakey texture instead of that signature fudgy, dense crumb.
The batter should look thick and glossy with visible flour streaks—that’s perfect. Stop mixing as soon as everything is just combined. 💫
Skipping the Room-Temp Ingredients
Cold butter or eggs can cause your cake to turn out unevenly textured or even fail to rise properly. Always let your eggs sit at room temperature for 30 minutes before using, and ensure your butter is melted and cooled to room temperature (not hot).
Cold ingredients can also cause the batter to curdle or separate, ruining the moisture balance.
Incorrect Oven Temperature
This recipe is sensitive to temperature fluctuations. If your oven runs hot, your cake might bake too quickly and dry out, or even burn before the center sets. Always preheat for at least 15 minutes and use an oven thermometer to confirm it’s at 350°F.
If your oven runs hot, reduce the temperature to 325°F and check for doneness 5 minutes early.
Using the Wrong Cocoa Powder
Not all cocoa powders are created equal! Natural cocoa powder (like Hershey’s) is more acidic and can make your cake taste bitter, while Dutch-processed cocoa (like Valrhona or Ghirardelli) is smoother and richer. If you must use natural cocoa, reduce the baking powder to 1 teaspoon to balance the acidity.
Also, measure by weight if possible—3.5 ounces of cocoa powder is more accurate than ¾ cup by volume.
Overbaking for a "Done" Look
I get it—you want a cake that looks fully baked, but overbaking is the enemy of fudgy texture. The moment a toothpick comes out with moist crumbs (not wet batter), take it out! If you wait for it to be completely clean, your cake will dry out.
The edges should be set, but the center should still have a slight spring when pressed gently. The crackly top is a good sign—don’t scrape it off! 🔥
Ignoring the Cooling Process
Rushing the cooling process is a common mistake. Letting the cake cool in the pan for 10 minutes before transferring to a wire rack prevents cracking and allows the structure to set properly.
If you remove it too soon, the cake can sink in the middle or develop a crackly top that’s too thick. Patience here makes all the difference for that perfect texture.
Nutrition facts
Frequently asked questions
Why does this chocolate cake turn out so fudgy instead of cakey?
The secret lies in the precise ratio of cocoa powder to flour (3:4 ratio) and the espresso powder, which enhances chocolate flavor without adding bitterness. The batter is mixed just until combined to avoid gluten development, and baking stops when a toothpick shows moist crumbs—not clean. This creates that signature dense, moist texture.
Can I make this recipe without eggs?
Yes! Replace the 2 eggs with 2 tablespoons melted butter plus 2 tablespoons milk for each egg. For a vegan version, use 2 tablespoons ground flaxseed mixed with 6 tablespoons water (let sit for 5 minutes to thicken). The texture will be slightly denser but still delicious.
How do I store leftovers to keep them moist?
Store in an airtight container at room temperature for 3 days or refrigerate for 1 week. For longer storage, freeze slices wrapped tightly for 3 months. To restore moisture, microwave individual slices for 10-15 seconds—they'll taste almost as good as fresh!
What's the best way to serve this cake?
Slice horizontally, spread with chocolate buttercream or ganache, and top with whipped cream or a dusting of cocoa powder. For extra indulgence, add a sprinkle of flaky sea salt to contrast the sweetness. Serve at room temperature for maximum fudginess!
Why did my cake crack on top?
The crackly top is actually a good sign—it means your cake baked perfectly! However, if it's too thick or cracked unevenly, your oven may be too hot. Next time, reduce the temperature to 325°F and check for doneness 5 minutes early. Never scrape off the crackly crust—it's part of the texture!