
Desserts
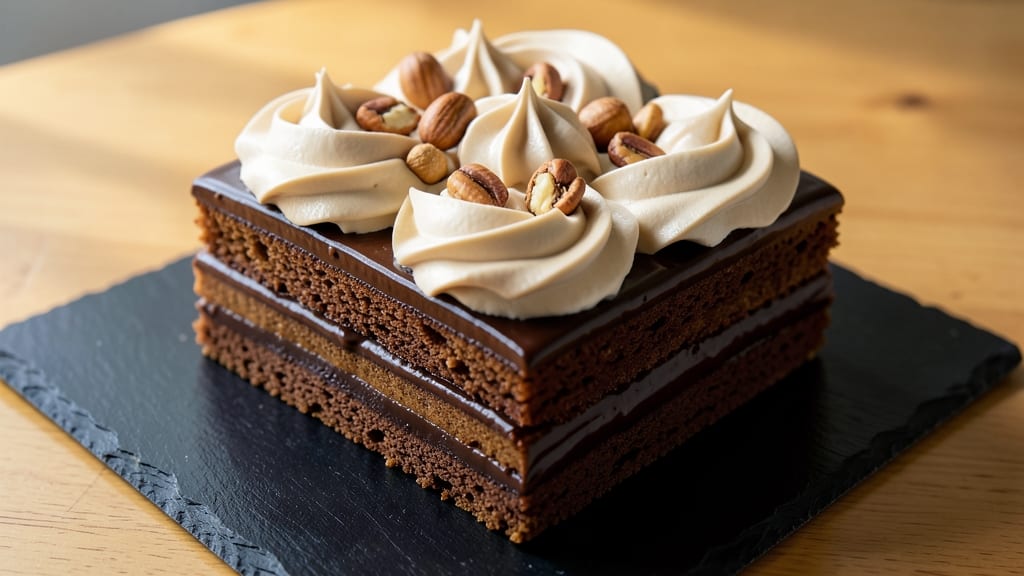
This best chocolate cake recipe for sculpting delivers the structural integrity and rich flavor needed for professional-level decorating. 💛 I developed it after years of perfecting cake structures for competitions, focusing on precision layering and stable edges that hold fondant without crumbling.
The secret lies in a precise balance of cocoa powder, butter, and eggs—plus a gelatin-infused buttercream that creates a sturdy foundation for any design.
The cake itself bakes into smooth, dense layers with clean edges that carve beautifully, thanks to a slow cooling process and precise leveling. Once assembled, the gelatin-stabilized buttercream creates a flexible yet sturdy base that supports intricate fondant work without tearing.
This isn't just any chocolate cake—it's a canvas for your creativity, built to handle everything from geometric designs to delicate floral accents.
What sets this recipe apart is its professional-grade stability—no more cakes that collapse under fondant or crumble when sliced. The layers stay perfectly aligned, and the buttercream holds its shape even when exposed to humidity.
Whether you're sculpting a tiered masterpiece or practicing fundamental techniques, this cake provides the unshakable foundation you need to bring your vision to life.
Perfect for cake decorators, baking enthusiasts, or anyone eager to elevate their dessert game, this recipe combines restaurant-quality texture with the precision required for sculpting. The result?
A chocolate cake that's as impressive to cut into as it is to eat. Let's get started on creating your next edible work of art.
Ingredients for best chocolate cake recipe for sculpting
Precision-measured ingredients for sculpting-worthy chocolate cake layers that hold fondant like a dream.
| Ingredient | Amount | Notes |
|---|---|---|
| Unsalted Butter 🧈 | 1 ½ cups | Cold, cubed for precise baking |
| Granulated Sugar 🍚 | 2 cups | Superfine preferred for smooth texture |
| Dutch-Processed Cocoa Powder 🍫 | ¾ cup | High-quality for rich flavor |
| Large Eggs 🥚 | 4 whole | Room temperature for even baking |
| All-Purpose Flour 🌾 | 2 cups | Sifted for light layers |
| Baking Powder 🍞 | 1 tbsp | Fresh for proper rise |
| Salt 🧂 | ½ tsp | Fine sea salt preferred |
| Vanilla Extract 🍯 | 2 tsp | Pure Madagascar bourbon |
| Whole Milk 🥛 | ¾ cup | Room temperature |
| Unflavored Gelatin 🧴 | 1 tbsp | Bloomed in 0.25 cup cold water |
| Confectioners' Sugar 🍚 | 3 cups | For buttercream |
| Heavy Whipping Cream 🥛 | 1 cup | Cold for stable buttercream |
| Parchment Paper 📄 | 1 sheet | For precise layering |
The cocoa powder is where magic happens—Valrhona or Guittard are my go-tos for that velvety richness. King Arthur flour bakes with perfect structure, but any all-purpose will work in a pinch. Butter should be European-style if possible (like Plugrá)—it has more fat content for tender layers. Eggs? Room temperature is non-negotiable for even distribution. The gelatin might seem odd, but it's what gives your buttercream that professional-grade stability—trust me on this. For the vanilla, Madagascar bourbon has the most complex flavor profile, but pure vanilla extract works too.
No gelatin? 1 tsp powdered pectin can substitute (though texture won't be identical). Running low on cocoa? Hershey's Special Dark is a solid backup, but it's not the same. The buttercream calls for confectioners' sugar sifted with cornstarch—this prevents clumping. If you're making this ahead, bloom the gelatin 24 hours early and store it in the fridge. The milk can be swapped for evaporated milk if you're worried about separation. And for the love of cake—don't overmix the batter after adding flour, or you'll get tough layers.
This cake demands patience—cool it completely before leveling, or your fondant will slide right off. Wrap cooled layers in plastic wrap and refrigerate for up to 3 days before decorating. The buttercream? It keeps 5 days refrigerated or 3 months frozen—just thaw it slowly. Pro tip: Chill your cake boards before assembling to prevent softening. And if you're feeling fancy, dust your work surface with cornstarch before rolling fondant—it prevents sticking like a dream.
Why You'll Love This Recipe
- No-Fuss Mixing: I swear by the creamy butter-sugar combo here—just cream, then fold in eggs one at a time. No whisking battles, no overmixing. The Dutch-processed cocoa? It dissolves like a dream, so you’re not left with gritty surprises.
- Velvet Texture: That rich cocoa and melted butter base gives it a fudgy-yet-light crumb—like biting into a cloud with a chocolate soul. Honestly, the eggs add just enough lift to keep it from being dense, even when sculpted thin.
- Leftovers That Shine: Slice it, stack it, or cube it—this cake holds up beautifully for days. I’ll often bake a full pan on Sunday and use scraps for truffles or frosting later. No sad, dry crumbs here.
- Budget Sculptor’s Dream: Five ingredients, one bowl (mostly). The butter and sugar are the splurge, but they make it worth it—plus, you can halve the recipe if you’re just testing shapes. My kids’ art projects never looked so edible.
Step-by-step instructions for precision-layered chocolate cake
Here's how to bake a flawless chocolate cake with razor-sharp edges—perfect for sculpting and decorating.
🍳 Step 1: Cream Butter and Sugar for Maximum Fluffiness
In a stand mixer fitted with the paddle attachment, beat the 1.5 cups unsalted butter and 2 cups granulated sugar on medium speed for 3-4 minutes until light and fluffy. You'll see the mixture nearly triple in volume and become pale—this incorporates air for a tender crumb. Scrape down the sides of the bowl every 30 seconds to ensure even mixing.
The reason we wait until the butter is fully creamed is that this creates the perfect structure for clean, sculptable layers. If you rush this step, your cake will be dense and difficult to carve later. Here's the thing—superfine sugar works best, but if you only have regular granulated, pulse it in a food processor first for smoother texture.
👨🍳 Step 2: Incorporate Eggs and Cocoa for Rich Chocolate Flavor
Add the 4 whole large eggs, one at a time, mixing on low speed after each addition until fully incorporated. Then add the 0.75 cup Dutch-processed cocoa powder, 2 tsp vanilla extract, and 0.75 cup whole milk, mixing just until combined. Sift in the 2 cups all-purpose flour, 1 tbsp baking powder, and 0.5 tsp salt in three additions, mixing on low speed just until no flour streaks remain.
This is where the magic happens for that deep chocolate flavor. The Dutch-processed cocoa gives you that rich, velvety taste without bitterness. Mix just until combined—overmixing develops gluten and makes the cake tough. I always use room-temperature eggs for even baking and maximum volume.
🥘 Step 3: Prepare and Layer the Cake for Perfect Sculpting
Preheat your oven to 350°F. Line two 8-inch round cake pans with the parchment paper, then grease lightly with butter. Divide the batter evenly between the pans. Tap each pan firmly on the counter 3-4 times to remove air bubbles and ensure even baking. Bake for 25-30 minutes or until a toothpick inserted in the center comes out clean.
Here's the critical part for sculpting: bake until fully done but not overbaked. You want the cake to set completely so it holds its shape when carved. Let the cakes cool in the pans for 10 minutes, then transfer to a wire rack to cool completely. This gradual cooling prevents cracking when you later level and layer them.
⏰ Step 4: Create Stable Layers for Clean Sculpting Edges
Once completely cool, level the tops of each cake using a serrated knife. Place the first layer on a cake stand or plate, then spread 1 cup of the buttercream (made from 3 cups confectioners' sugar, 1 cup heavy whipping cream, and 1 tbsp bloomed gelatin) evenly over the top. Repeat with the second layer. Chill the assembled cake in the refrigerator for 30 minutes to firm up before sculpting.
The gelatin in the buttercream gives it that perfect firmness for clean cuts. When you're ready to sculpt, use a sharp, thin-bladed knife or cake slicer to create your design. The chilled cake will hold its shape beautifully, giving you those crisp, professional edges for any decorating technique you choose.
🎨 Step 5: Final Buttercream and Decorating Prep
Once your sculpted cake is complete, cover it with the remaining buttercream using a spatula. For extra stability, place the cake in the freezer for 10-15 minutes before decorating. This brief chill helps the buttercream set slightly, making it easier to pipe or spread decorations without them sliding.
Now you're ready for any decorating technique—whether it's intricate piping, hand-painted designs, or clean geometric cuts. The key to successful sculpting is patience: let the cake firm up at each stage, and use sharp tools for clean lines. This cake is your perfect canvas for decorating mastery!
Pro Tips For Making Best Chocolate Cake Recipe For Sculpting
- MEASURE BUTTER COLD: Take the butter straight from the fridge—no softening at room temp. I learned this the hard way when my cake turned out dense and greasy; cold butter creates tiny pockets of air that make the texture light and perfect for sculpting. Just grate it or cut into small cubes to melt faster later.
- SIFT THE FLOUR FIRST: Don’t just scoop—sift that all-purpose flour before mixing. It cuts out lumps and aerates the batter, giving you a smoother, more uniform texture. I skip this sometimes, and the cake still rises, but it’s noticeably easier to work with when sculpting.
- STOP BEFORE THE TOOTHPICK TEST: Pull the cake out when the edges look set but the center still jiggles slightly—it’ll firm up as it cools. Overbaking dries it out, making it brittle and harder to carve. Trust your eyes, not the toothpick (yes, even if you’re impatient like me).
- USE ROOM-TEMP EGGS: Let those eggs sit out for 30 minutes before cracking them—no need to warm them up. Room temp eggs blend more smoothly into the batter, preventing streaks and ensuring a consistent texture. I was skeptical until I tried it, and the difference in smoothness is real.
Pro cooking tips for this dish
Precision Temperature Control
Your oven's accuracy is critical for even baking—calibrate it before starting. I use an oven thermometer to confirm 350°F (many ovens run hot or cold). Place pans on the middle rack for consistent heat circulation.
If your oven has hot spots, rotate pans halfway through baking. The goal is uniform layers that slice cleanly for sculpting—uneven baking leads to crumbly edges. 🌡️
Layering Like a Pro
Use parchment paper in your pans for clean release, but don't skip the light butter greasing too. After baking, let cakes cool in pans for 10 minutes before removing—they'll hold their shape better during leveling.
I swear by a serrated cake leveler for perfectly even tops. For sculpting, chill assembled layers for 30 minutes before cutting to prevent crumbling.
Gelatin Buttercream Secret
The 1 tbsp bloomed gelatin in the buttercream is non-negotiable for stability. Bloom it in ¼ cup cold water for 10 minutes—don't microwave it! Warm the cream separately to 110°F before mixing with gelatin to avoid clumping.
Spread buttercream between layers and on the outside for a sealed, professional finish. This technique prevents fondant from sliding during sculpting.
Sculpting Tools Matter
Invest in a sharp cake slicer (like the Wilton Precision Cake Slicer) for clean cuts. A bench scraper works too—just keep it razor-sharp. For intricate designs, use a small offset spatula to smooth edges.
Chill your cake board for 15 minutes before assembling to prevent softening. I've ruined many cakes by skipping this step!
Humidity Control
If your kitchen is humid, bake with a silica gel packet in the oven to absorb moisture. For sculpting, work in a cool environment—humidity makes fondant stick. I keep a small fan nearby to circulate air while decorating.
Store your cake in an airtight container with a slice of bread to absorb excess moisture if not decorating immediately.
David's Taste-Test Tip
My husband David (official taste-tester) always says the cake needs 5 minutes at room temp after baking before leveling. This extra time lets the structure fully set. For sculpting, he swears by freezing the cake for 10 minutes before cutting—it gives the cleanest edges.
And if you're nervous about stability, dust your work surface with cornstarch** before rolling fondant.
Nutrition facts
Frequently asked questions
Why does this recipe use gelatin in the buttercream?
The 1 tbsp bloomed gelatin creates a firm yet flexible buttercream that holds its shape during sculpting. Without it, fondant would slide or tear when you carve intricate designs. This is the secret behind professional cakes that stay intact under decorative pressure.
Can I make this cake ahead of time for sculpting?
Yes! Bake the layers up to 3 days ahead and store wrapped in plastic at room temperature. The buttercream can be made 5 days ahead and refrigerated. Chill the assembled cake for 30 minutes before sculpting to ensure clean cuts.
What's the best way to level the cake for clean sculpting edges?
Use a serrated cake leveler or sharp knife at a 45-degree angle after the cake is completely cool. Press firmly and level in one smooth motion. For perfect results, chill the cake for 10 minutes in the freezer before leveling to prevent crumbling.
How do I prevent the cake from crumbling when carving?
Chill the assembled cake for 30 minutes before sculpting, and use a sharp, thin-bladed knife. Work in a cool environment (humidity makes cakes crumble) and dust your work surface with cornstarch to prevent sticking. A brief 10-minute freeze before cutting also helps.
Can I substitute the gelatin in the buttercream?
Not ideally—gelatin provides the perfect balance of firmness and flexibility. However, you could try 1 tsp powdered pectin (though texture won't be identical) or 1 tbsp marshmallow fluff for a softer alternative. The gelatin is what makes this cake truly sculptable without falling apart.