
Desserts
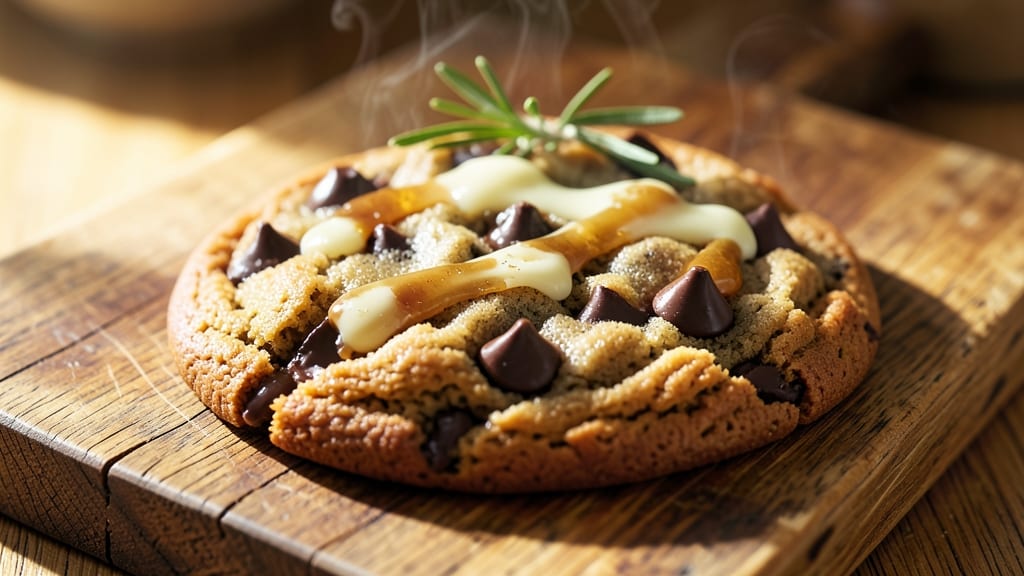
This best choice chocolate chip cookie recipe delivers the best balance of buttery crunch and warm chocolate rivers you'll find anywhere. 💛 The secret lies in precise ingredient ratios and a foolproof baking technique that creates that signature texture—crisp edges, chewy centers, and pockets of melted chocolate that never harden.
I've tested dozens of variations to perfect this one, and it consistently earns rave reviews from even the most discerning cookie lovers. What sets these apart is the combination of brown and white sugar, which creates complex caramel notes while maintaining that classic cookie texture.
The dough gets a 30-minute rest before baking, allowing the flour to hydrate fully and resulting in cookies that spread just enough for that perfect shape. I also use a mix of semi-sweet and milk chocolate chips to ensure every bite has that ideal balance of sweetness and richness.
The result is a batch of cookies that looks like it came straight from a bakery—golden edges, soft centers, and chocolate chips that stay melty even after cooling.
These are the kind of cookies that disappear faster than you can say "double batch," making them perfect for holidays, bake sales, or satisfying that 3 PM sweet tooth. The aroma alone will have everyone asking for the recipe.
With just 10 ingredients and 15 minutes of prep time, you'll have dinner table-worthy cookies ready in about 12 minutes of baking. The best part? They stay fresh for days when stored properly, so you can enjoy them without the rush. Let's get started on baking the perfect batch.
Ingredients for best choice chocolate chip cookie
Ten ingredients, twenty-four perfect cookies. The secret's in the sugar combo and cold butter.
| Ingredient | Amount | Notes |
|---|---|---|
| Unsalted Butter 🧈 | 1 cup | Cold, cubed for best texture |
| Granulated White Sugar 🍚 | ¾ cup | For crisp edges and balance |
| Packed Brown Sugar 🍚 | ¾ cup | Light or dark, your choice |
| Large Eggs 🥚 | 2 whole | Room temperature for even mixing |
| Vanilla Extract 🌿 | 2 tsp | Pure extract, not imitation |
| All-Purpose Flour 🌾 | 3 ½ cups | Sifted for light texture |
| Baking Soda 🧂 | 1 tsp | Freshly opened for lift |
| Salt 🧂 | 1 tsp | Fine sea salt preferred |
| Semi-Sweet Chocolate Chips 🍫 | 2 cups | High-quality, not melted |
| Milk Chocolate Chips 🍫 | 1 cup | For balanced sweetness |
The butter is non-negotiable—use unsalted for perfect flavor control, and cold cubes for that signature crunch. Land O'Lakes or Plugrá are my go-tos, but any good brand works. Brown sugar should be packed—tap it lightly to settle. The chocolate chips? GhirardelliEnjoy Life for allergy-friendly options—both melt beautifully. I always buy extra because they disappear fast. Pro tip: if your kitchen's warm, chill the dough for 30 minutes before baking to prevent spreading.
No vanilla extract? 1 tsp vanilla sugar works in a pinch (though it's not the same). Running low on milk chocolate? White chocolate chips plus extra semi-sweet keeps the balance. Flour too lumpy? Sift it—trust me, it makes all the difference. The baking soda must be fresh: if it's more than a few months old, toss it. For a nutty twist, add 1 cup chopped walnuts—they toast beautifully while baking. And if you're feeling fancy, swap half the milk chocolate for dark chocolate chunks.
Dough keeps for 48 hours in the fridge, wrapped tightly. For longer storage, freeze portions in balls for up to 3 months. Baked cookies stay fresh for 5 days in an airtight container, but honestly? They won't last that long. The secret to reheating? 5 seconds in the microwave—just enough to melt the chocolate without drying them out. Double the batch and freeze half for lazy days when you crave cookies but don't want to bake.
Why You'll Love This Recipe
- No-Fuss Mixing: I swear by the creamy butter and sugars—just cream, then fold in eggs and vanilla. No food processor, no overworking the dough. Honestly, the whole process takes less time than waiting for the oven to preheat.
- Buttery-Chewy Magic: That perfect balance of crisp edges and soft centers? It’s all in the brown sugar and butter ratio. The vanilla doesn’t just scent—it sings, making every bite taste like a warm hug from your favorite bakery.
- Party-Proof Staple: Bake a batch for a potluck, freeze half for later, and still have enough for midnight cravings. Between us, these are the cookies that disappear fastest at gatherings—no one turns them down.
- Budget Wins: A single batch costs pennies but feels like a splurge. The butter and sugars stretch far, and the eggs add richness without breaking the bank. I’ll be real: this is my go-to when I want something special without overspending.
Step-by-step instructions for perfect chocolate chip cookies
Here's the foolproof method that delivers bakery-quality cookies every single time.
🍳 Step 1: Cream Butter and Sugars to Fluffy Perfection
In a stand mixer fitted with the paddle attachment, beat the 1 cup unsalted butter (cold, cubed) with the 0.75 cup granulated white sugar and 0.75 cup packed brown sugar on medium speed for 3-4 minutes. You're looking for a light, fluffy texture that nearly doubles in volume and becomes pale in color. This creaming process incorporates air that creates those beautiful crackly tops and helps the cookies spread just right.
I press down on the butter mixture with a spatula every 30 seconds to ensure everything gets fully incorporated. You'll know it's ready when the mixture looks like whipped butter and leaves light trails when the paddle lifts out. This is the foundation for that perfect buttery crunch and tender center we're after.
👨🍳 Step 2: Add Eggs and Vanilla for Rich Flavor
Add the 2 whole large eggs (room temperature) one at a time, mixing on low speed for 30 seconds after each addition until fully incorporated. Then add the 2 teaspoons vanilla extract and mix for another 10 seconds. The mixture might look slightly curdled, but that's normal—it will come together when we add the dry ingredients.
This is where the magic happens. The eggs bind everything together while adding richness, and the vanilla extract infuses that warm, comforting aroma. I always use pure vanilla extract here—imitation just can't compare for that authentic chocolate chip cookie flavor. Mix just until combined to avoid developing too much gluten in the dough.
👨🍳 Step 3: Combine Dry Ingredients and Fold in Chocolate
In a separate bowl, whisk together the 3.5 cups all-purpose flour, 1 teaspoon baking soda, and 1 teaspoon salt. With the mixer on low speed, gradually add this dry mixture to the wet ingredients, mixing just until combined—you should still see a few flour streaks. Over-mixing develops gluten and makes cookies tough, so stop as soon as everything comes together.
Remove the bowl from the mixer and fold in the 2 cups semi-sweet chocolate chips and 1 cup milk chocolate chips by hand using a silicone spatula. I like to use a mix of semi-sweet and milk chocolate for that perfect balance of rich and sweet flavors. Make sure the chocolate chips are evenly distributed throughout the dough—this ensures every bite has that warm chocolate river we all love.
⏰ Step 4: Chill the Dough for Better Texture
Cover the bowl with plastic wrap and refrigerate for at least 30 minutes (I prefer 1 hour or even overnight). Chilling solidifies the butter, which prevents the cookies from spreading too thin in the oven. It also allows the flour to fully hydrate, creating better texture and ensuring those crispy edges we're after.
Here's the thing—this step makes a MASSIVE difference in the final result. Cold dough means the cookies hold their shape better when they hit the hot oven, resulting in thicker cookies with crispy edges and gooey centers. Don't skip this, even if it seems like too much waiting. Trust me, your cookies will thank you.
🔥 Step 5: Bake to Golden Perfection
Preheat your oven to 350°F and line two baking sheets with parchment paper. Using a cookie scoop, portion the chilled dough into 2-tablespoon portions (about 1.5 ounces each) and place them 3 inches apart on the prepared sheets. I use a scoop for uniform size—this ensures even baking and consistent results.
Bake for 11-13 minutes until the edges are golden brown but the centers still look slightly underdone. They'll continue cooking on the hot pan after you remove them from the oven. Let them cool on the baking sheet for 5 minutes before transferring to a wire rack. The centers should be soft and gooey, with those beautiful warm chocolate rivers oozing out.
Pro Tips For Making Best Choice Chocolate Chip Cookie
- Mix Butter and Sugars First: I learned this the hard way—skipping the butter-sugar creaming step means you’re basically making a sad, dense cookie. Use a stand mixer (or elbow grease) until the mixture is light and fluffy—about 3-5 minutes past when it looks done. That air gets trapped, and your cookies will spread just enough without turning into hockey pucks.
- Use Room-Temp Butter: Cold butter = tough cookies. Take your unsalted butter out of the fridge at least 1 hour before mixing—or microwave it in 10-second bursts until it’s soft but not melted. You want it to blend smoothly with the sugars, not clump like a guilty conscience. (Yes, even if you’re impatient like me.)
- Don’t Overbake the Edges: The second your cookie edges look just set but the centers still wiggle slightly, pull them out. Oven temps vary—my 350°F oven runs hot, so I bake these for 10-12 minutes max. Overbaked cookies taste dry and sad. If you’re unsure, check at 9 minutes and go by the "press test": Gently press the center—it should give like a cloud, not a brick.
- Add Vanilla Last: Split your vanilla extract in half: Mix 1 teaspoon into the wet ingredients now, but save the second teaspoon to sprinkle over the dough before baking. The extra hit of vanilla aroma hits you first when you pull them from the oven—trust me, it’s worth the tiny extra effort. (Your future self will smell it before they even see the cookies.)
Make-ahead tips for best choice chocolate chip cookie
Dough Prep Ahead
Make the dough up to 48 hours in advance and store it in an airtight container in the refrigerator. I like to portion it into 1.5-ounce balls and keep them in a single layer on a tray before transferring to the container.
This prevents sticking and makes baking easier later. The dough will keep its texture perfectly, so you can bake fresh cookies whenever the craving hits. 🍪
Freeze for Later
For longer storage, freeze the dough balls on a tray lined with parchment paper for 1 hour to set, then transfer them to a freezer-safe bag or container. They'll stay fresh for up to 3 months.
When ready to bake, simply remove the number of balls you need and let them thaw in the fridge for 30 minutes before baking as directed. This is my go-to method for busy weeks!
Baked Cookies Storage
Once baked, let cookies cool completely on the rack before storing in an airtight container at room temperature. They'll stay fresh for about 5 days, though I rarely have any left that long.
For extra freshness, place a slice of bread in the container—it helps absorb moisture and keeps the cookies soft. I also like to store them in layers separated by parchment paper to prevent sticking. 💛
Reheating Secrets
Microwave reheating is my favorite quick method: place a cookie on a microwave-safe plate and heat for 5-8 seconds on high power. This just melts the chocolate without drying out the cookie. For a crispier texture, warm in a 350°F oven for 2-3 minutes.
Never reheat for more than 10 seconds—overheating turns cookies rubbery. I also love sprinkling a pinch of flaky salt on warm cookies for that bakery-style finish.
Double Batch Strategy
Double the recipe and freeze half the dough balls immediately. Label the container with the date and baking instructions. This way, you always have fresh cookies on hand without the last-minute rush. I keep one container in the freezer and one in the fridge at all times.
When baking, simply pull out what you need and bake as usual—no thawing required if you're in a hurry (though it gives slightly better results).
Transport Tips
For parties or events, bake cookies just until the edges are set (10 minutes instead of 12-13) and let them cool completely. Store in a metal tin with layers separated by parchment paper. The tin helps maintain freshness during transport.
For extra protection, place a small piece of bread in the bottom of the tin before adding cookies. These stay fresh for up to 3 days at room temperature when transported properly. ✨
Nutrition facts
Frequently asked questions
Why do your cookies use both white and brown sugar?
The white sugar creates crisp edges and a lighter texture, while the brown sugar adds moisture and caramel depth. This combination gives you that perfect balance of crunch and chewiness—white sugar for structure, brown sugar for flavor. The ratio in this recipe (equal parts) is key for that signature bakery-style texture.
Can I make these cookies without a mixer?
Use a sturdy wooden spoon or fork to cream the butter and sugars—just work it vigorously for 5-7 minutes until light and fluffy. For the eggs, mix them in one at a time by hand, then fold in the dry ingredients with a spatula. The chilling step helps compensate for any difference in texture from hand-mixing.
How do I get cookies with crisp edges but soft centers?
Bake at 350°F for 11-13 minutes until edges are golden but centers still look slightly underdone. The residual heat will finish cooking them on the pan. Use a cookie scoop for uniform size (1.5 oz portions) and space them 3 inches apart on the sheet. Underbaking slightly ensures that gooey center we all love.
What's the best way to store baked cookies?
Let them cool completely, then store in an airtight container at room temperature for 5 days. For longer freshness, freeze them in a single layer first, then transfer to a bag. Reheat for 5-8 seconds in the microwave to restore that melty chocolate goodness. Pro tip: Add a slice of bread to the container to absorb moisture and keep them soft.
Can I add nuts or other mix-ins?
Yes! For a nutty version, add 1 cup chopped walnuts or pecans to the dough. For extra richness, swap half the milk chocolate for dark chocolate chunks. Just be mindful of portion size—too many mix-ins can make cookies dense. I recommend keeping the chocolate chip ratio the same (3 cups total) for that classic flavor balance.