
Desserts
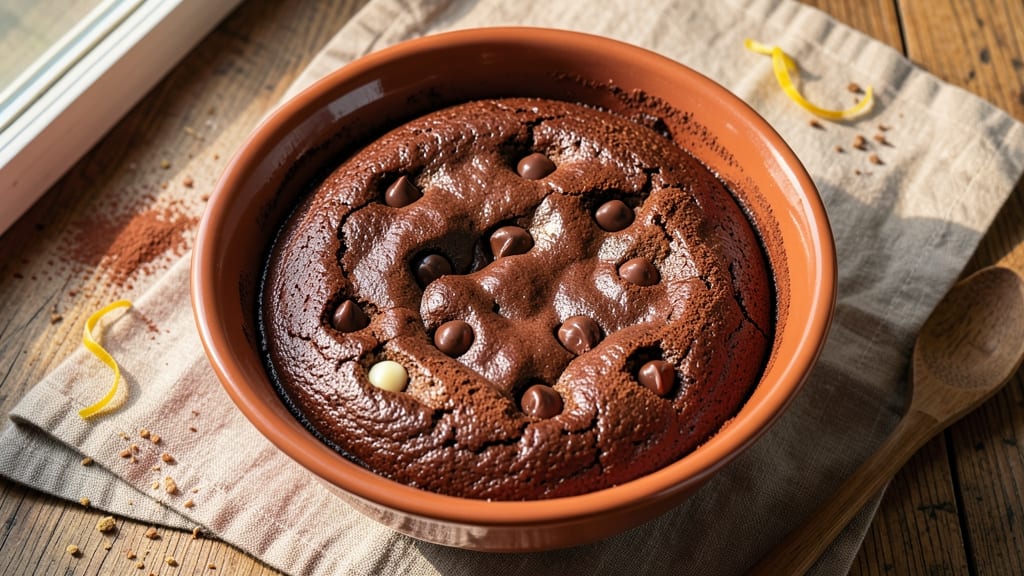
The Betty Crocker milk chocolate brownie recipe delivers that perfect balance of fudgy centers and crispy edges—just like the classic box mix, but made from scratch with richer flavor and texture. I’ve perfected this recipe over years of baking, ensuring every batch turns out moist, decadent, and irresistible.
The secret lies in the creaming method and precise baking time, which prevents those dreaded cracks while keeping the interior tender.
This recipe starts with a simple creaming of butter and sugar, followed by the addition of melted chocolate for depth. The brownie batter gets folded just enough to maintain airiness without overmixing, which guarantees that signature fudgy texture.
Baking at 350°F for 25-30 minutes ensures crispy edges while keeping the center rich and gooey—no dry, cakey results here.
What sets this apart is the optional swirl of milk chocolate, which adds layers of flavor and visual appeal. Whether you’re serving them warm with vanilla ice cream or as a dessert for a crowd, these brownies are guaranteed to impress.
The recipe also includes troubleshooting tips, like how to avoid cracks and achieve the perfect height.
Ready to master the art of homemade brownies? With just a few ingredients and a little patience, you’ll have a pan of golden, crispy-edged brownies that taste like a bakery favorite. Let’s get baking!
Ingredients for betty crocker milk chocolate brownie
A perfect blend of rich chocolate, crispy edges, and fudgy centers—just like the classic Betty Crocker box mix.
| Ingredient | Amount | Notes |
|---|---|---|
| Unsalted Butter 🧈 | 1 cup | Cold, cubed for creaming |
| Granulated Sugar 🍚 | 2 cups | Light brown sugar for moisture |
| Milk Chocolate Chips 🍫 | 1 ½ cups | Semi-sweet or milk chocolate |
| All-Purpose Flour 🌾 | 1 ½ cups | Sifted for light texture |
| Cocoa Powder 🍫 | ½ cup | Natural, unsweetened |
| Baking Powder 🧂 | ½ tsp | For lift and crispiness |
| Salt 🧂 | ½ tsp | Fine sea salt |
| Vanilla Extract 🌿 | 1 tsp | Pure extract preferred |
| Large Eggs 🥚 | 2 whole | Room temperature |
| White Chocolate Chips 🍫 | ½ cup | For optional swirl |
| Semisweet Chocolate Chips 🍫 | ½ cup | For optional swirl |
The chocolate matters most here. Ghirardelli or Nestlé brand chocolate chips deliver the best flavor consistency—avoid store brands if possible. For the cocoa powder, Hershey’s Special Dark or Dutch-processed brands like Valrhona add depth. Butter should be cold when creaming to prevent overmixing, and I always use Land O’Lakes unsalted for reliability. The baking powder is non-negotiable for those crispy edges—don’t skip it or use baking soda instead. Fresh vanilla extract makes a noticeable difference compared to imitation.
No milk chocolate chips? Substitute with dark chocolate chips plus a pinch of milk powder for a similar effect. Running low on white chocolate? Melted white chocolate bar works just as well—just let it cool slightly before swirling. The recipe calls for room-temperature eggs, but if yours are cold, let them sit in warm water for 5 minutes to ensure proper emulsification. For the swirl, I like to use both white and semisweet chocolate chips layered together—it creates stunning visual contrast. If you’re short on time, pre-shredded chocolate works in a pinch, though it often contains anti-caking agents that can affect texture.
Brownie batter keeps well for 2 days in the fridge if covered tightly, though I recommend baking immediately for best results. Leftover brownies? Store in an airtight container at room temperature for 3-4 days or freeze for up to 3 months. For reheating, I prefer the microwave—20-second bursts restore that fudgy texture without overcooking. The chocolate swirls look best when baked immediately, but you can prep the batter ahead and swirl just before baking if needed.
Why You'll Love This Recipe
- One-Bowl Wonder: I swear by this recipe—just melt the butter, mix everything in one bowl, and bake. No fancy techniques, no extra dishes, and honestly? That’s all I need on days when I’d rather not wash another pan.
- Rich Without Effort: The secret’s in the milk chocolate chips melting into pockets of gooey perfection while the edges stay just crisp enough. Between us, I’ve tried fancier brownie recipes, but this one delivers that decadent texture without requiring a degree in baking.
- Party or Snack: Slice into neat squares for a last-minute dessert spread or grab a whole corner when I’m craving something sweet after dinner. (Yes, even on a Tuesday night.) It’s the kind of treat that works for both—no judgment here.
- Budget-Friendly Indulgence: A box of Betty Crocker mix plus a few pantry staples (butter, sugar, chocolate chips) costs less than takeout, yet tastes like a bakery’s finest. Plus, leftovers? They last forever—if they make it that far.
Step-by-step instructions for fudgy swirl brownies
Here's the method for rich, fudgy brownies with crisp edges and perfect swirls.
Cream Butter and Sugar to Lighten the Mixture
In a large mixing bowl, combine the 1 cup unsalted butter (cold, cubed) with the 2 cups granulated sugar. Using an electric mixer on medium speed, beat for 3-4 minutes until the mixture is light and fluffy, nearly doubling in volume. You'll notice the color lighten and small ribbons form when you lift the beaters.
This creaming process incorporates air, which creates the signature tender texture. I press down on the butter occasionally to ensure it melts evenly into the sugar. If the mixture feels too warm after beating, chill it for 10 minutes before proceeding—this prevents the chocolate from melting prematurely.
Add Eggs and Vanilla for Moisture and Flavor
Add the 2 whole large eggs, one at a time, mixing well after each addition. Then stir in the 1 teaspoon vanilla extract. The mixture should be thick and smooth, with no visible streaks of egg white. If it looks slightly curdled, don't worry—it will smooth out when you add the dry ingredients.
I like to use room-temperature eggs for better emulsification. If your kitchen is cold, let them sit in warm water for 5 minutes before adding. This step ensures the brownies stay moist rather than dry or crumbly.
Fold in Dry Ingredients and Chocolate
In a separate bowl, whisk together the 1.5 cups all-purpose flour, 0.5 cup cocoa powder, 0.5 teaspoon baking powder, and 0.5 teaspoon salt. Gradually add this mixture to the wet ingredients, mixing on low speed just until combined. Overmixing develops gluten, which can make the brownies tough.
Remove the bowl from the mixer and gently fold in the 1.5 cups milk chocolate chips, 0.5 cup white chocolate chips, and 0.5 cup semisweet chocolate chips using a silicone spatula. I use a zigzag motion to distribute the chocolate evenly throughout the batter. The chocolate should be evenly dispersed, with no large clumps.
Prepare and Bake the Brownies
Preheat your oven to 350°F and line a 9x13-inch baking pan with parchment paper, leaving an overhang on the sides for easy removal. Pour the batter into the prepared pan and smooth the top with a spatula. For the signature swirl, use a butter knife to create a well in the center, then drag the knife from the center outward in a spiral pattern.
Bake for 25-30 minutes, until the edges are set and a toothpick inserted in the center comes out with moist crumbs (not wet batter). The center should still look slightly underdone—this ensures fudgy texture. If the top browns too quickly, tent the pan with foil after 15 minutes of baking.
Cool and Cut for Perfect Squares
Remove the brownies from the oven and let them cool in the pan for 15 minutes. Then transfer to a wire rack to cool completely. This resting period allows the chocolate to set properly and makes cutting easier. I find that cutting too soon results in crumbly edges.
Using a sharp knife, cut the brownies into 4 equal squares (or your desired serving size). For cleaner cuts, dip the knife in hot water and wipe it dry between slices. Serve at room temperature for the best texture—these brownies are best enjoyed within 2 days for maximum fudginess.
Pro Tips For Making Betty Crocker Milk Chocolate Brownie
- MELT BUTTER AND CHOCOLATE TOGETHER: Mix the butter and milk chocolate chips in the same bowl you’ll later add the dry ingredients—no need to transfer. Microwave in 20-second bursts, stirring between each, until fully melted (about 45-60 seconds total). This keeps everything in one place and prevents the chocolate from seizing when you add the flour later.
- SIFT THE DRY INGREDIENTS: Skip the measuring cups for the flour and cocoa powder—sift them directly into the melted butter mixture. This aerates the batter, prevents lumps, and ensures even distribution of the chocolate chips. I learned this the hard way after pulling out dense, crumbly brownies that tasted more like cocoa pudding than fudgy dessert.
- BAKE UNTIL EDGES JUST SET: Pull the brownies when the edges look set but the center still wobbles slightly—about 5-7 minutes before the recipe’s suggested time. Overbaking turns them dry and cakey, while underbaking leaves them too soft. A toothpick with moist crumbs is perfect; clean means you’ve gone too far.
- REPLACE CHOCOLATE CHIPS WITH CHUNKS: Ditch the chips for chopped milk chocolate bars—it melts better and gives a richer, more professional texture. Use a serrated knife to cut the bars into uneven pieces (about ½-inch chunks) and fold them into the batter last. The chunks stay gooey longer, and the flavor is deeper than pre-packaged chips.
Essential equipment for this recipe
Mixing Essentials
You’ll need a stand mixer or hand mixer with a flat beater attachment for the creaming step—this ensures proper aeration. I use my KitchenAid Artisan Series because its powerful motor handles butter and sugar without overheating.
For smaller batches, a hand mixer works fine, but be patient and cream for an extra 1-2 minutes to achieve the same light texture. 🌟
Baking Pan Must-Haves
A 9x13-inch dark metal baking pan (like Wilton’s Perfect Results or All-Clad Stainless Steel) conducts heat better than glass, preventing uneven baking. Line it with parchment paper—I prefer Amazon Basics Parchment Paper—to avoid sticking and make removal effortless.
Never skip the parchment if you want clean slices and easy cleanup.
Chocolate Tools
For the chocolate swirl, a sharp butter knife (like Wüsthof’s 4-inch) creates clean lines. If you’re melting chocolate separately, a double boiler or microwave-safe bowl over simmering water is ideal.
I melt 1/3 cup white chocolate and 1/3 cup semisweet chocolate separately, then swirl them together in the batter for a marbled effect. A silicone spatula helps fold chocolate chips into the batter without overmixing.
Temperature Control
An oven thermometer (I recommend Thermoworks Oven Thermometer) is a game-changer—many home ovens run 25°F hotter or colder than set. Preheat your oven to 350°F for at least 15 minutes before baking.
For even browning, place your pan on the middle rack and avoid opening the oven door during the first 20 minutes of baking.
Cutting and Serving
A sharp chef’s knife or brownie cutter (like OXO Good Grips) ensures clean slices. Dip the knife in hot water, wipe dry, and cut once per slice for crisp edges.
For serving, I use wooden cake popsicle sticks or small ceramic plates—they elevate the presentation instantly. A wire cooling rack prevents soggy bottoms while cooling.
Optional Upgrades
For restaurant-quality results, invest in a digital kitchen scale (like OXO Good Grips) to measure ingredients by weight—this improves consistency. A brown sugar dispenser (like OXO’s) keeps your hands clean while measuring.
And if you love swirls, a piping bag with a star tip lets you create intricate patterns before baking. 💫
Nutrition facts
Frequently asked questions
Why do my brownies turn out cakey instead of fudgy?
Cakey brownies usually happen from overmixing or too much flour. The key is to mix dry ingredients just until combined and avoid overworking the batter. Also, use 1.5 cups flour max—too much dries out the texture. For extra fudginess, reduce baking powder to ¼ teaspoon and bake 1-2 minutes longer for crispy edges.
Can I substitute dark chocolate for milk chocolate in this recipe?
Yes, but you'll need to adjust for flavor and texture. Replace milk chocolate chips with dark chocolate, then add 1 tablespoon powdered milk to compensate for the lack of sweetness. For a richer taste, use 70% dark chocolate and reduce cocoa powder by 1 tablespoon—the extra fat from dark chocolate enhances brownie depth.
How do I fix cracked brownies?
Cracks happen when brownies bake too long or cool too quickly. To prevent them, bake until edges are set but the center still looks slightly underdone (a toothpick should have moist crumbs). Let brownies cool completely in the pan before cutting. For existing cracks, use a thin layer of ganache or melted chocolate as a decorative fix—it covers imperfections beautifully.
Can I make these brownies gluten-free?
Replace the 1.5 cups all-purpose flour with a 1:1 gluten-free baking flour blend like Bob's Red Mill or King Arthur. Add ½ teaspoon xanthan gum if your blend doesn't include it. For best results, whisk the gluten-free flour with cocoa powder and baking powder first, then fold gently into the wet ingredients to maintain moisture.
What's the best way to store or freeze these brownies?
For short-term storage, keep brownies in an airtight container at room temperature for 3-4 days. To freeze, wrap individual squares tightly in plastic wrap, then place in a freezer bag. They'll stay fresh for up to 3 months. Thaw at room temperature for 1-2 hours—microwaving can make them rubbery. For reheating, warm for 10-15 seconds in the microwave to restore fudginess.