
Desserts
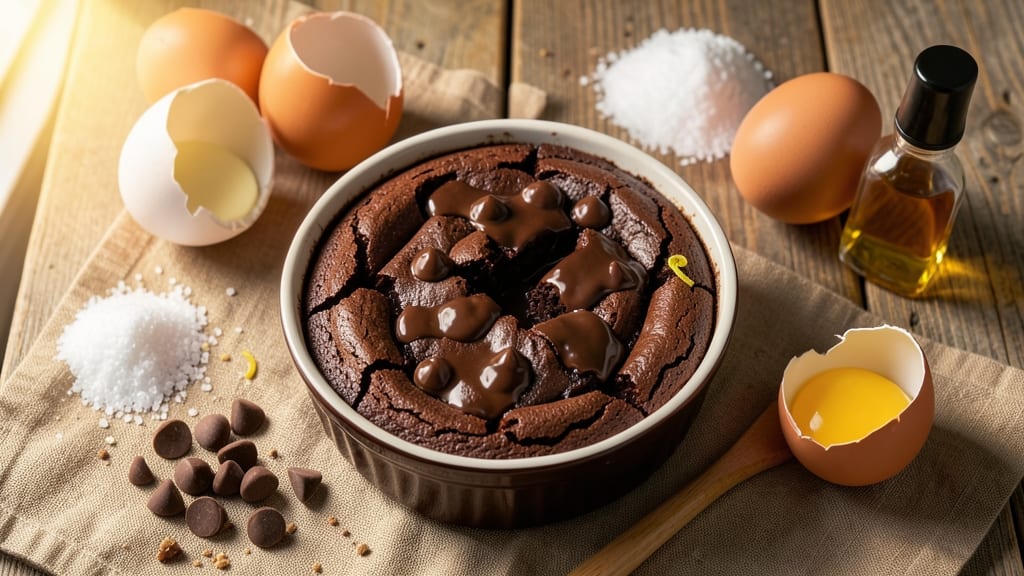
This brownie recipe using melted chocolate chips delivers the perfect balance of fudgy cracks and ultra-smooth chocolate rivers that make every bite irresistible. The secret lies in melting the chocolate chips properly—no lumps, just velvety pools of rich cocoa that create those signature chocolate rivers when baked.
I've perfected this technique over years of baking, ensuring your brownies turn out dense, decadent, and with just the right amount of crackly top.
The process is straightforward but precise: melt the chocolate chips over a double boiler to avoid burning, then mix them with melted butter and sugar for a smooth, glossy base. This recipe uses simple pantry staples—flour, eggs, and vanilla—but combines them in a way that guarantees restaurant-quality results every time.
The key is patience during mixing and baking at the right temperature to avoid dryness.
What you'll end up with is a pan of brownies that's fudgy at the edges with a crackly top, rich chocolate rivers that ooze when cut, and a tender yet dense interior.
The texture is what sets these apart—no cakey disappointment here. These brownies are perfect for satisfying a chocolate craving, impressing guests, or adding to a dessert platter.
For even more indulgence, consider adding a sprinkle of sea salt on top before baking or mixing in chopped nuts for texture. The recipe scales easily, so you can make a single pan for personal enjoyment or double it for sharing.
Let's get started on creating your perfect batch of brownies.
Ingredients for brownie recipe using melted chocolate chips
These irresistible ingredients create the perfect fudgy brownies with signature chocolate rivers you'll crave.
| Ingredient | Amount | Notes |
|---|---|---|
| Semi-Sweet Chocolate Chips 🍫 | 1 ½ cups | High-quality chips for smooth rivers |
| Unsalted Butter 🧈 | 1 cup | Melted, full-fat for richness |
| Granulated Sugar 🍚 | 1 ½ cups | White sugar preferred |
| All-Purpose Flour 🌾 | ¾ cups | Sifted for light texture |
| Large Eggs 🥚 | 2 whole | Room temperature for blending |
| Pure Vanilla Extract 🌿 | 1 tbsp | High-quality for flavor |
| Salt 🧂 | ½ tsp | Fine sea salt preferred |
| Baking Powder 🍞 | ¼ tsp | For slight lift |
| Flaky Sea Salt 🧂 | 1 tbsp | For crackly top finish |
| Dark Chocolate Bars 🍫 | 4 oz | 70% cocoa for cutting |
| Heavy Cream 🥛 | ¼ cup | Optional for extra gloss |
| Walnuts 🥜 | ½ cup | Chopped for texture |
The chocolate chips are non-negotiable—Ghirardelli or Guittard make all the difference. Trader Joe's has great bulk options if you're making a big batch. For the butter, I swear by Land O'Lakes unsalted—it melts smoothly without burning. The sugar should be fine white granulated, but turbinado adds subtle crunch if you're feeling fancy. Don't skip sifting the flour—brownie batter is forgiving but not magic. For the chocolate bars, Lindt Excellence 70% is my go-to for cutting those perfect rivers. Pro tip: keep your chocolate bars chilled while you work—they'll stay firmer for slicing.
No chocolate chips? Melted dark chocolate bars work too—just use the same amount. Out of vanilla? Almond extract at half the amount gives a nice twist. The walnuts can be swapped for pecans or hazelnuts, but toast them first—Costco sells pre-toasted nuts if you're short on time. Need to make this nut-free? Skip them entirely—the brownies will still be decadent. For extra richness, add 1 tbsp cocoa powder to the flour mix. And if you're feeling adventurous, swap half the butter for nutella—trust me, it's a game-changer.
Store your brownies in an airtight container at room temperature for up to 5 days. For longer storage, freeze the whole pan—3 months with no texture loss. The chocolate rivers stay perfect when reheated for 20 seconds in the microwave. I always make a double batch because these disappear fast. Wrap individual squares in parchment before freezing for single-serving treats. And if anyone asks, the secret to those rivers is patience—don't overmix the batter!
Why You'll Love This Recipe
- Here’s what sold me: that crispy edge with the gooey center, all thanks to the melted chocolate chips. The butter keeps it rich, but the sugar and eggs add structure—no dry, cakey mess here. It’s the kind of brownie that disappears in three bites.
- Fewer Ingredients, Same Magic: I swear by this recipe because it’s that simple—just melt the chocolate chips with butter, mix in sugar and eggs, then fold in flour. No extra steps, no measuring headaches. The melted chocolate chips blend into a silky batter that’s foolproof, even if you’re not a baking pro.
- Fudgy-Crackly Balance: Here’s what sold me: that crispy edge with the gooey center, all thanks to the melted chocolate chips. The butter keeps it rich, but the sugar and eggs add structure—no dry, cakey mess here. It’s the kind of brownie that disappears in three bites.
- Party-Ready in Minutes: Between us, this is my secret weapon for last-minute gatherings. Bake a pan, slice it up, and boom—you’ve got a dessert that looks impressive (even if the edges aren’t perfect). Add a dusting of powdered sugar, and suddenly you’re the hero of the potluck.
Step-by-step instructions for fudgy brownies with chocolate rivers
Here's how to create decadent brownies with that perfect crackly top and rivers of molten chocolate.
Melt Chocolate and Butter for Ultra-Smooth Texture
Place the 1.5 cups semi-sweet chocolate chips and 1 cup unsalted butter in a microwave-safe bowl. Microwave in 30-second bursts on high, stirring between each interval, until completely melted and smooth. You want the mixture to reach 110°F—just warm enough to blend but not so hot it cooks the eggs later.
Here's the thing—if you see any graininess in the melted chocolate, don't panic. Simply return it to the microwave for 10 more seconds and stir vigorously. The goal is silky smooth chocolate that will create those beautiful rivers when baked. Let the melted mixture cool slightly for 5 minutes while you prepare the rest.
Whisk Wet Ingredients for Maximum Moisture
In a separate bowl, whisk together the 2 whole large eggs, 1.5 cups granulated sugar, 1 tbsp pure vanilla extract, and 0.5 tsp salt until fully combined and slightly thickened. I like to use a whisk for this step—it incorporates more air than a spoon would. The mixture should be pale yellow and hold its shape when you lift the whisk.
Now, slowly pour the melted chocolate-butter mixture into the egg mixture while whisking constantly. This gradual addition prevents lumps and ensures everything blends perfectly. The batter should be thick but pourable—almost like a rich chocolate pudding. If it looks too thin, let it sit for 2 minutes while you prepare the dry ingredients.
Combine Dry Ingredients and Fold Gently
In a medium bowl, sift together the 0.75 cups all-purpose flour and 0.25 tsp baking powder. This sifting step is crucial—it prevents dense brownies by removing any lumps in the flour. Gently fold the dry ingredients into the wet mixture using a spatula, mixing just until combined. Overmixing develops gluten, which makes brownies tough instead of fudgy.
Fold in the 0.5 cup chopped walnuts (if using) and set the batter aside. Here's where precision matters: the batter should be thick and slightly shiny. If it looks too stiff, add 1 tablespoon of heavy cream—this keeps the brownies moist. Don't skip this step—proper batter consistency is what gives you that perfect crackly top and fudgy interior.
Prepare the Pan and Layer for Chocolate Rivers
Preheat your oven to 350°F. Line an 8x8-inch baking pan with parchment paper, leaving an overhang on all sides for easy removal. Spread half of the brownie batter evenly into the pan, creating a thin, even layer. This first layer is your foundation for those gorgeous chocolate rivers.
While the first layer bakes, chop the 4 oz dark chocolate bars into small pieces. You want chunks that will melt and create rivers but not completely disappear into the batter. Sprinkle half of these chocolate pieces evenly over the first brownie layer. Then add the remaining batter, spreading it evenly over the chocolate. Top with the remaining chocolate pieces.
Bake and Finish with Flaky Sea Salt
Bake for 25-30 minutes until the edges are set but the center still looks slightly underbaked. You want the brownies to be gooey inside—that's the magic of this recipe! Here's the trick: insert a toothpick into the center. If it comes out with moist crumbs but not wet batter, they're ready. If it's completely clean, they've overbaked.
Remove from the oven and immediately sprinkle 1 tbsp flaky sea salt over the top. This adds a sophisticated contrast to the rich chocolate flavor. Let the brownies cool in the pan for 15 minutes before lifting them out using the parchment overhang. Cut into squares while still warm for that perfect fudgy texture with crackly edges and molten chocolate rivers.
Pro Tips For Making Brownie Recipe Using Melted Chocolate Chips
- Melt Chocolate Slowly: I learned this the hard way—blasting chocolate chips in the microwave turns them into greasy, clumpy messes. Instead, melt them in 30-second bursts, stirring between each, until just smooth. Stop when the butter’s melted too; you’ll finish the job with the warm batter.
- Use Room-Temp Eggs: Cold eggs sink like stones and won’t mix properly, leaving your brownies with weird pockets. Take the eggs out of the fridge 15 minutes before mixing—just enough to make them flow smoothly without turning the batter into a science experiment.
- Fold, Don’t Stir: Once you add the flour, resist the urge to mix like you’re baking a cake. Use a spatula to fold it in just until combined—overmixing develops gluten and turns your fudgy dream into a dense, cakey disappointment.
- Check Doneness with the Toothpick Test: The classic toothpick trick works, but here’s the catch: pull it out early. If moist crumbs cling, your brownies are perfect. If it comes out clean, they’re overdone—especially in hot pans. Pull them when they’re just shy of done; they’ll set up as they cool.
Make-ahead tips for this brownie recipe using melted chocolate chips
Prep Ahead Strategy
Melt the chocolate chips and butter up to 3 days in advance, then store in an airtight container at room temperature. This pre-melted mixture keeps beautifully and saves you time on baking day. Just whisk it gently before using to restore smoothness. 💫
Batter Prep Timeline
Combine all wet ingredients (eggs, sugar, vanilla, salt) and refrigerate for up to 24 hours before baking. This chilling step enhances flavor development and prevents overmixing when you're ready to fold in the dry ingredients. Trust me, your brownies will taste even more decadent!
Layered Assembly
Prepare the chocolate bar pieces and measure out your flaky sea salt the night before. Store them separately in small containers to keep everything organized. This step alone cuts your baking day prep time in half while ensuring perfect chocolate rivers every time.
Freezer-Friendly Method
For maximum convenience, assemble the entire brownie pan (including chocolate layers) and freeze it completely. Bake straight from frozen at 350°F for 35-40 minutes, adding 5-10 minutes if your oven runs hot. The texture remains perfect—just slightly more fudgy from the cold start!
Portion Control
Cut the cooled brownies into squares and wrap each one individually in parchment paper. Store these wrapped portions in a single-layer freezer bag for up to 3 months. When you're ready to serve, simply microwave for 15 seconds to restore that warm, gooey perfection.
Make-Ahead Mistakes
Avoid refrigerating the fully assembled pan before baking—condensation ruins the crackly top. Also, never reheat brownies directly from the fridge; let them sit at room temperature for 10 minutes first. And remember: the chocolate rivers won't reform after cutting, so plan to serve them fresh from the pan!
Nutrition facts
Frequently asked questions
Why do I need to melt the chocolate chips instead of using them as-is?
Melting the chocolate chips creates a silky, smooth base that blends perfectly with the butter and sugar. This technique produces those signature chocolate rivers when baked, rather than just melted pools on top. The melted state also ensures even distribution throughout the batter for maximum flavor in every bite.
Can I substitute chocolate chips with chocolate bars?
Yes! Use 4 oz dark chocolate bars (70% cocoa) instead of the chocolate chips, melted with the butter. For the chocolate rivers layer, chop the bars into small pieces before sprinkling. The texture will be slightly richer but just as delicious. Just ensure your chocolate is high-quality for the best results.
How do I know when my brownies are done baking?
Your brownies are ready when the edges are set but the center still looks slightly underbaked. Insert a toothpick—if it comes out with moist crumbs (not wet batter), they're perfect. Overbaking by even 1 minute can make them dry. The crackly top should form naturally during the last 5 minutes of baking.
Why do my brownies turn out cakey instead of fudgy?
Cakey brownies usually happen from overmixing the batter or using too much flour. Mix just until combined when folding in dry ingredients, and measure flour accurately (spoon and level). For extra fudginess, reduce flour to 0.6 cups and add 1 tbsp cocoa powder to the dry mix. The key is patience—don't overwork the batter!
How can I make these brownies nut-free?
Simply omit the walnuts entirely—they're optional! The recipe will still yield rich, fudgy brownies with perfect chocolate rivers. For extra texture, try adding 1/4 cup dried cranberries or mini chocolate chips instead. The flavor remains decadent without nuts.