
Desserts
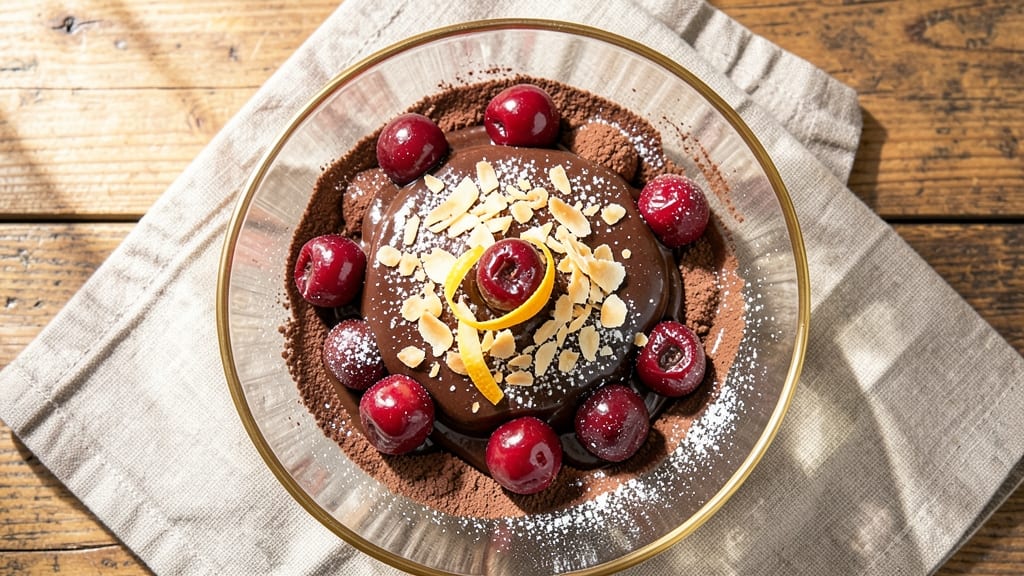
This no-bake cherry chocolate balls recipe delivers decadent, melt-in-your-mouth bites that require zero oven time—just a few simple steps and patience. The secret lies in combining rich cocoa powder with sweetened condensed milk, creating a dough that wraps around tart cherries for a perfect balance of textures and flavors.
I’ve perfected this recipe over years of holiday baking, ensuring every bite is smooth, creamy, and bursting with fruity brightness.
The process is straightforward: mix the dough ingredients until smooth, fold in chopped cherries, then roll into perfect balls before chilling. Once firm, you’ll coat them in melted chocolate, coconut flakes, or powdered sugar for that classic finish.
The result? A dessert that’s elegant enough for gatherings but simple enough for a weeknight treat—no heat, no fuss, just pure indulgence.
What makes these stand out is their restaurant-quality texture—the outer shell stays firm while the center remains tender, thanks to the precise ratio of cocoa and condensed milk. The cherries add a pop of tartness that cuts through the sweetness, making each bite feel special.
These are the kind of no-bake treats that disappear faster than you can say "holiday dessert table."
Serve them on a platter with a sprinkle of flaky salt for contrast, or gift them in clear jars for a thoughtful homemade touch. The recipe scales easily, so you can make a batch for a crowd or just a few for yourself.
Let’s get started—your taste buds will thank you.
Ingredients for cherry chocolate balls
Sweetened condensed milk, cocoa powder, and cherries—just what you need for these no-bake bites.
| Ingredient | Amount | Notes |
|---|---|---|
| Sweetened Condensed Milk 🥛 | 1 cup | Full-fat for creaminess |
| Unsweetened Cocoa Powder 🍫 | ½ cup | Natural or Dutch-processed |
| Vanilla Extract 🌿 | 1 tsp | Pure vanilla preferred |
| Salted Butter 🧈 | ½ cup | Cold, cubed for texture |
| Pitted Dark Cherries 🍒 | 1 cup | Chopped, tart variety |
| Powdered Sugar 🍚 | ½ cup | For rolling and coating |
| Dark Chocolate Chips 🍫 | 1 cup | 70% cocoa for coating |
| Toasted Coconut Flakes 🥥 | ¼ cup | For garnish (optional) |
| Flaky Sea Salt 🧂 | 1 tsp | For finishing touch |
| Heavy Whipping Cream 🥛 | ¼ cup | For extra richness (optional) |
| All-Purpose Flour 🌾 | 2 tbsp | For dusting and binding |
The cocoa powder makes all the difference here. Ghirardelli or Hershey’s Special Dark are my go-tos—they’ve got that deep, rich flavor that stands up to the cherries. Grab the natural cocoa if you want a slightly tangy note, or Dutch-processed for smoother texture. The cherries should be tart, like Montmorency or frozen dark cherries (thawed and drained). If you can’t find pitted cherries, pit them yourself—it’s worth the extra minute. For the condensed milk, Borden or Carnation are the most reliable brands, and always use full-fat for that creamy texture.
No dark chocolate chips? Melt a chocolate bar and let it cool to room temperature—just make sure it’s at least 60% cocoa. Short on cherries? Dried cranberries or chopped apricots work in a pinch, but they’ll change the flavor profile. The butter should be cold when you mix it in—cut it into small cubes and let it sit out for 10 minutes if it’s straight from the fridge. Powdered sugar can be swapped for confectioners’ sugar, but it’s the same thing. And if you’re feeling fancy, add a splash of cherry liqueur to the dough for extra depth.
These keep beautifully in an airtight container in the fridge for up to 2 weeks, though they’ll likely disappear faster. For longer storage, freeze them uncoated for 3 months—just let them thaw at room temperature before coating. The coating sets best at room temperature, so take them out 10 minutes before serving. If you make a big batch, store the dough in the fridge for up to 3 days—just let it sit at room temp for 30 minutes before rolling. Trust me, they taste even better the next day.
Why You'll Love This Recipe
- No-Fuss Mixing: I swear by this recipe because it’s basically three ingredients plus cherries—just stir, chill, roll. No fancy equipment, no waiting for dough to rise, just you, a bowl, and 10 minutes of hands-on time. Honestly, the hardest part is resisting eating the dough before it’s even shaped.
- Taste Like Childhood: That perfect balance of sweet condensed milk and rich cocoa? It’s the kind of flavor that makes you pause mid-bite. The dark cherries cut through the richness like a little surprise, and the vanilla ties it all together so smoothly. Between us, it’s the first thing I reach for when I need a hit of nostalgia.
- Party in a Jar: These are my secret weapon for holidays, potlucks, or just because. Roll them in extra cocoa powder for a pretty finish, and they stay fresh for days in the fridge. I’ve used them as dessert at Christmas, packed them in lunchboxes for kids’ birthdays, and even gifted them in jars—no one ever guesses how easy they were to make.
- Budget Luxury: Sweetened condensed milk and cocoa powder are pantry staples that won’t break the bank, and a bag of cherries lasts forever if you freeze them. I’ve made 30 of these for under $10, and they disappear faster than store-bought treats. Plus, the leftovers? They’re just as good the third day—if they last that long.
Step-by-step instructions for no-bake cherry chocolate balls
These rich, bite-sized treats come together without heat—just mix, roll, and chill.
Melt Butter and Chocolate Together
In a medium heatproof bowl set over a saucepan of simmering water (double boiler), combine the 0.5 cup salted butter and 1 cup dark chocolate chips. Stir gently until both are completely melted and smooth, about 5 minutes. Remove from heat and let cool slightly—you want it warm enough to mix but not so hot it cooks the cherries.
Here's the thing—if you rush this step, the chocolate will seize when you add the cocoa powder later. I like to test the mixture by dipping a spoon in water—if it steams slightly, it's ready. This ensures everything blends perfectly without clumping.
Mix the Cocoa Base
In a separate bowl, whisk together the 1 cup sweetened condensed milk, 0.5 cup unsweetened cocoa powder, and 1 tsp vanilla extract until smooth. This mixture should be thick but pourable—like a rich chocolate pudding. Add the melted chocolate mixture to the cocoa bowl and stir until fully combined and glossy.
I always use a silicone spatula for this step because it scrapes every last bit from the bowl. The mixture will be warm but not hot—perfect for mixing in the cherries next. If it looks too thick, add 1 tbsp heavy whipping cream to loosen it slightly.
Fold in Cherries and Flour
Gently fold in the 1 cup pitted dark cherries and 2 tbsp all-purpose flour using a rubber spatula. The cherries should be evenly distributed but still visible—you want each bite to have that fruity surprise. Work quickly so the mixture doesn't cool too much, which could make rolling difficult later.
Don't overmix here. You're just combining ingredients, not developing gluten like you would with bread dough. The cherries should stay intact but well-coated in the chocolate mixture. If the dough feels too sticky, chill it in the fridge for 10 minutes before proceeding.
Roll and Coat the Balls
Using slightly wet hands (dip in water and dry between balls), roll the mixture into 1-inch balls. Place them on a parchment-lined tray and immediately roll each ball in powdered sugar, pressing gently to adhere. This creates that classic dusty coating that makes these treats look so elegant.
I press down gently on each ball during the sugar coating—this prevents them from falling apart when you handle them. If the sugar doesn't stick, your hands might be too dry. Just dip them again and try a few more. Work in batches so you don't have to rush.
Chill and Garnish
Refrigerate the coated balls for at least 1 hour (or up to 24 hours) until firmly set. This chilling time is crucial—it lets the flavors meld and the texture firm up. Before serving, roll each ball in toasted coconut flakes and sprinkle with flaky sea salt for that perfect sweet-salty balance.
Here's where it gets fun—serve them at room temperature for the best texture. The contrast between the cool, creamy center and the slightly toasted coconut topping is what makes these little bites so irresistible. Store any leftovers in an airtight container in the fridge for up to 5 days—they'll keep beautifully.
Pro Tips For Making Cherry Chocolate Balls
- CHOP CHERRIES SMALL: Tiny pieces melt into the mix better than big chunks—think rice-sized, not marble-sized. I learned this the hard way when my first batch had a surprise cherry in every bite. A sharp knife and steady hand save time here.
- MELT BUTTER SLOW: Warm the butter with the condensed milk over low heat until it’s just melted—no bubbling. After burning two batches, I finally got it: rushing turns the sauce grainy and dulls the chocolate flavor. Patience pays off.
- SIFT THE COCOA: Unsweetened cocoa powder clumps like a grumpy cat—sift it into the warm mixture to avoid lumps. I skip this sometimes, and the texture suffers. Takes 10 seconds; saves 10 minutes of chewing later.
- CHILL THE BALLS: Roll them into balls now, but let them sit in the fridge for 30 minutes before rolling in cocoa. Freshly formed balls smear like wet clay; chilled ones hold shape and coat perfectly. No one wants a chocolate mess.
Make-ahead tips for this recipe
Dough Prep Ahead
Mix the dough ingredients up to 3 days in advance and store in an airtight container in the fridge. The flavors deepen overnight, and the texture becomes even more workable.
When ready to roll, let the dough sit at room temperature for 30 minutes before shaping—this prevents cracking when you coat them in sugar. I like to prep the dough the night before so I can focus on rolling and chilling the next day. 🌟
Cherry Prep Shortcut
Save time by using frozen pitted cherries (thawed and drained) instead of fresh. Look for Montmorency cherries in the frozen section—they’re tart and hold their shape beautifully. If you’re using fresh cherries, pit them while the dough chills to avoid mess.
I keep a small bowl of water nearby to rinse my hands between batches. This step only takes 5 minutes and makes the whole process smoother. ✨
Batch Rolling Tips
Roll the dough into balls in batches to maintain consistency. Use a cookie scoop (like the Wilton 1-inch scoop) for uniform size, or weigh portions to 1 tablespoon each for precision.
Place rolled balls on a parchment-lined tray and refrigerate for 10 minutes before coating—this helps them hold their shape. I label trays with the date to track chilling time. 💡
Coating Alternatives
Swap the powdered sugar coating for melted white chocolate or crushed pistachios for variety. For a festive touch, use colored sugar (like Wilton’s gold dust) or crushed candy canes during the holidays.
Just ensure your coating is at room temperature before applying—cold chocolate will set too quickly. Store coated balls in single layers in airtight containers to prevent sticking. 🎄
Freezing Uncoated Balls
Freeze uncoated dough balls for up to 3 months by placing them on a tray, freezing solid, then transferring to a ziplock bag. Thaw in the fridge overnight before coating. This is perfect for holiday prep—just pull out what you need as gifts.
Avoid coating before freezing, as moisture can cause texture issues. Label bags with the date and coating instructions for easy reference. ❄️
Gift-Worthy Packaging
Package finished balls in clear cellophane bags tied with ribbon for a professional look. Add a handwritten tag with serving suggestions (like "Dip in coffee or warm milk"). For larger batches, use mini mason jars layered with coconut flakes—these make stunning desk gifts.
Store in a cool, dry place for up to 1 week before gifting. The presentation elevates these treats from homemade to "wow" factor. 💛
Nutrition facts
Frequently asked questions
Can I make these without cherries?
Yes! Swap cherries for dried cranberries, chopped apricots, or even raspberries for a fruity twist. For a nutty variation, try chopped walnuts or almonds instead. The key is keeping the moisture level similar—if using dried fruit, lightly toast it first to prevent excess stickiness in the dough.
Why did my chocolate balls crack when chilling? Cracking usually happens when the dough cools too quickly or isn't firm enough.
How do I store these for holidays or gifting?
For best results, store uncoated dough balls in an airtight container in the fridge for up to 3 days or freeze for 3 months. Coat them just before serving or gifting. Package finished treats in clear cellophane bags with a ribbon, or use mini mason jars layered with coconut flakes. Keep them in a cool, dry place for up to 5 days before gifting.
Can I use white chocolate instead of dark?
White chocolate works beautifully for coating, especially if you prefer a sweeter flavor. Use the same 1 cup amount, but add 1 tablespoon of coconut oil to help it melt smoothly. For extra richness, mix in 1 teaspoon of vanilla bean paste with the melted white chocolate. Just note that white chocolate has a lower melting point, so handle it gently when coating.
What’s the best way to reheat these if they get too firm?
No reheating needed—they’re best at room temperature! If they feel too hard after refrigeration, let them sit at room temperature for 10-15 minutes before serving. For a quick softening trick, place the container in a bowl of warm water for 2 minutes (don’t submerge). Avoid microwaving—they’ll lose their texture. The chilled version is actually ideal for serving with coffee or tea!