
Beverages
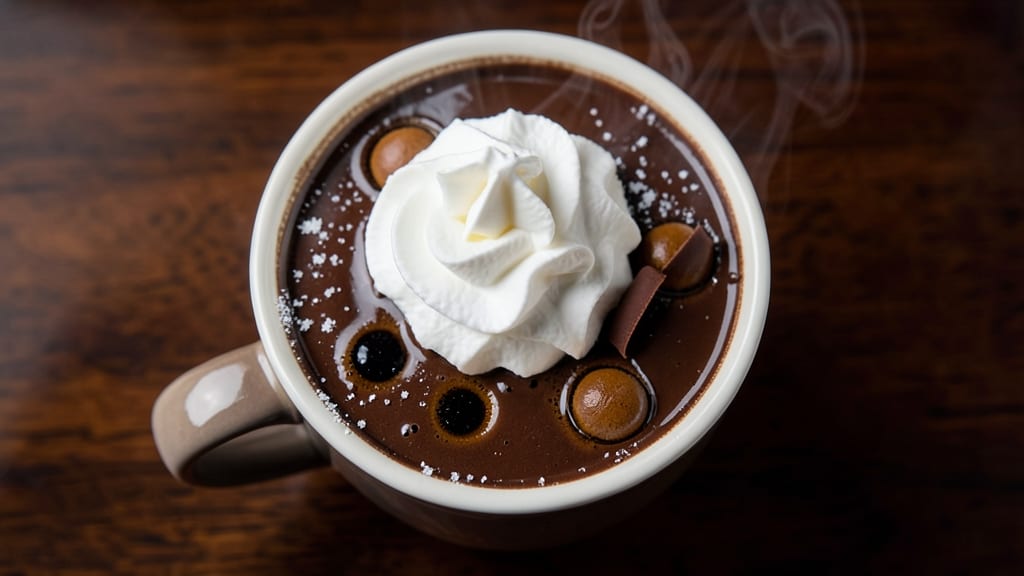
This barista-style hot chocolate recipe transforms your kitchen into a café with velvety microfoam and rich espresso infusion. The secret lies in perfectly tempered chocolate and expertly steamed milk—no fancy equipment required.
I developed this method after years of experimenting with café techniques at home, and it delivers that signature silky texture and bold flavor every time.
The process starts with a smooth chocolate base, melted just enough to maintain its velvety quality, then combined with hot milk infused with espresso for depth. Steaming the milk to create microfoam gives it that signature café texture—light, airy, and perfectly stable.
This isn’t your childhood hot chocolate; it’s a sophisticated drink with layers of flavor and presentation that rivals any specialty shop.
What you’ll end up with is a drink that looks as impressive as it tastes—creamy, aromatic, and topped with optional whipped cream or chocolate shavings for that final café touch.
The espresso infusion adds complexity without overpowering the chocolate, while the microfoam creates that luxurious mouthfeel that makes it feel like a treat. It’s the perfect way to elevate a simple pleasure into something extraordinary.
Whether you’re serving this to guests or indulging yourself on a chilly evening, the method is straightforward but yields professional results. The key is patience—letting the milk steam properly and tempering the chocolate just right. Once you master these techniques, you’ll never settle for anything less than café-quality at home.
Ingredients for barista hot chocolate
Just 11 ingredients transform your kitchen into a café—rich chocolate, velvety milk, and espresso magic.
| Ingredient | Amount | Notes |
|---|---|---|
| High-Quality Dark Chocolate Bar 🍫 | 4 oz | 70% cacao, finely chopped |
| Whole Milk 🥛 | 2 cups | Cold, for steaming |
| Espresso Shots ☕ | 2 whole | Freshly brewed, chilled |
| Unsalted Butter 🧈 | 2 tbsp | Cold, cubed for tempering |
| Granulated Sugar 🍚 | 2 tbsp | Fine grain preferred |
| Heavy Whipping Cream 🥛 | ½ cup | Cold, for microfoam |
| Vanilla Extract 🌿 | ½ tsp | Pure, high-quality |
| Pinch of Salt 🧂 | ⅛ tsp | Fine sea salt |
| Whipped Cream 🍦 | ¼ cup | Optional, for topping |
| Dark Chocolate Shavings 🍫 | 1 tbsp | Optional garnish |
| Cinnamon Stick 🌿 | 1 whole | For garnish |
The chocolate makes or breaks this. Valrhona or Guittard bars are my go-to—their high cacao content delivers that deep, complex flavor without bitterness. If you can't find specialty chocolate, Ghirardelli 70% or higher works beautifully. Chop it finely so it melts smoothly into the milk. The butter is non-negotiable for tempering; European-style, high-fat butter like Plugrá gives the best results. Skip the margarine—this is café-quality, not shortcuts. Store your chocolate in a cool, dark place to preserve its flavor, and keep the butter in the fridge until ready to use.
No espresso machine? Double-strength instant espresso works in a pinch, though fresh is ideal. If you're using powdered sugar, sift it first to avoid graininess in the final drink. The vanilla extract matters—Madagascar bourbon vanilla adds depth, but pure vanilla bean paste works too. For the whipped cream topping, cold bowls and beaters are essential for stable microfoam. If you're feeling fancy, add a splash of vanilla or a pinch of salt to the whipped cream before serving—trust me, it elevates everything. The cinnamon stick isn't just for looks; it infuses subtle warmth into each sip.
Prep ahead by chopping the chocolate and measuring everything the night before—this recipe is all about timing. The milk should be cold when you start steaming, and the chocolate mixture should be ready in a heatproof pitcher. Once made, the hot chocolate stays hot for about 10 minutes, so serve immediately. Store any leftover chocolate mixture in the fridge for up to 3 days, reheating gently over low heat with a splash of milk. The whipped cream? Whip it fresh—it won’t keep well once made, but it’s worth the effort for that café-style finish.
Why You'll Love This Recipe
- Five-Ingredient Magic: I swear, this is the kind of recipe where you’ll stare at your pantry thinking, "I already have all this?" Dark chocolate, milk, espresso, butter, sugar—no fancy gadgets, no stress, just pure cozy alchemy in a mug.
- Velvet Espresso Kiss: That first sip? Rich, deep, and just hinted with coffee’s bold edge—thanks to the espresso shots and dark chocolate’s bittersweet punch. Honestly, it tastes like a café made it, even if I’m the one stirring.
- Date Night or Lazy Sunday: Dress it up with whipped cream for company or keep it simple with a sprinkle of cocoa for a solo movie marathon. Between us, I’ve served this at both—no judgment if you call it "emergency dessert" more often than not.
- Leftovers? Just Reheat: Make a big batch, store it in the fridge, and reheat with a splash of milk. The butter keeps it silky, so it’s never sad or watered-down—just like the first time, but with less effort. My secret weapon for "I’m too tired to cook" nights.
Step-by-step instructions for barista-style hot chocolate
Here's how to craft café-quality hot chocolate with velvety microfoam and rich espresso notes.
Temper the Chocolate and Butter
Place the 4 oz high-quality dark chocolate bar and 2 tbsp unsalted butter in a heatproof bowl set over a saucepan of simmering water. Keep the water at a gentle simmer—never boiling—so the chocolate melts smoothly without scorching. Stir occasionally until both are completely melted and the mixture reaches 110°F. This gentle heat ensures the chocolate develops its full flavor without burning.
Remove from heat and let cool slightly to 95°F—this is crucial for creating stable microfoam later. If the mixture cools too quickly, you'll struggle to incorporate air properly. I like to place the bowl in an ice bath for 1-2 minutes to bring it down to the ideal temperature. This step might seem fussy, but it's what separates amateur hot chocolate from barista-level perfection.
Steam the Milk and Infuse with Espresso
Pour the 2 cups cold whole milk into a saucepan and heat over medium-low heat until it reaches 150°F. Use a candy or instant-read thermometer for precision—this temperature ensures you get silky microfoam without curdling. While the milk heats, add the 2 whole espresso shots and 1 whole cinnamon stick to the pan. The espresso will infuse into the milk, adding bold coffee notes without bitterness.
Remove the cinnamon stick before the milk reaches 150°F—it's done its job once the milk is steaming. Here's the thing: don't let the milk boil. Boiling milk destroys the delicate proteins needed for proper microfoam formation. If you see small bubbles forming at the edges, you're close—just reduce heat slightly to maintain that gentle simmer.
Create the Chocolate Base
In a separate bowl, whisk together the melted chocolate mixture with 2 tbsp granulated sugar and 0.5 tsp vanilla extract until smooth. The sugar helps balance the bitterness of the dark chocolate while enhancing the espresso flavor. Add the 0.125 tsp pinch of salt and whisk again—this might seem like a tiny amount, but it's what makes the flavors pop and prevents the chocolate from tasting flat.
Now carefully pour the 150°F steamed milk into the chocolate mixture while whisking continuously. The contrast between the hot milk and cooler chocolate will cause the mixture to thicken slightly—this is normal. If you notice any graininess, strain the mixture through a fine-mesh sieve to ensure silky smoothness. The goal is a thick, pourable chocolate with a glossy sheen that indicates proper emulsification.
Whip the Microfoam
Transfer the chocolate-milk mixture to a chilled mixing pitcher. Using a hand mixer or stand mixer with the whisk attachment, whip on high speed for 2-3 minutes until the mixture triples in volume and develops a light, airy texture. This is where the magic happens—the 0.5 cup cold heavy whipping cream we've been holding back comes into play.
With the mixer running, gradually add the cold heavy whipping cream in a slow, steady stream. The cold cream helps stabilize the microfoam by adding fat and protein. You're looking for a texture that's thick enough to hold its shape when poured—almost like a cross between hot chocolate and cappuccino foam. If it's too thin, whip for another 30 seconds; if it's too thick, add 1 tablespoon of hot milk to loosen it.
Assemble and Serve
Divide the microfoam mixture evenly among 4 mugs. Top each serving with 0.25 cup whipped cream and 1 tbsp dark chocolate shavings for visual appeal and texture contrast. The whipped cream adds a light, airy element that balances the richness of the chocolate, while the shavings provide a satisfying crunch and elegant presentation.
Serve immediately with a cinnamon stick for stirring—it's both practical and decorative. The contrast between the velvety microfoam, rich chocolate base, and crisp espresso notes creates a layered experience that's pure café quality. Pro tip: If you're serving this to guests, prepare the microfoam just before serving so it stays at its peak texture and temperature.
Pro Tips For Making Barista Hot Chocolate
- CHOP CHOCOLATE SMALL: I learned this the hard way—chunky chocolate melts unevenly and creates gritty bits. Use a sharp knife to hack the dark chocolate into ¼-inch cubes (not shavings) so every piece melts smoothly into the milk. No food processor needed—just elbow grease.
- WHISK ON LOW HEAT: High heat turns your hot chocolate into scrambled eggs. Warm the milk and butter over medium-low while whisking constantly—you’re not making caramel, just a silky base. Pull it off heat the second it steams, or you’ll end up with a skin.
- SHOOT ESPRESSO LAST: Add those espresso shots after removing the pot from heat. The residual warmth keeps the coffee from turning bitter, and you avoid the sad sight of a lukewarm shot sinking to the bottom. Stir immediately to bloom the flavors.
- GRATE BUTTER FIRST: Cold butter clumps and takes forever to melt. Grate it into tiny flakes before adding it to the milk—it dissolves in seconds and emulsifies better. Skip the chunks, or you’ll be whisking like a maniac for 10 minutes. (Yes, even if you’re impatient like me.)
Serving suggestions for barista hot chocolate
Mug Presentation
Serve your barista hot chocolate in pre-warmed mugs—this prevents heat loss and keeps the drink piping hot longer. I use double-walled ceramic mugs like Ritual Coffee Mugs because they maintain temperature beautifully. For extra café flair, place a small saucer beneath each mug to catch drips from the microfoam.
The contrast between the dark mug and light microfoam creates a stunning visual effect that makes your drink look as impressive as it tastes. 🥛
Topping Combinations
Start with the classic trio: whipped cream, dark chocolate shavings, and a cinnamon stick. For a spiced twist, sprinkle ½ tsp ground cinnamon or pinch of cayenne pepper (trust me, it adds warmth without heat).
If you love textures, add toasted coconut flakes or crushed peppermint candies for a festive touch. Pro tip: Use a microplane to shave chocolate—it creates finer, more elegant curls than a grater. 🍫
Beverage Pairings
Pair this rich hot chocolate with light, crisp white wines like Sauvignon Blanc or dry Riesling to cut through the sweetness. For beer lovers, a Belgian witbier (like Hoegaarden) complements the espresso notes beautifully.
If you're serving this at a gathering, offer mini espresso shots on the side—guests can add them to their mugs for an extra caffeine kick. The contrast of bitter espresso and sweet chocolate is a crowd-pleaser. ☕
Seasonal Garnishes
Swap toppings for the season: In fall, add pumpkin spice whipped cream (mix ½ tsp pumpkin pie spice into whipped cream) and caramel drizzle. For winter holidays, use candied orange peel and crushed candy canes.
In spring, try fresh berries (raspberries or strawberries) and edible flowers for a lighter touch. The key is to keep garnishes fresh—prep them just before serving to maintain texture and flavor. 🌿
Serving Tools
Use a small ladle (like a mini espresso pitcher) to pour the microfoam—it creates a smooth, controlled layer. For guests, provide spoons to stir in extra espresso or mix toppings. If you're feeling fancy, add mini chocolate saucers on the side for dipping.
I also keep a small bowl of powdered sugar nearby for those who prefer it sweeter. The right tools make the experience feel like a true café indulgence. ✨
Temperature Control
Serve hot chocolate between 140°F and 160°F—too hot and it burns, too cool and the microfoam collapses. If your kitchen gets chilly, keep the pitcher of microfoam in a warm oven (200°F) while serving.
For outdoor gatherings, use an insulated thermal carafe to maintain temperature. The goal is to let guests enjoy every sip without rushing—this is a drink meant to savor, not gulp. 💛
Nutrition facts
Frequently asked questions
Can I make this without an espresso machine?
Use 2 tablespoons of finely ground instant espresso powder dissolved in 2 tablespoons of hot water instead of fresh shots. For extra depth, steep 1 tablespoon of coarse coffee grounds in ½ cup hot water for 5 minutes, then strain before adding to the milk. The key is to use strong coffee—weak brews won't provide that signature barista kick.
Why did my microfoam turn grainy?
Graininess usually happens when chocolate overheats or cools too quickly. To fix it, strain the mixture through a fine-mesh sieve before whipping, or whisk vigorously to break up any lumps. For prevention: melt chocolate gently over double boiler heat (never microwave) and let it cool to 95°F before adding milk. The butter also helps create a smoother texture—never skip it!
How do I adjust the sweetness level?
Start with the 2 tablespoons of sugar in the recipe, but taste as you go. For less sweetness, reduce to 1 tablespoon or omit entirely—dark chocolate's natural bitterness shines through. For extra sweetness, add 1-2 teaspoons of powdered sugar to each serving after pouring. Pro tip: A pinch of salt enhances sweetness naturally, so keep that in your base mixture.
Can I make this ahead of time?
Prepare the chocolate base and steamed milk separately up to 1 day ahead, then reheat gently before combining. Store the chocolate mixture in an airtight container in the fridge—it keeps for 3 days. Reheat over low heat with a splash of milk to restore smoothness. The whipped cream and microfoam should be made fresh, though, as they lose texture when reheated.
What's the secret to perfect microfoam?
The magic happens with cold equipment and precise temperatures. Use a chilled mixing pitcher and whip the mixture on high speed for 2-3 minutes—don't rush it! The cold heavy cream adds stability, while the 95°F chocolate creates the ideal foundation. If your mixer isn't powerful enough, try a French press: pour the hot chocolate into it, then pump the plunger up and down vigorously for 30 seconds to incorporate air.