
Desserts
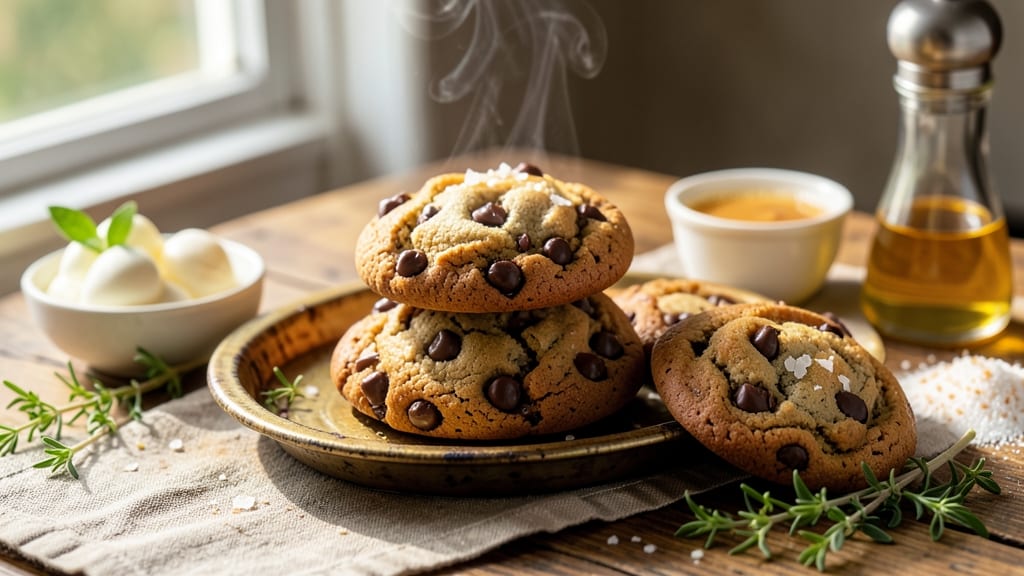
This best ever brown butter chocolate chip cookie recipe delivers a flavor explosion with nutty depth and caramelized crunch that'll make you question store-bought cookies forever. The secret lies in browned butter—its rich, toasty aroma transforms ordinary chocolate chip cookies into something extraordinary.
I've perfected this recipe over years of baking, and every batch gets rave reviews.
What sets these apart is the brown butter technique, which adds a sophisticated nutty flavor and golden caramelization that no regular butter can match. The dough comes together with simple ingredients but develops complex layers of taste when baked.
The result? Cookies with crisp edges, chewy centers, and chocolate chips that stay gloriously melty.
These cookies are foolproof for both beginners and experienced bakers—they're easy to mix, simple to shape, and impossible to resist. The brown butter creates a perfect balance of sweetness and richness, while the chocolate chips add pockets of gooey goodness in every bite.
Whether you're baking for a crowd or treating yourself, this recipe delivers restaurant-quality results at home.
The best part? These cookies improve with age, developing even deeper flavor as they sit. Store them properly, and you'll have cookies that taste like they just came out of the oven days later. Let's get baking—your taste buds will thank you.
Ingredients for best ever brown butter chocolate chip cookie
These transformative ingredients create cookies with nutty depth and caramelized crunch you'll crave forever.
| Ingredient | Amount | Notes |
|---|---|---|
| Unsalted Butter 🧈 | 1 cup | Browned to nutty perfection |
| Granulated Sugar 🍚 | ¾ cup | Light brown preferred |
| Packed Brown Sugar 🍚 | ¾ cup | For deep caramel flavor |
| Large Eggs 🥚 | 2 whole | Room temperature preferred |
| Vanilla Extract 🌿 | 2 tsp | Pure, high-quality extract |
| All-Purpose Flour 🌾 | 2 ½ cups | Sifted for light texture |
| Baking Soda 🧂 | 1 tsp | Ensures proper rise |
| Diamond Crystal Kosher Salt 🧂 | 1 tsp | Adjust to taste |
| Semisweet Chocolate Chips 🍫 | 2 cups | High-quality chips only |
| Flaky Sea Salt 🧂 | 1 tbsp | For finishing sprinkle |
| Granulated Sugar 🍚 | ¼ cup | For rolling dough balls |
The butter is non-negotiable here—European-style unsalted butter browns beautifully and adds that signature nutty aroma. Plugrá or Kerrygold are my go-tos, but any good-quality butter works. Brown it in a light-colored saucepan over medium heat until it smells heavenly and turns golden brown—about 5-6 minutes. Watch it closely to avoid burning. The chocolate chips? Ghirardelli or Valrhona elevate these cookies to gourmet status, but name-brand chips from the grocery store work too. For the sugars, I always use a mix of light and dark brown—it creates that perfect balance of sweetness and caramelized depth.
No vanilla extract? Seeds from a vanilla bean steeped in warm water for 15 minutes work wonders, or even vanilla bean paste at half the amount. Running short on baking soda? Baking powder at double the amount gets you close, but the texture won't be quite the same. The flaky sea salt is worth hunting down—Maldon or Jacobsen are my favorites, but any flaky salt works. For the flour, King Arthur or Gold Medal are my top picks, but any all-purpose flour will do. Pro tip: Toast your flour in a dry pan for 2 minutes before mixing—it deepens the flavor and creates a lighter cookie.
Brown butter loses its magic fast, so use it immediately or store it in the fridge for up to 2 weeks in an airtight container. The dough keeps well for 3 days in the fridge, wrapped tightly in plastic. For best results, bake only what you can eat in a day—these cookies are impossible to resist. Store baked cookies in an airtight container at room temperature for up to 5 days, or freeze for 3 months. They'll taste even better the next day as the flavors meld together—trust me on this!
Why You'll Love This Recipe
- No-Fuss Mixing: I swear by the "dump-and-stir" method here—just toss the melted brown butter, sugars, eggs, and vanilla into a bowl. No creaming, no fuss, and the dough comes together faster than I can say "cookie time." (Yes, even on a Tuesday night.)
- Rich Nutty Magic: That browned butter? It’s where the flavor lives—deep, toasty, and just a little caramelized. The moment the chocolate chips melt into the warm, buttery dough, it’s ridiculously good. Honestly, the first bite makes me forget I’m not at a bakery.
- Bakes Like a Dream: These cookies spread just enough for that perfect chewy edge but stay thick enough to hold a scoop of ice cream. (I’ve tested this.) They’re ready in 12 minutes—no waiting around, no burning the edges. Plus, they stay soft for days if you’re not a one-bite kind of person.
- Budget-Friendly Crowd-Pleaser: A single batch uses basic pantry staples—eggs, sugar, butter—and stretches to feed a houseful. Freeze half the dough for later, and you’ve got a ready-to-bake treat for when guests drop by. Between us, this is my go-to for potlucks and lazy Sundays.
Step-by-step instructions for brown butter chocolate chip cookies
Here's how to transform simple ingredients into cookies with nutty depth and caramelized crunch that'll have everyone begging for the recipe.
Brown the Butter for Maximum Flavor
Melt the 1 cup unsalted butter in a light-colored saucepan over medium heat. Watch closely as it foams and bubbles—this is when the magic happens. The butter will transform from pale yellow to golden brown with tiny browned bits floating on top. This is the nutty, caramelized flavor that makes these cookies extraordinary.
When the butter reaches 350-365°F (it should smell like popcorn and toasted nuts), immediately pour it into a heatproof bowl to cool for 10 minutes. Don't skip this cooling step—the butter needs to solidify slightly before mixing with sugars. The browned butter will be liquid but should thicken enough to hold its shape when chilled. This transformation creates the signature nutty depth that separates these cookies from ordinary chocolate chip varieties.
Cream Butter with Sugars for Light Texture
In a stand mixer fitted with the paddle attachment, beat the cooled brown butter with the 0.75 cup granulated sugar and 0.75 cup packed brown sugar on medium speed for 3-4 minutes. You're looking for a light, fluffy mixture that nearly doubles in volume and becomes pale in color. This creaming process incorporates air, which creates those beautiful crackly tops and helps the cookies spread just enough for perfect texture.
I like to scrape down the sides of the bowl with a silicone spatula every 30 seconds to ensure even mixing. The sugars should dissolve completely and the butter should be completely smooth. Here's the thing—don't rush this step. Properly creamed butter and sugars create the ideal foundation for tender, chewy cookies with perfect texture. If you skip this or do it too quickly, you'll end up with dense, cakey cookies instead.
Add Eggs and Vanilla for Richness
Add the 2 whole large eggs, one at a time, mixing on low speed for 30 seconds after each addition until fully incorporated. Then add the 2 teaspoons vanilla extract and mix for another 10 seconds. The mixture might look slightly curdled after adding the eggs, but that's normal—the vanilla will help everything come together smoothly.
I always use room-temperature eggs for this recipe because they mix more easily with the butter and create a smoother dough. If your eggs are straight from the fridge, let them sit at room temperature for 30 minutes before using. The vanilla extract should be pure, not imitation—you can really taste the difference in these rich cookies. This step builds the flavor foundation that makes every bite irresistible.
Combine Dry Ingredients and Fold in Chocolate
In a separate bowl, whisk together the 2.5 cups all-purpose flour, 1 teaspoon baking soda, and 1 teaspoon diamond crystal kosher salt. Add this dry mixture to the wet ingredients and mix on low speed for 30-45 seconds until just combined—you should still see a few flour streaks. Over-mixing develops gluten and makes cookies tough, so stop as soon as everything comes together.
Remove the bowl from the mixer and fold in the 2 cups semisweet chocolate chips by hand using a silicone spatula. I use a gentle folding motion to distribute the chocolate evenly throughout the dough. Make sure they're well incorporated but don't overwork the dough—just until the chocolate is evenly distributed. This step ensures each bite has that perfect chocolate-to-dough ratio that makes these cookies so addictive.
Chill, Roll, and Bake to Golden Perfection
Cover the dough bowl with plastic wrap and refrigerate for at least 30 minutes (I prefer 1 hour or even overnight). Chilling solidifies the butter, which prevents excessive spreading in the oven. It also allows the flour to fully hydrate, creating better texture. Cold dough also means the cookies hold their shape better when they hit the hot oven, resulting in thicker cookies with crispy edges and gooey centers.
Preheat your oven to 350°F and line two baking sheets with parchment paper. Scoop the chilled dough into 2-tablespoon portions (I use a cookie scoop for uniform size) and roll each portion in the 0.25 cup granulated sugar. Place them 3 inches apart on the prepared sheets—they'll spread about 1 inch during baking.
Bake for 11-13 minutes until the edges are golden brown but the centers still look slightly underdone. They'll continue cooking on the hot pan after you remove them from the oven. Let them cool on the baking sheet for 5 minutes before transferring to a wire rack. Immediately after removing from the oven, sprinkle each cookie with a pinch of flaky sea salt for that perfect sweet-salty balance.
Pro Tips For Making Best Ever Brown Butter Chocolate Chip Cookie
- Brown Butter First: I learned this the hard way—don’t wait until the dough stage. Brown your butter before mixing anything else, then let it cool completely. That nutty depth is the whole reason you’re making this recipe, and rushing it means missing half the flavor.
- Chill the Dough: Give it a solid 24 hours in the fridge, even if you’re impatient. The gluten relaxes, the butter firms up, and the cookies spread just enough for that perfect chewy center. (Yes, even if you’re baking them the next day.)
- Measure Brown Sugar Right: Pack it firmly—no gaps. I used to scoop and level, and the cookies turned out too dry. Use a spoon to press it down in the cup, then scrape off the excess. That extra moisture makes all the difference.
- Rotate the Pan: Swap the baking sheets halfway through, even if they look fine. The oven’s hot spots will bake one side faster, and you’ll end up with some cookies too pale and others burned. (Trust me, I’ve done it.)
Make-ahead tips for this dish
Dough Prep Ahead
Make the dough up to 3 days in advance and store it in the fridge wrapped tightly in plastic wrap. I like to portion it into 2-tablespoon balls right after mixing, then freeze them on a parchment-lined tray for 1 hour before transferring to a freezer bag.
This way, you can bake individual cookies whenever you crave them—just pull them straight from the freezer and add 2 minutes to the baking time. 🍪
Baked Cookie Storage
For freshly baked cookies, let them cool completely on the baking sheet before storing in an airtight container at room temperature. They'll keep for 5 days while developing even deeper flavor. I always store them in a single layer with parchment paper between each layer to prevent sticking.
For longer storage, freeze baked cookies in a single layer on a tray for 1 hour, then transfer to a freezer bag for up to 3 months. 🥶
Reheating Perfection
To revive cookies straight from the fridge or freezer, bake them at 350°F for 8-10 minutes until warmed through. For a quick fix, microwave individual cookies for 10-15 seconds covered with a damp paper towel.
I find this method works best for cookies stored for 3-4 days—they come out warm and gooey, just like fresh-baked. 🔥
Freezer-Friendly Tips
For the best texture when baking from frozen, place dough balls on a parchment-lined sheet and bake at 350°F for 13-15 minutes—the extra time compensates for the cold start. I like to bake frozen cookies in batches of 12 at a time to avoid overcrowding the oven.
This method ensures even baking without sacrificing texture. The result? Cookies that taste almost as good as freshly baked. ❄️
Batch Baking Strategy
When baking for holidays or gatherings, I divide the dough into 4 portions and freeze 3 immediately while baking the first batch. This way, I can bake 24 cookies at a time without overwhelming my oven.
Use a timer to rotate baking sheets halfway through for even baking—this is especially important when working with large batches. 🕒
Flavor Development
These cookies actually taste better the next day as the flavors meld together. The brown butter continues to develop its nutty notes, and the chocolate chips soften just enough to become perfectly melty.
I always bake a double batch on Sunday so I can enjoy freshly baked cookies all week—trust me, the anticipation makes them taste even better! 💫
Nutrition facts
Frequently asked questions
Why does brown butter make these cookies taste so different?
The brown butter adds a rich, nutty depth that regular butter can't match. When butter browns, it develops complex flavors similar to toasted nuts and caramel, creating that signature aroma and taste. This transformation turns ordinary chocolate chip cookies into something truly special!
Can I use salted butter instead of unsalted?
Yes, but you'll need to reduce the added salt to ½ teaspoon instead of 1 teaspoon. Salted butter already contains about ¼ teaspoon of salt per tablespoon, so omitting the extra salt prevents over-salting the cookies. The flavor will still be delicious, just with slightly less contrast.
How do I know when the butter is properly browned?
The butter is ready when it reaches 350-365°F and smells like toasted nuts or popcorn. You'll see golden brown flecks floating on top and the butter should look darker and thicker. If it starts smoking or smells burnt, remove it immediately—properly browned butter should never burn.
What's the secret to getting perfect chocolate chip distribution?
Fold the chocolate chips in by hand using a silicone spatula after mixing the dough in the stand mixer. This gentle method ensures even distribution without overworking the dough. For extra chocolatey pockets, press a few chips into the tops of each cookie before baking.
Can I make these cookies without a stand mixer?
Use a large mixing bowl and a sturdy wooden spoon or whisk. Cream the brown butter and sugars by hand for 5-7 minutes, scraping down the sides frequently. The mixture should look light and fluffy—just like when using a mixer. The dough will be slightly less aerated but still delicious.