
Desserts
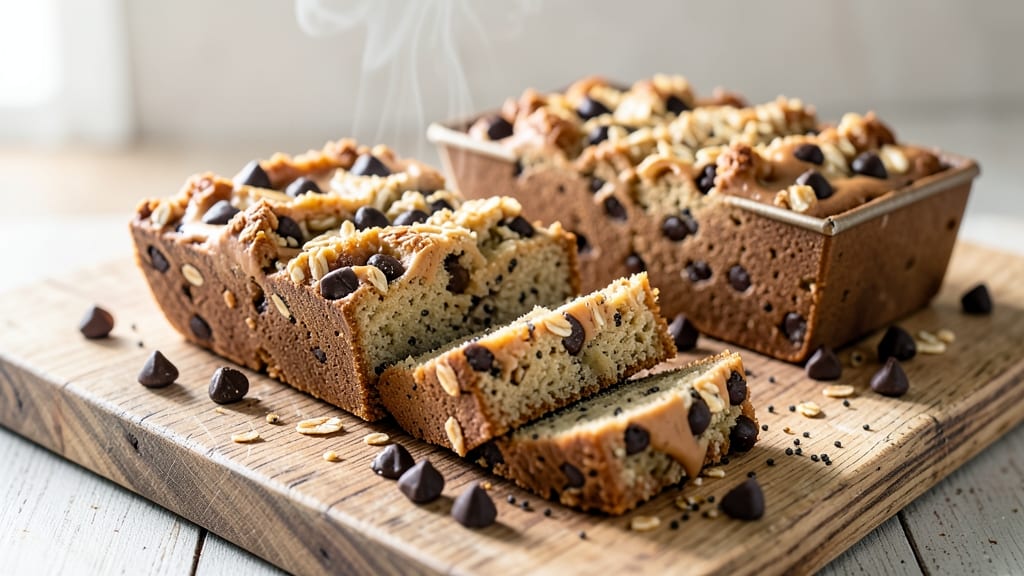
This benefit bars banana chocolate chunk recipe delivers energy-packed bars with a fudgy texture that satisfies cravings while fueling your day. 💛 The secret lies in blending ripe bananas with oats, nuts, and dark chocolate chunks—creating a nutrient-dense treat that requires no oven and minimal effort.
Perfect for meal prep or an after-work snack, these bars combine natural sweetness with protein and fiber for sustained energy. What sets these benefit bars apart is their simplicity and versatility.
With just a handful of ingredients—ripe bananas, rolled oats, peanut butter, and dark chocolate—you’ll achieve a dense, chewy texture that’s rich in antioxidants and plant-based protein. The no-bake method makes them ideal for busy schedules, while the addition of nuts or seeds adds extra crunch and nutritional benefits.
By the time you roll and slice these bars, you’ll have a batch of fudgy, chocolatey energy bites that taste like dessert but pack the benefits of a balanced snack. They’re naturally sweetened, gluten-free, and customizable—add protein powder for extra muscle fuel or coconut flakes for tropical flair.
Store them in the fridge for up to a week, or freeze for longer shelf life. The result is a treat that’s as good for you as it is delicious—perfect for athletes, busy parents, or anyone craving a healthier alternative to store-bought bars. Let’s get mixing!
Ingredients for benefit bars banana chocolate chunk
Ripe bananas, oats, and chocolate chunks make these no-bake bars irresistibly fudgy and packed with energy.
| Ingredient | Amount | Notes |
|---|---|---|
| Ripe Bananas 🍌 | 2 large | Spotty skin preferred |
| Rolled Oats 🌾 | 2 cups | Quick or old-fashioned |
| Peanut Butter 🥜 | ½ cup | Natural, no added sugar |
| Dark Chocolate Chunks 🍫 | ¾ cup | 70% cocoa or higher |
| Almond Butter 🥜 | ¼ cup | Optional for nut variation |
| Chia Seeds 🌱 | 2 tbsp | For extra fiber |
| Maple Syrup 🍯 | 2 tbsp | For extra sweetness |
| Vanilla Extract 🌸 | 1 tsp | Pure extract preferred |
| Sea Salt 🧂 | ¼ tsp | Fine grain preferred |
| Coconut Flakes 🥥 | ¼ cup | Toasted for extra flavor |
| Flaxseeds 🌱 | 2 tbsp | Ground for binding |
| Coconut Oil 🫒 | 1 tbsp | For rolling ease |
The bananas are the hero here—ripe ones with brown spots give the best sweetness and texture. Grab the organic ones from Whole Foods if you want to avoid pesticides, but regular grocery store bananas work just fine. For the chocolate, 70% cocoa or higher is key—Ghirardelli or Lindt chunks melt beautifully. The oats should be rolled, not steel-cut—they need to blend into that chewy texture. Pro tip: Toast your oats in a dry pan for 3-4 minutes before mixing—it deepens the flavor without extra effort.
No peanut butter? Almond butter or sunflower seed butter works perfectly (just watch for allergies). Skip the chia seeds? Extra flaxseeds or hemp hearts add similar nutrition. The maple syrup is optional but recommended—Grade B is richer and gives that classic pancake-house taste. If you're making these for kids or sensitive palates, reduce the salt to just a pinch. For extra protein, add 1 scoop vanilla plant-based protein powder to the mix—it blends right in without altering the texture.
These bars keep beautifully—wrap tightly in parchment paper and store in the fridge for up to 7 days. For longer storage, freeze on a tray first, then transfer to a bag for up to 3 months. To reheat, pop them in the microwave for 10-15 seconds—they soften up like a warm cookie. The coconut oil trick? It makes rolling and slicing 100 times easier—no sticking, no mess. Double the batch and freeze half—you'll thank yourself later.
Why You'll Love This Recipe
- I’ll be real: this recipe’s magic is in the not stirring. Just mash those bananas, fold in the oats and nut butters, then press in chocolate chunks—no blender, no fuss. Honestly, my kids “help” by dumping ingredients in, and we still end up with bars that taste like a bakery’s secret.
- No-Fuss Mixing: I’ll be real: this recipe’s magic is in the not stirring. Just mash those bananas, fold in the oats and nut butters, then press in chocolate chunks—no blender, no fuss. Honestly, my kids “help” by dumping ingredients in, and we still end up with bars that taste like a bakery’s secret.
- Craving Crush: That first bite? Warm oats, sticky peanut butter, and melty dark chocolate hitting your tongue at the same time—it’s like dessert and breakfast had a baby. Between us, the almond butter adds this nutty depth that makes it ridiculously hard to stop at one.
- Snack for Everyone: These bars are my go-to for school lunches, gym bags, or when my partner forgets to pack snacks. (Yes, even on a Tuesday night.) The oats hold up for days, the chocolate stays chunky, and my daughter—who’s picky—still picks them first.
Step-by-step instructions for banana chocolate chunk energy bites
Here's how to make these no-bake energy bites with a fudgy texture that'll keep you going all day.
👨🍳 Step 1: Mash the Bananas and Mix Wet Ingredients
Start by mashing the 2 large ripe bananas in a large mixing bowl until completely smooth—no lumps allowed. The bananas should be spotty-skinned for perfect ripeness. Add the 0.5 cup peanut butter, 0.25 cup almond butter, 2 tbsp maple syrup, 1 tsp vanilla extract, and 1 tbsp coconut oil. Mix these wet ingredients together until fully combined and creamy.
Here's the thing—if the mixture looks too thick, add 1-2 teaspoons of water to help it bind. You want a consistency that's like thick peanut butter but still spreadable. This base will hold everything together beautifully, so take your time getting it just right.
👨🍳 Step 2: Combine Dry Ingredients for Perfect Texture
In the same bowl, add the 2 cups rolled oats, 2 tbsp chia seeds, 2 tbsp ground flaxseeds, 0.25 tsp sea salt, and 0.25 cup toasted coconut flakes. Stir everything together with a spatula until the dry ingredients are fully incorporated and the mixture looks like wet sand.
Now fold in the 0.75 cup dark chocolate chunks by hand—you want them distributed evenly throughout. I like to use my fingers for this part because it helps me feel the texture and ensure everything is well combined. This is where the magic happens—the chocolate will melt just enough during storage to create that coveted fudgy texture.
⏰ Step 3: Chill for 30 Minutes (Don't Skip This!)
Transfer the mixture to an airtight container and refrigerate for at least 30 minutes. This chilling step is crucial—it allows the ingredients to firm up just enough to hold their shape when rolled. The bananas will start to dry out slightly, and the oats will absorb moisture, creating that perfect bite.
Real talk: I know it's tempting to skip this step, but trust me, it makes all the difference. If you're in a hurry, you can pop the container in the freezer for 15 minutes instead. Just don't leave it too long or the mixture will get too hard to roll.
👨🍳 Step 4: Roll into Perfect Energy Bites
After chilling, remove the mixture from the container and scoop out 1-tablespoon portions (this should make about 12 energy bites). Roll each portion between your palms into smooth, round balls. I press down gently as I roll to ensure they hold their shape—this prevents them from crumbling apart later.
If the mixture feels too sticky to roll, chill it for another 10 minutes. The ideal texture should be firm enough to hold together but still soft enough to mold easily. Place each finished energy bite on a parchment-lined plate and flatten the top slightly with your palm for a more uniform look.
🍽️ Step 5: Store and Enjoy Your No-Bake Treats
Let the energy bites sit at room temperature for 10 minutes to firm up slightly before transferring them to an airtight container. Store them in the refrigerator for up to 7 days or in the freezer for up to 3 months. The chocolate will melt just enough during storage to create that perfect fudgy texture you're after.
When you're ready to enjoy, simply grab one and savor the combination of creamy peanut butter, rich dark chocolate, and chewy oats. These energy bites are packed with fiber from the oats and chia seeds, healthy fats from the nut butters, and natural sweetness from the bananas and maple syrup—making them the perfect no-bake snack for busy days.
Pro Tips For Making Benefit Bars Banana Chocolate Chunk
- Mash Bananas Like Pudding: I used to just smash them with a fork, but after three batches of uneven texture, I switched to a potato masher—press hard until no lumps remain. This keeps the oats from absorbing moisture unevenly, so your bars stay chewy, not gummy.
- Use Warm Nut Butters: Skip the fridge-cold peanut or almond butter—microwave it for 10 seconds first. Warm nut butters blend smoother into the banana mix and coat the oats better, giving your bars that cohesive, fudgy hold instead of dry pockets.
- Press Bars Firmly: Don’t just shove the dough into the pan and call it done. Pack it down with your hands or a glass, pressing until the edges are tight. This prevents crumbling when you cut them later—no one wants a snack that falls apart mid-bite.
- Add Chocolate Last: Fold in the dark chocolate chunks right before pressing the mixture into the pan. If you mix them in early, they’ll melt into the warm banana, turning your bars into a dense, uniform chocolate slab instead of keeping those glorious pockets of gooey surprise.
Pro cooking tips for benefit bars banana chocolate chunk
Banana Ripeness Matters
The secret to perfect texture starts with your bananas—spotty, brown-skinned ones are non-negotiable. I’ve learned the hard way that underripe bananas make the mixture too dry and crumbly. For best results, grab bananas with black spots all over (not just at the stem).
If you’re unsure, mash one first—it should be soft enough to spread like peanut butter. Pro tip: Keep your bananas in a paper bag on the counter for a day if they’re not ripe enough—they’ll sweeten up faster. 🍌
Mixing Like a Pro
Use a spatula for dry ingredients and your hands for wet—this gives you better control. When combining the oats and chia seeds, press them into the wet mixture to ensure even distribution.
If your dough feels too sticky after chilling, pop it back in the fridge for 5-10 more minutes. I’ve found that room-temperature ingredients mix better—take your peanut butter out of the fridge 15 minutes before starting.
The goal is a texture that’s cohesive but moldable, like wet sand at the beach. 🏖️
Chilling Tricks
Don’t skip the 30-minute chill—this is where the magic happens. The bananas release starch, and the oats absorb moisture, creating that signature chewy texture. For faster results, use a small airtight container (like a mason jar) and refrigerate it upright—the mixture firms up more evenly.
If you’re in a rush, freeze the dough for 15 minutes instead, but don’t overdo it or it’ll be too hard to roll. I like to press the chilled dough against the container walls to release any air bubbles—this prevents cracks when rolling. ❄️
Rolling Without the Mess
Wet your hands slightly with coconut oil before rolling—this prevents sticking and makes the process smoother. Scoop 1-tablespoon portions using a cookie scoop for uniformity (I use a 2-tablespoon scoop for slightly larger bars). Press each ball gently between your palms to eliminate air gaps—this ensures they hold their shape.
If the dough cracks while rolling, just press it back together and keep going. For extra fudgy bars, under-chill the dough slightly (20 minutes instead of 30) so the chocolate melts more during storage. 💫
Storage Hacks
Store your bars in a single layer on a tray for 1 hour before transferring to an airtight container—this prevents them from sticking together. For long-term storage, freeze on a tray first, then transfer to a bag with parchment paper between layers.
To reheat, microwave for 10 seconds—they’ll soften just enough to feel like a warm treat. I’ve kept these bars in the freezer for up to 4 months with zero texture loss. Label your container with the date to track freshness—trust me, you’ll forget they’re there! ⏰
Texture Troubleshooting
If your bars turn out too dry, next time add 1 extra tablespoon of peanut butter or 1 teaspoon of maple syrup to the wet ingredients. For extra fudgy bars, reduce the oats by ¼ cup and add 2 extra tablespoons of chocolate chunks.
If they crumble while rolling, chill the dough 10 minutes longer—this firms up the starches. And if they’re too sticky? Sprinkle a tiny bit of extra oats on your hands while rolling. Every batch is different, so adjust as you go—this is where the real magic happens! ✨
Nutrition facts
Frequently asked questions
Can I make these banana chocolate chunk bars without oats?
If you're avoiding gluten or just prefer a different texture, swap the oats for 1 cup crushed nuts (like almonds or walnuts) or 1 cup shredded coconut. For a grain-free option, try 1 cup almond flour or 1 cup gluten-free rolled oats. Just note that the texture will be slightly different—nuts add crunch while coconut gives a lighter feel.
How do I prevent the bars from crumbling when rolling?
Chill the dough for 5-10 extra minutes if it feels too sticky—this firms up the starches from the bananas. Wet your hands with coconut oil before rolling to prevent sticking, and press each ball gently but firmly. If they still crumble, try adding 1 extra tablespoon of peanut butter to the wet ingredients next time.
Can I add protein powder to these energy bites?
Yes! Add 1 scoop vanilla plant-based protein powder (about 30g) to the wet ingredients for extra muscle fuel. For best results, use a neutral-flavored powder (like pea or rice protein) to avoid altering the chocolate-peanut flavor. If you notice the texture gets too dry, add 1 extra tablespoon of maple syrup or peanut butter.
Why do my bars taste too sweet after storage?
The bananas caramelize slightly during storage, making the bars taste sweeter over time. To balance this, reduce the maple syrup to 1 tablespoon in future batches. If they're still too sweet, add ½ teaspoon cinnamon or ¼ teaspoon espresso powder to the dry ingredients—both deepen the chocolate flavor and cut sweetness.
What's the best way to cut these into bars instead of balls?
Press the chilled dough into a parchment-lined 8x8-inch pan (about ½-inch thick) and refrigerate for 1 hour. Once firm, use a sharp knife dipped in hot water to cut into squares. For extra fudgy bars, under-chill the dough (20 minutes) so the chocolate melts more during storage—this creates that classic bar texture.