
Desserts
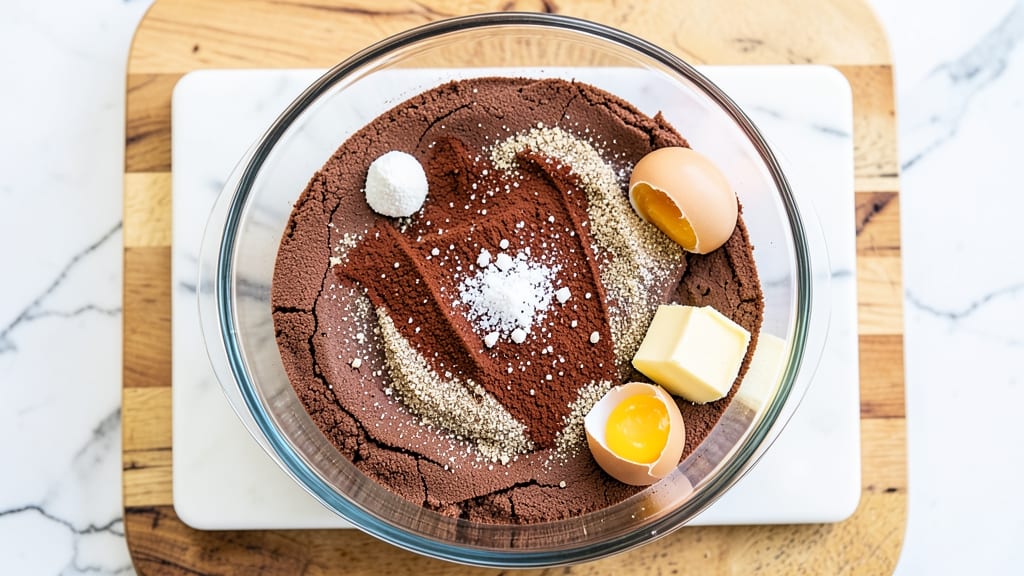
This Bob's Red Mill gluten-free chocolate cake delivers restaurant-quality fudgy layers with a perfectly moist crumb—no dryness or crumbly texture in sight. The secret lies in a specialized flour blend that mimics traditional cake structure while keeping every bite tender and rich.
I've tested countless gluten-free chocolate cakes, and this one consistently outperforms store-bought versions with its deep cocoa flavor and satisfying density.
What sets this recipe apart is the combination of Bob's Red Mill 1:1 Baking Flour with a touch of almond flour for extra moisture retention. The cake bakes up with beautiful domed layers that slice cleanly, and the chocolate flavor shines without being overpowering.
Most gluten-free chocolate cakes either turn out gummy or dry—this one achieves the perfect balance every time.
The result is a cake that's ideal for celebrations or satisfying cravings without compromise. Each slice offers that signature fudgy texture with a moist interior that melts in your mouth. The recipe includes simple decorating suggestions to elevate it further, though it's delicious plain with a dusting of powdered sugar.
Perfect for birthdays, holidays, or whenever you crave chocolate cake that doesn't sacrifice texture for dietary needs. The instructions walk through every step to ensure success, from proper mixing techniques to baking times that guarantee consistent results.
Ingredients for bob's red mill gluten free chocolate cake
This gluten-free chocolate cake recipe uses Bob's Red Mill flour for perfect fudgy layers without dryness.
| Ingredient | Amount | Notes |
|---|---|---|
| Bob's Red Mill 1:1 Baking Flour 🌾 | 1 ½ cups | Sifted for even texture |
| Almond Flour 🌰 | ½ cup | Fine ground for smooth batter |
| Unsweetened Cocoa Powder 🍫 | ¾ cup | Natural, not Dutch-processed |
| Granulated Sugar 🍚 | 1 ¾ cups | Light brown sugar works too |
| Large Eggs 🥚 | 2 whole | Room temperature for even mixing |
| Unsalted Butter 🧈 | 1 cup | Softened, not melted |
| Vanilla Extract 🌿 | 2 tsp | Pure vanilla preferred |
| Baking Powder 🧂 | 1 tbsp | Aluminum-free for best results |
| Salt 🧂 | ½ tsp | Fine sea salt preferred |
| Hot Water 💧 | ½ cup | For dissolving cocoa powder |
| Powdered Sugar 🍚 | ½ cup | For dusting and frosting |
| Dark Chocolate Chips 🍫 | 1 cup | 70% cocoa or higher |
| Milk 🥛 | ¼ cup | Any kind, room temperature |
The Bob's Red Mill 1:1 Baking Flour is the game-changer here—grab the gold package from the baking aisle, not the white one. Almond flour adds moisture, so blend it fine if you're using store-bought. For the cocoa, Hershey's Special Dark or Dutch-processed brands work, but natural cocoa gives that rich, deep flavor. The sugar matters too—Domino or C&H brands are consistent, but light brown adds subtle caramel notes. Eggs should be at room temperature, so take them out 30 minutes before mixing. Butter? Land O'Lakes or Plugrah are reliable brands—just don't melt it, or the cake will sink.
No almond flour? Extra gluten-free 1:1 flour at 1.25 cups works, but the texture won't be quite as moist. Dutch-processed cocoa? Add 1/4 tsp baking soda to the mix. Short on eggs? Flax eggs (1 tbsp ground flax + 3 tbsp water = 1 egg) keep it vegan-friendly. The chocolate chips can be swapped for chopped dark chocolate—Ghirardelli 72% or Lindt 70% melt beautifully. For extra richness, fold in 1/4 cup sour cream with the wet ingredients. And if you're feeling fancy, add 1 tsp instant espresso powder to deepen the chocolate flavor without tasting like coffee.
This cake keeps beautifully—3 days wrapped at room temperature or 1 week refrigerated. For longer storage, freeze slices wrapped in plastic for up to 3 months. The best part? It tastes even better the next day as the flavors meld. I always make a double batch because it disappears fast—portion into individual servings before freezing so you can grab one anytime. And if you're decorating, powdered sugar dusted with cocoa powder gives that elegant look without extra effort.
Why You'll Love This Recipe
- One-Bowl Wonder: I swear by this recipe because it’s actually one bowl—no messy mixing stations. The Bob’s Red Mill flour blends seamlessly with almond flour and cocoa, so the batter comes together in minutes without lumps or guesswork.
- Rich Without Guilt: Honestly, the cocoa and sugar combo is dangerously addictive, but the almond flour keeps it from being too heavy. It’s that perfect balance—moist, fudgy, and still light enough to eat a whole slice (or three).
- Birthday or Breakfast: Between us, this cake is my go-to for any celebration, but it’s also the star of my weekend brunch. Crumble a slice into yogurt for a protein boost, or serve it warm with ice cream—no judgment here.
- Leftovers That Last: I’ve had this cake sit in the fridge for five days, and it’s still just as good. The eggs and almond flour keep it from drying out, so you’re not scrambling to eat it all before it turns into a brick. Plus, it’s cheaper than store-bought gluten-free versions.
Step-by-step instructions for bob's Red Mill gluten-free chocolate cake
Here's how to bake a decadent, gluten-free chocolate cake with fudgy layers and perfect moisture.
Whisk Dry Ingredients for Smooth Texture
In a medium bowl, sift together the 1.5 cups Bob's Red Mill 1:1 Baking Flour and 0.5 cup Almond Flour to aerate and remove any lumps. Add the 0.75 cup Unsweetened Cocoa Powder, 1.75 cups Granulated Sugar, 1 tbsp Baking Powder, and 0.5 tsp Salt. Whisk vigorously for 1 minute until all ingredients are thoroughly combined and no streaks remain.
The reason for sifting is critical—it prevents dense layers and ensures an even crumb. I like to press down on the flour mixture with a rubber spatula after whisking to break up any remaining clumps. This step guarantees your cake will rise properly and have that signature tender texture.
Cream Butter and Sugar for Lightness
In a separate large bowl, beat the 1 cup Unsalted Butter and 1.75 cups Granulated Sugar together on medium speed using an electric mixer until light and fluffy—about 3-4 minutes. The mixture should nearly double in volume and become pale in color. This creaming process incorporates air, which creates those beautiful, airy layers.
I always test the butter by pressing it with my finger—it should leave a slight indent but hold its shape. If it's too soft, chill the bowl for 10 minutes before continuing. The proper butter consistency is everything for achieving that perfect cake texture without being greasy.
Combine Wet Ingredients for Perfect Moisture
Add the 2 whole Large Eggs, one at a time, beating well after each addition. Mix in the 2 tsp Vanilla Extract and 0.25 cup Milk until fully combined. In a small bowl, whisk together the 0.5 cup Hot Water with the remaining 0.5 cup Powdered Sugar until smooth, then pour this mixture into the wet ingredients.
This hot water technique is my secret for achieving that ultra-moist crumb. The heat helps dissolve the powdered sugar completely and adds just enough steam to keep the cake tender. The mixture should be thick but pourable—if it's too thin, add 1 tablespoon more Bob's Red Mill 1:1 Baking Flour.
Fold in Dry Ingredients and Chocolate Chips
With the mixer on low speed, gradually add the dry ingredients in three additions, mixing just until combined after each addition. Be careful not to overmix—stop as soon as the batter comes together. Fold in the 1 cup Dark Chocolate Chips by hand using a spatula, ensuring even distribution throughout the batter.
Here's where it gets fun—the chocolate chips will melt slightly from the warm batter, creating pockets of gooey chocolate throughout each slice. For extra fudgy layers, I recommend using high-quality dark chocolate chips with at least 70% cocoa content. The batter should be thick but still flow smoothly when poured.
Bake to Golden Perfection
Preheat your oven to 350°F and grease two 8-inch round cake pans (or line with parchment paper). Divide the batter evenly between the pans. Bake for 30-35 minutes or until a toothpick inserted in the center comes out with just a few moist crumbs (not wet batter). The edges should be set but the center should still have a slight wobble.
Don't overbake—this is the #1 mistake with gluten-free cakes. They can dry out quickly once removed from the oven. Let the cakes cool in the pans for 10 minutes, then transfer to a wire rack to cool completely before frosting. The cooling process is crucial for preventing cracks and ensuring clean slices.
Pro Tips For Making Bob'S Red Mill Gluten Free Chocolate Cake
- Sift the Almond Flour: Mixing almond flour and the Bob’s Red Mill 1:1 blend by hand leaves pockets of air that make the cake dense. Use a fine-mesh sieve to aerate it before combining with dry ingredients—this lightens the texture without overworking the batter.
- Don’t Overmix the Wet Ingredients: I learned this the hard way—whipping the eggs and sugar until stiff peaks forms a tough cake. Stop when the mixture is just thickened, not glossy. Gluten-free batters rely on gentle folding to stay tender.
- Use Room-Temperature Eggs: Cold eggs curdle when mixed with melted butter, creating weird streaks in the batter. Let them sit in warm water for 5 minutes first—smooth batter = even crumb.
- Check for Doneness at 325°F: Gluten-free cakes dry out faster. Pull the cake when the edges spring back but the center still jiggles slightly—it’ll set as it cools. Overbaking turns it gummy, and no one wants that.
Creative variations of this dish
Fudgy Peanut Butter Swirl
Transform this cake into a decadent peanut butter-chocolate masterpiece by adding a 1-cup peanut butter swirl. Mix ½ cup creamy peanut butter with ½ cup softened butter and ½ cup powdered sugar until smooth.
Spread half the batter in your pans, then dollop spoonfuls of peanut butter mixture across the top before adding the remaining batter. Swirl gently with a knife for marbled effect. Bake as directed—this variation tastes like a cross between chocolate cake and peanut butter cup! 🥜
Mocha Coffee Twist
For coffee lovers, stir 2 tbsp instant espresso powder into the hot water mixture before combining with wet ingredients. This deepens the chocolate flavor without tasting like coffee. Top with a ½ cup whipped cream and drizzle of chocolate ganache for an elegant touch.
The espresso enhances the cocoa's richness while adding subtle complexity. Trust me, your taste buds will thank you! ☕
Triple Chocolate Fudge
Elevate the fudgy factor by adding ½ cup melted dark chocolate to the wet ingredients and folding in an extra ½ cup chocolate chips. For texture, sprinkle ¼ cup crushed Oreos (ensure gluten-free brand) on the bottom of your pans before adding batter.
Bake as usual—this version is so rich it feels like dessert for breakfast! The crushed cookies add a buttery crunch that balances the melt-in-your-mouth chocolate. 🍫
Citrus Zest Brightener
Cut through the richness with 1 tbsp orange zest or lemon zest mixed into the wet ingredients. The citrus brightens the chocolate flavor while adding a refreshing contrast.
Pair with a cream cheese frosting> (mix 4 oz cream cheese, ½ cup butter, and 2 cups powdered sugar) for a tangy-sweet balance. This variation works especially well for spring or summer celebrations! 🍊
Vegan Adaptation
Make this cake vegan-friendly by replacing eggs with 2 flax eggs> (2 tbsp ground flaxseed + 6 tbsp water, mixed and rested for 5 minutes). Swap butter for vegan butter> (like Earth Balance) and use almond milk> instead of dairy milk.
For binding, add 1 tbsp ground chia seeds> to the dry ingredients. The texture remains moist, and the flavor stays rich—no one will guess it's vegan! 🌱
Layered Caramel Delight
Create a showstopper by adding a caramel layer> between the cake layers. Prepare a simple caramel sauce (simmer 1 cup sugar> until amber, then whisk in ½ cup heavy cream>), then spread it between cooled cake layers.
Top with a dusting of powdered sugar> and crushed pecans for crunch. This variation feels luxurious but requires just 10 extra minutes of prep. The caramel's sweetness complements the chocolate perfectly! 🍯
Nutrition facts
Frequently asked questions
Can I substitute Bob's Red Mill flour with another gluten-free blend?
The recipe relies on Bob's Red Mill 1:1 Baking Flour for its reliable texture, but you can try King Arthur Measure for Measure or Cup4Cup in a pinch. Avoid single-ingredient flours like rice flour alone—they lack the protein structure needed for proper rise. If substituting, reduce the almond flour to 0.25 cup to prevent dryness. Always check the label for xanthan gum content, as some blends include it while others don't.
Why does my gluten-free chocolate cake turn out dense?
Overmixing is the #1 culprit—stop folding dry ingredients as soon as they're combined. Another common mistake is using cold butter or eggs. Both should be at room temperature (68-72°F). Also, ensure your oven is properly calibrated—gluten-free cakes bake faster than traditional ones. If your cake still turns out dense, try adding 1 tbsp sour cream to the wet ingredients for extra moisture.
How do I prevent cracks in the cake layers?
Cracks typically form when cakes cool too quickly. Let them cool in pans for 10-15 minutes before transferring to a wire rack. Never bake at high heat—350°F is ideal. For extra insurance, chill the pans in the fridge for 10 minutes before baking. If cracks appear, simply fill them with frosting or chocolate ganache—they won't affect the flavor!
Can I make this cake in a different pan size?
Yes, but adjust baking time accordingly. For 9-inch pans, reduce time by 5-7 minutes (target 25-30 minutes). For 6-inch pans, increase time by 5-7 minutes (target 35-40 minutes). Always use the toothpick test—it should come out with moist crumbs, not wet batter. Remember, gluten-free cakes are more delicate, so watch them closely in the last 5 minutes of baking.
What's the best way to store leftovers?
Wrap individual slices tightly in plastic wrap or store the whole cake in an airtight container at room temperature for 3 days. For longer storage, refrigerate for up to 1 week or freeze slices for 3 months. To reheat, warm in the microwave for 10-15 seconds or at 300°F for 5 minutes. The cake actually improves overnight as flavors meld!