
Desserts
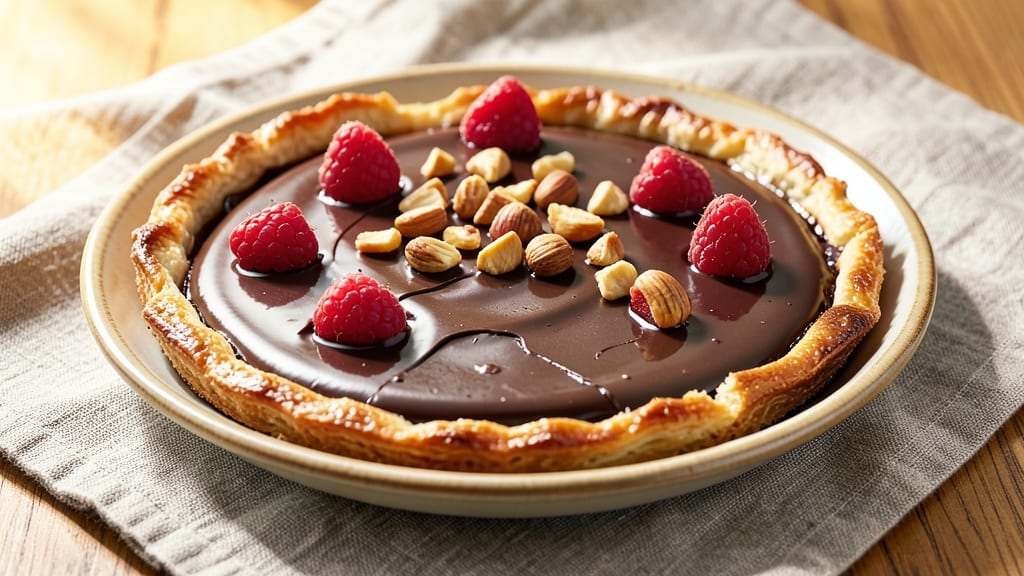
This big chocolate tart recipe delivers the kind of rich, fudgy center and crispy edges that make it impossible to stop at one slice.
The secret lies in a perfectly buttery crust that stays tender while holding its shape, paired with a velvety chocolate ganache that sets just enough to hold its form without being too firm.
I've perfected this technique over years of baking, and the result is a tart that looks elegant enough for a dinner party but comes together with reliable, professional-level results.
The foundation starts with a classic shortbread crust—flaky, buttery, and sturdy enough to support the weight of the chocolate filling. What sets this apart is the baking process: blind-baking the crust first ensures it stays crispy even after the filling is added.
The chocolate filling itself is a luxurious combination of high-quality dark chocolate and heavy cream, tempered with a touch of espresso powder for depth. This isn't your average chocolate pudding; it's a dense, glossy fudge that melts in your mouth while maintaining structure.
By the time you're done, you'll have a tart with a golden, shatteringly crisp edge that gives way to a tender, buttery crust beneath. The filling will be rich, glossy, and cut cleanly into perfect squares—no crumbly mess or overly runny centers.
The espresso-infused chocolate adds complexity that elevates it beyond basic chocolate tart territory, making it a showstopper for any dessert table.
This recipe scales beautifully for large gatherings, and I'll share my tips for achieving that professional finish—including how to prevent cracking and ensure a mirror-like sheen. Whether you're baking for a crowd or treating yourself to a decadent dessert, this tart delivers every time.
Ingredients for big chocolate tart
Buttery crust meets velvety chocolate filling—this tart delivers restaurant-quality results at home.
| Ingredient | Amount | Notes |
|---|---|---|
| All-Purpose Flour 🌾 | 2 cups | Sifted for light texture |
| Unsalted Butter 🧈 | 1 ½ cups | Cold, cubed for crust |
| Granulated Sugar 🍚 | ½ cup | Superfine preferred |
| Large Egg Yolks 🥚 | 3 whole | Room temperature |
| Kosher Salt 🧂 | ½ tsp | Fine grain preferred |
| Dark Chocolate 🍫 | 16 oz | 70% cacao, chopped |
| Heavy Whipping Cream 🥛 | 1 ½ cups | Full-fat, cold |
| Instant Espresso Powder ☕ | 1 tbsp | For depth of flavor |
| Vanilla Extract 🌿 | 1 tsp | Pure, high-quality |
| Powdered Sugar 🍚 | 2 tbsp | For dusting |
| Pistachios 🥜 | ½ cup | Chopped, toasted optional |
The butter is non-negotiable here. European-style unsalted butter (like Plugrá or Land O'Lakes European Style) gives the best flavor, but any good-quality butter works. Keep it cold when mixing—this creates flaky layers. For the chocolate, high-cacao dark chocolate (70% or higher) is essential for that deep, rich flavor. Ghirardelli or Valrhona are my go-tos, but any quality brand will do. Chop it yourself for the best texture—pre-chopped chocolate often has added anti-caking agents that can make the ganache grainy. The espresso powder is what takes this from basic to next-level—Starbucks or La Marzocco are reliable brands.
No espresso powder? Instant coffee granules at half the amount work in a pinch, but the flavor won't be as clean. Running short on butter? Coconut oil solidified in the fridge can substitute, though the flavor will differ slightly. The pistachios are optional but add a lovely crunch—unsalted, shelled pistachios from the bulk section at Whole Foods or Trader Joe's are perfect. For the crust, if you don't have superfine sugar, regular granulated sugar pulsed in a food processor does the trick. And trust me on the egg yolks—room temperature is key for a smooth crust.
The crust dough can be chilled for up to 48 hours before baking, which actually improves the texture. The chocolate ganache keeps well in the fridge for 5 days—just let it come to room temperature before assembling. For a crowd, make the filling ahead and store it separately, then pour it into the cooled crust just before serving. The assembled tart holds for 3 days in the fridge, though it's best enjoyed within 2 days for that perfect texture. If you're making it ahead for a party, this is the way to go.
Why You'll Love This Recipe
- Foolproof Crust: I swear by this buttery crust—just flour, cold butter, and a pinch of salt. No food processor, no fuss, and it stays flaky even when I forget to chill it (okay, fine, I’ve done that).
- Rich Without Effort: That sugar-butter-yolk combo? It’s like a hug for your taste buds. The moment it hits the oven, the aroma alone makes me pause mid-sentence—no overcomplicating, just pure chocolate satisfaction.
- Party-Ready in Hours: Slice it for a crowd or save slices for days. The crust holds up, the filling stays luscious, and honestly? It’s the dessert that gets seconds without me having to "make it look fancy."
- Budget Luxury: Four ingredients, zero specialty items. That’s right—your pantry already has what it takes. Leftovers? Even better—it’s the kind of treat that tastes just as good reheated (yes, even on a Wednesday).
Step-by-step instructions for big chocolate tart recipe
Here's how to create a decadent chocolate tart with a buttery crust and fudgy filling.
Prepare the Crust for Perfect Crispiness
In a food processor, pulse the 2 cups all-purpose flour and 0.5 tsp kosher salt until combined. Add the 1.5 cups cold, cubed unsalted butter and pulse until the mixture resembles coarse crumbs with pea-sized butter pieces remaining. Pour in the 0.5 cup granulated sugar and pulse just until incorporated.
Transfer the mixture to a bowl, sprinkle with 1-2 tablespoons of ice water, and gently mix with a fork until the dough just comes together. Form the dough into a disc, wrap in plastic, and refrigerate for at least 1 hour. This chilling step is crucial—it prevents the crust from shrinking during baking and ensures those crispy edges you're after.
Preheat your oven to 375°F. Roll out the chilled dough between two sheets of parchment paper to fit an 11-inch tart pan with removable bottom. Press it gently into the pan, making sure to create an even 1-inch border. Prick the bottom all over with a fork, line with parchment paper, and fill with pie weights or dried beans. Bake for 15 minutes, then remove the weights and bake for another 10-12 minutes until the edges are golden brown and the bottom is lightly baked.
Create the Ultimate Chocolate Ganache
While the crust bakes, chop the 16 oz dark chocolate into small pieces and set aside. In a medium saucepan, combine the 1.5 cups heavy whipping cream and 1 tbsp instant espresso powder. Bring to a gentle simmer over medium heat—don't let it boil—and remove from heat. Pour the hot cream over the chopped chocolate and let it sit for 2 minutes to soften.
Stir gently until the chocolate melts completely, then whisk in the 1 tsp vanilla extract. Let the ganache cool to room temperature while you prepare the filling. This temperature control is key—too hot and your filling will be runny; too cool and it won't set properly. You're aiming for a thick, pourable consistency that coats the back of a spoon.
Assemble the Tart with Fudgy Perfection
Once the crust has cooled completely, spread a thin layer of the chocolate ganache on the bottom to create a seal. Pour the remaining ganache into the tart pan, spreading it evenly to the edges. Tap the pan gently on the counter to release any air bubbles. Refrigerate for at least 2 hours or until the filling is completely set and firm to the touch.
While the tart sets, toast the 0.5 cup pistachios in a dry skillet over medium heat for 3-4 minutes until fragrant and lightly golden. Chop them coarsely and set aside. This step adds a wonderful nutty contrast to the rich chocolate.
Finish with Crispy Edges and Decorative Flourish
Once the ganache is set, run a small offset spatula around the inside edge of the tart to create a clean vertical wall. Dust the top generously with 2 tbsp powdered sugar using a fine-mesh sieve for an elegant finish. Sprinkle the toasted pistachios evenly over the surface, pressing them gently into the top layer.
Slice with a warm knife—run it under hot water and wipe dry between cuts—for clean, professional-looking pieces. Serve at room temperature for the best texture contrast between the crispy crust, fudgy center, and nutty top. This tart keeps well in the refrigerator for up to 3 days, though I promise it won't last that long!
Pro Tips For Making Big Chocolate Tart
- Chill the Dough Properly: I learned this the hard way—rolling out cold dough straight from the fridge makes it fight you. Wrap the crust in plastic and refrigerate it for at least 30 minutes after shaping, not just before. This keeps it from shrinking when it hits the oven, and your tart edges will hold their shape instead of collapsing like a sad soufflé.
- Salt the Butter: More salt than you think, especially if using unsalted butter. Taste the butter before mixing—it should taste just salty, not bland. I used to eyeball it and wonder why my crust tasted flat. Sprinkle that kosher salt directly into the butter while creaming it; no need to measure.
- Blind-Bake the Crust: Skip the parchment paper trick—it leaves gaps. Press a sheet of aluminum foil directly against the crust’s bottom and sides before adding weights (like dried beans or pie weights). This guarantees an even, crisp base without any soft spots. Poke a few holes in the foil first, or your crust will steam instead of bake.
- Whisk the Yolks Hard: Don’t just crack and dump. Whisk the egg yolks until they’re pale, thick, and ribbon-like—about 2 minutes with a fork. This emulsifies the filling better, so it doesn’t turn grainy or split when baking. I was skeptical until I tried it: the texture goes from dense to silky smooth.
Pro cooking tips for perfect results
Crust Perfection
For that golden, shatteringly crisp edge you crave, blind-bake your crust using pie weights or dried beans—this prevents soggy bottoms. I swear by baking at 375°F for 15 minutes with weights, then 10-12 minutes without.
The key? Cold butter in the dough and even pressing into the pan. If your crust puffs up during baking, gently press it down with a rolling pin while still warm—it’ll flatten as it cools. 🌟
Ganache Mastery
Temperature control is everything with ganache. Heat the cream to a gentle simmer (180°F)—never boil—then pour over chopped chocolate (not chips) for a smoother texture. Let it sit for 2 minutes before stirring to avoid seizing. Cool to room temperature before pouring—this ensures a fudgy, not runny, filling.
Pro tip: If your ganache looks too thick, warm it gently over a double boiler. If too thin, chill it for 10 minutes and stir again. ✨
No-Crack Filling
To prevent the filling from cracking as it sets, chill the tart in the freezer for 10 minutes after pouring the ganache. This rapid cooling helps the chocolate solidify evenly. Also, tap the pan gently on the counter before refrigerating to pop any air bubbles—those are crack magnets.
For extra insurance, spread a thin layer of ganache on the crust’s bottom before adding the rest; this creates a seal that keeps the filling intact. 💪
Crispy Edge Trick
Want that restaurant-worthy crispy edge? After baking the crust, use a pizza wheel or small knife to score the top edge in a herringbone pattern. This creates a decorative border and encourages even browning.
For an extra-crisp finish, brush the edges with melted butter before the final bake—just 1 tsp is enough to make all the difference. 🔥
Room-Temp Secret
Let the tart sit at room temperature for 30 minutes before slicing—this ensures clean cuts and prevents the filling from sliding. For a glossy finish, dust with powdered sugar right before serving.
And if you’re serving it chilled, bring it to room temp for 10 minutes first—this highlights the crispy crust vs. fudgy center contrast. Trust me, your guests will notice! 💫
Nutrition facts
Frequently asked questions
Can I make this tart without a tart pan?
Use a 9-inch pie dish or even a deep 9-inch cake pan lined with parchment paper. For a rustic look, try a cast-iron skillet—just grease it well and adjust baking times (cast iron stays hotter, so reduce to 350°F). The key is ensuring your crust has 1-inch thick edges to support the filling. If using a round pan, you can still create a tart shape by pressing the crust up the sides after baking.
Why did my chocolate filling crack?
Cracking usually happens when the ganache cools too quickly or has air bubbles. To fix this, tap the pan gently on the counter before refrigerating to release bubbles, then chill in the freezer for 10 minutes after pouring. Also ensure your ganache is at room temperature (not warm) when pouring—this helps it set evenly. For extra insurance, spread a thin layer of ganache on the crust bottom first to create a barrier.
Can I substitute white chocolate for dark?
While you can use white chocolate, the flavor and texture will be completely different. White chocolate lacks the deep richness and fudgy texture of dark chocolate. If you must substitute, use 70% dark chocolate for the closest experience. For a lighter version, try mixing half dark and half white chocolate, but expect a sweeter, less intense flavor. The espresso powder won't work as well with white chocolate, so omit it if substituting.
How do I make this tart ahead of time?
This tart actually tastes better the next day! Assemble it completely (including pistachios) and refrigerate for up to 3 days. For serving, let it sit at room temperature for 30 minutes to bring out the crispy crust texture. You can also make the crust and filling separately: bake the crust 2 days ahead, store at room temp, and make the ganache 1 day ahead (it keeps well in the fridge). Just let everything come to room temp before assembling.
What's the best way to transport this tart?
For short trips (1 hour or less), keep it refrigerated in its pan. For longer transport, wrap the pan tightly in plastic wrap, then place in a cool insulated bag with an ice pack. If transporting for an event, assemble the tart 2 hours before serving so it has time to set properly. Avoid temperature changes—never leave it in a hot car! For a crowd, consider individual slices wrapped in parchment and placed in a cool box.