
Desserts
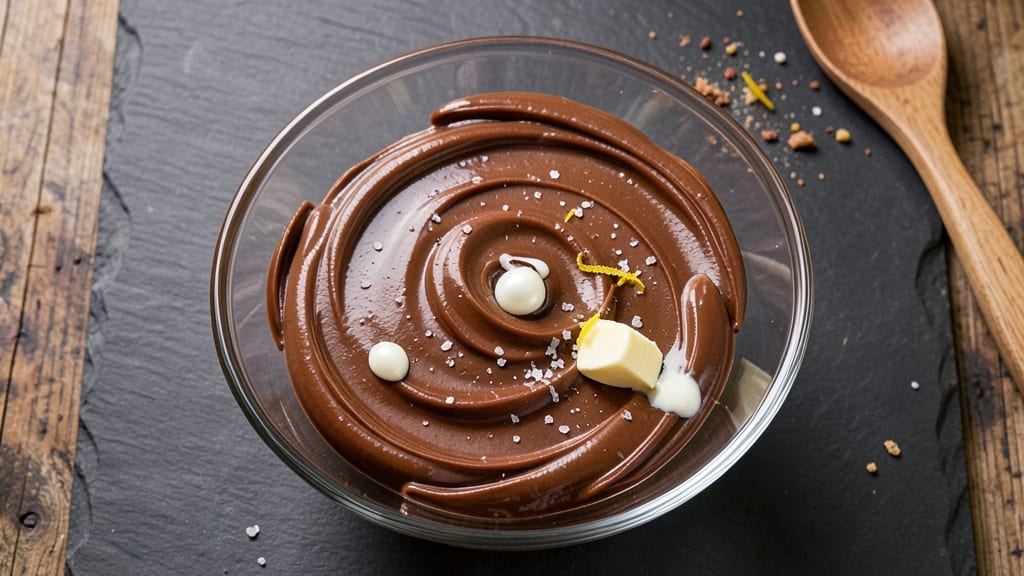
Bittersweet chocolate ganache transforms desserts from ordinary to extraordinary with its velvety texture and deep, complex flavor. This recipe delivers a perfectly tempered ganache—smooth, glossy, and stable enough to drizzle, dip, or fill without seizing. I developed it after years of testing, ensuring it’s foolproof for both beginners and seasoned bakers.
The secret lies in the ratio of 70% bittersweet chocolate to heavy cream, heated and cooled precisely to create a silky, pourable consistency.
Unlike store-bought versions, this ganache stays firm at room temperature but melts effortlessly when warmed, making it ideal for layering cakes, filling truffles, or drizzling over fruit tarts.
What sets this apart is its versatility—use it as a glaze for cakes, a filling for pastries, or even a decadent sauce for ice cream. The bittersweet chocolate provides a rich, slightly bitter depth that balances perfectly with sweet elements, elevating any dessert it touches.
With just two ingredients and minimal effort, you’ll achieve a professional-quality ganache that’s easier to make than you’d expect. Let’s create something truly luxurious—your desserts will never be the same.
Ingredients for bittersweet chocolate ganache
Two core ingredients plus a few luxurious touches—this ganache is restaurant-quality in minutes.
| Ingredient | Amount | Notes |
|---|---|---|
| Bittersweet Chocolate (70% Cocoa) 🍫 | 8 oz | High-quality, chopped into even pieces |
| Heavy Whipping Cream 🥛 | 1 cup | Full-fat, cold from the refrigerator |
| Unsalted Butter 🧈 | 2 tbsp | For extra richness and stability |
| Vanilla Extract 🌿 | ½ tsp | Pure, high-quality vanilla |
| Kosher Salt 🧂 | ⅛ tsp | Fine grain for subtle seasoning |
The chocolate is everything here. 70% cacao bittersweet gives that perfect balance of richness and bitterness—Valrhona or Callebaut are my go-tos, but any high-quality brand works. Chop it into even, small pieces (about 1/2-inch) so it melts uniformly. The cream? Full-fat is non-negotiable—light cream won’t give you that velvety finish. Grab the coldest tub from the back of your fridge, and let it sit out just 10 minutes before using. The butter and vanilla are the secret weapons: butter adds stability (so it doesn’t seize), and vanilla rounds out the bitterness beautifully.
No butter? Extra 1 tbsp of heavy cream works in a pinch, though the ganache will be slightly less stable. Short on vanilla? A pinch of instant espresso powder deepens the chocolate flavor—trust me, it’s a game-changer. Want to make it ahead? Add 1 tsp of corn syrup to prevent graininess when reheating. And if you’re worried about the chocolate burning, use a double boiler or heatproof bowl over simmering water instead of direct heat. The salt is optional but worth it—it enhances all the flavors without being noticeable.
This ganache keeps beautifully. Room temperature in an airtight container for up to 2 days, or refrigerated for 1 week. To reheat, warm in 10-second bursts in the microwave, stirring between each until smooth. For long-term storage, freeze in 1-tbsp portions—thaw quickly in warm water when ready to use. Pro tip: Line your container with parchment to prevent sticking. Leftovers make amazing ice cream toppers or cake fillers—just let it sit at room temp for 10 minutes before using.
Why You'll Love This Recipe
- No-Fuss Magic: I swear by this—just chop chocolate, heat cream, stir. That’s it. No tempering, no fussing, no watching timers like a hawk. The butter and vanilla tie everything together while you’re still wiping flour off your hands.
- Deep, Rich Crunch: That 70% bittersweet? It’s where the magic happens. The ganache gets this perfect crackly top while staying silky smooth inside—like biting into a dark chocolate bar that somehow knows it’s on a cake. A pinch of salt makes the whole thing sing.
- Date Night Ready: Make it ahead, store it in the fridge, and pull it out when guests arrive. Drizzle over strawberries for a fancy dessert, swirl into ice cream for a grown-up treat, or use it to glaze pound cake when you’re too tired to bake from scratch.
- Leftover Goldmine: Honestly, I’ve never thrown out ganache. Use the extra to stuff cookies, top brownies, or even spread on toast with a sprinkle of sea salt. It’s the ultimate pantry hero—cheap, flexible, and always delicious.
Step-by-step instructions for bittersweet chocolate ganache
A velvety, glossy ganache that transforms any dessert into a showstopper—here's how to make it perfect every time.
Chop the Bittersweet Chocolate
Begin by chopping the 8 oz bittersweet chocolate (70% cocoa) into even, small pieces using a sharp chef's knife. The goal is to create uniform chunks that will melt simultaneously in the cream. I like to work on a cutting board over a bowl to catch any stray shavings—this prevents wasted chocolate and makes cleanup easier.
For best results, use high-quality chocolate with a 70% cocoa content. This percentage balances rich flavor with smooth texture. If your chocolate has a waxy coating, gently rub the pieces between your palms to remove it before melting—this ensures a glossier, more professional finish.
Heat the Heavy Whipping Cream
In a medium saucepan, combine the 1 cup heavy whipping cream over medium-low heat. Warm it until small bubbles form around the edges and the cream reaches 170°F—this is just below a full simmer. Stir occasionally to prevent hot spots that could cause the cream to scorch or separate.
Here's the thing—if you heat the cream too aggressively, it can break or curdle. You'll know it's ready when it's steaming gently and smells rich and creamy. Remove the pan from heat immediately once it hits 170°F to preserve its temperature and prevent overheating.
Pour and Infuse the Cream
Carefully pour the warm cream over the chopped chocolate in a heatproof bowl. Let it sit for 2 minutes—this allows the cream to begin melting the chocolate without immediate agitation. During this time, add the 0.5 tsp vanilla extract and 0.125 tsp kosher salt to the mixture. The salt enhances the chocolate's depth, while the vanilla adds a subtle, aromatic sweetness.
After the 2-minute rest, gently stir the mixture with a silicone spatula, working from the center outward to ensure all the chocolate is incorporated. The ganache should begin to thicken and take on a glossy sheen as it comes together. If you see any unmelted chocolate, let it sit for another 30 seconds before stirring again—this ensures a completely smooth texture.
Add Butter for Stability
Once the ganache is fully melted and smooth, remove it from heat (if it wasn't already) and stir in the 2 tbsp unsalted butter. The butter adds richness and helps stabilize the ganache, preventing it from becoming too thin or grainy over time. This step is especially important if you plan to use the ganache for drizzling or filling—it gives the finished product a silky, professional consistency.
Let the ganache cool slightly for 5-7 minutes at room temperature. It should thicken to a spreadable but pourable consistency—like a thick syrup. If it thickens too much, gently reheat it in 10-second intervals in the microwave or over a double boiler, stirring between each interval until it reaches the ideal pouring consistency.
Test and Adjust for Perfection
To ensure your ganache is ready, dip a spoon into the mixture and let it cool for 10 seconds. When you lift it, the ganache should drip slowly but not pool heavily. If it's too thick, thin it with 1 tsp warm cream at a time until it reaches the perfect drizzling consistency. If it's too thin, chill it for 10-15 minutes in the refrigerator to firm it up slightly.
Now your ganache is ready to elevate any dessert—drizzle it over cakes, fill truffles, or use it as a glaze for pastries. For an extra touch of elegance, strain it through a fine-mesh sieve to remove any remaining lumps and achieve a flawlessly smooth finish. Store any leftovers in an airtight container in the refrigerator for up to 1 week, reheating gently before use.
Pro Tips For Making Bittersweet Chocolate Ganache
- CHOP CHOCOLATE UNIFORMLY: I learned this the hard way—uneven chocolate chunks mean grainy ganache. Use a sharp knife or melamine scraper to break the 70% bittersweet into pieces no bigger than a pea. The heat will work faster and smoother when every bit hits the cream at the same time.
- HEAT CREAM TO 185°F: Skip the eyeballing—use a thermometer. Heavy cream should hit 185°F (just before simmering) before pouring over chopped chocolate. Too cool? It’ll seize. Too hot? It’ll scald. This temp melts chocolate evenly without breaking.
- SALT THE CREAM FIRST: More salt than you think, especially with unsalted butter. Add a pinch of kosher salt to the warm cream before mixing—it balances the bitterness of 70% chocolate and rounds out the flavor. Trust me, the ganache tastes richer afterward.
- WHISK IN BUTTER LAST: I used to add butter at the start, and the ganache always turned greasy. Instead, let the chocolate and cream fully emulsify, then whisk in softened butter (about 2 tablespoons per cup of ganache) off the heat. This keeps the texture silky, not buttery.
Essential equipment for this recipe
Heatproof Bowls
You’ll need a heatproof glass or stainless steel bowl (I love CorningWare or Le Creuset) to melt the chocolate and cream together. This prevents scorching and ensures even heat distribution.
A double boiler setup (bowl over a saucepan of simmering water) is ideal—it gives you gentle, controlled heat without risking overheating. Avoid plastic bowls, as they can warp or melt under high temperatures. 🔥
Thermometer
A candy or instant-read thermometer (like the Thermoworks Thermapen) is essential for monitoring the cream’s temperature at 170°F. This precision prevents curdling or overheating, which can ruin your ganache.
If you don’t have one, watch for small bubbles forming around the edges—just don’t let it boil. A quick read at this stage ensures a silky, stable texture.
Silicone Spatula
Use a silicone spatula (I recommend OXO Good Grips) to stir the ganache—it’s heat-resistant and won’t scratch your bowl. The flexible edge helps scrape every last bit of chocolate from the sides, ensuring a smooth, lump-free finish.
A stiff spatula also makes it easier to test the consistency by dipping and lifting a spoonful. 💫
Fine-Mesh Sieve
A fine-mesh sieve (like the Anolon Stainless Steel) is perfect for straining your ganache before using it. This removes any tiny chocolate particles or butter lumps, giving you a flawlessly smooth drizzle or filling.
I keep one in my kitchen specifically for ganache and other sauces—it’s a game-changer for professional-looking results.
Mixing Spoon
A wooden or silicone mixing spoon (I prefer OXO’s silicone version) helps gently fold the butter into the ganache without overmixing. Wooden spoons add a touch of rustic charm, while silicone won’t scratch your bowl.
Avoid metal spoons, as they can scratch the bowl or, in rare cases, react with acidic ingredients over time.
Storage Containers
For leftovers, use airtight glass containers (like Pyrex) to store your ganache. Glass preserves flavor better than plastic and won’t absorb odors. Label them with the date—ganache keeps for 1 week refrigerated or 3 months frozen.
I also like to line the containers with parchment paper to prevent sticking and make reheating easier. ❄️
Nutrition facts
Frequently asked questions
Can I substitute heavy cream with something else?
For best results, stick with full-fat heavy whipping cream—it creates the perfect balance of richness and smoothness. In a pinch, you can use 36% heavy cream (like half-and-half) but expect a slightly lighter texture. For a dairy-free option, substitute with full-fat coconut milk (canned, not cartoned) and add 1 tbsp corn syrup to prevent graininess. The fat content is critical for that velvety ganache consistency.
Why did my ganache seize up and turn grainy?
This usually happens when the cream is overheated or the chocolate isn't fully melted before stirring. To fix it, gently reheat the mixture in 10-second bursts in the microwave, stirring vigorously between each interval. If it's still grainy, strain it through a fine-mesh sieve to remove any unmelted chocolate particles. For prevention, always heat the cream to 170°F (just below simmer) and let it sit over the chocolate for 2 minutes before stirring.
How do I use this ganache for truffles?
Once your ganache has cooled to room temperature (about 1 hour), spoon it into a piping bag fitted with a 1/2-inch round tip. Pipe 1-tbsp dollops onto parchment paper, spacing them 1 inch apart. Chill in the freezer for 15 minutes to firm up, then roll each dollop in cocoa powder, crushed nuts, or shredded coconut. For extra stability, add 1 tsp corn syrup to the ganache before piping—it helps prevent cracking.
Can I make this ganache ahead of time?
This ganache stores beautifully for 2 days at room temperature in an airtight container, or up to 1 week refrigerated. For longer storage, freeze in 1-tbsp portions wrapped tightly in plastic wrap. To reheat, warm in 10-second intervals in the microwave, stirring between each until smooth. Pro tip: Add 1 tsp corn syrup when reheating to prevent graininess from forming during storage.
What's the best way to drizzle ganache without it pooling?
For a professional-looking drizzle, let your ganache cool to room temperature (about 30 minutes) until it's thick but still pourable. Use a small squeeze bottle or piping bag with a 1/4-inch tip to create elegant lines. Work quickly—if the ganache starts to thicken too much, reheat it in 5-second bursts in the microwave. For extra stability, chill the ganache for 10 minutes before drizzling onto cold desserts like cakes or fruit tarts.