
Desserts
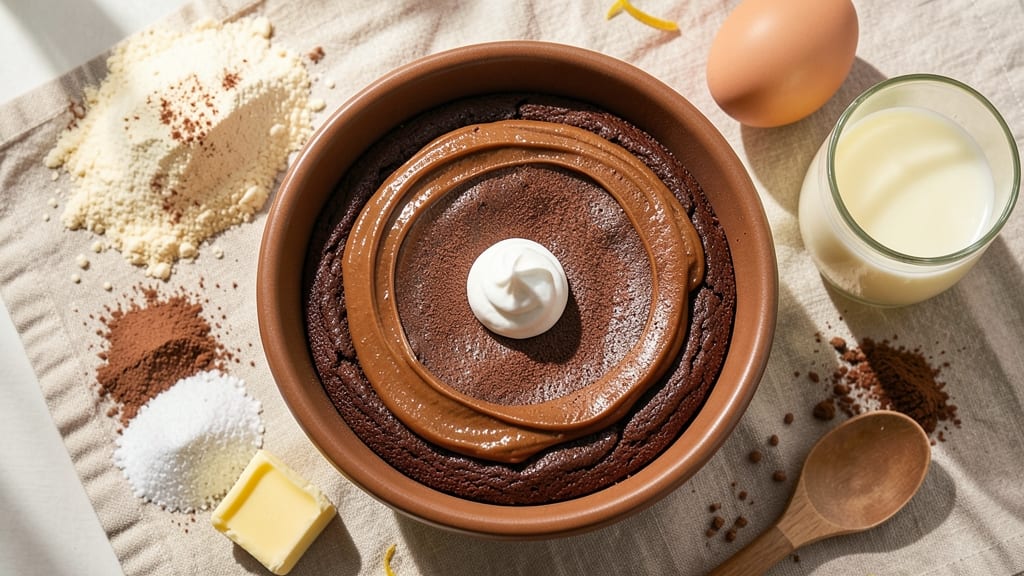
This busy day chocolate cake recipe delivers rich, moist layers in under 5 minutes of active prep—perfect for when time is tight but dessert cravings aren’t. The secret lies in a simple one-bowl method that skips extra steps while ensuring tender crumb and deep chocolate flavor.
I designed this after realizing most quick cakes either taste dry or require fussy techniques that slow you down.
The cake itself comes together in one bowl with pantry staples, and the 15-minute frosting (just powdered sugar, butter, and milk) takes no skill—just a few strokes of a mixer. No waiting for frosting to set, no complicated layering, and no last-minute scrambling.
What you get is a cake that’s moist for days, with a velvety texture that resists cracking even when sliced ahead of time.
This recipe works for weeknight dinners, office potlucks, or spontaneous celebrations—because who says cake needs hours to shine? The frosting’s tangy-sweet balance cuts through the richness, and you can customize it with cocoa powder for extra chocolate intensity or a splash of vanilla for warmth.
Serve with a cup of coffee, a glass of milk, or nothing at all—it’s that good.
Best of all, it scales effortlessly: halve the recipe for a single serving or double it for a crowd. The key to success? Room-temperature ingredients and a light hand with mixing—no overmixing here.
Let’s get to that cake before your sweet tooth takes over completely. Here’s everything you need to pull it off.
Ingredients for busy day chocolate cake
Room-temperature ingredients and pantry staples make this cake a busy day lifesaver.
| Ingredient | Amount | Notes |
|---|---|---|
| All-Purpose Flour 🌾 | 1 ½ cups | Sifted for light texture |
| Granulated Sugar 🍚 | 1 ½ cups | White or light brown |
| Unsalted Butter 🧈 | 1 cup | Room temperature, not melted |
| Cocoa Powder 🍫 | ½ cup | Natural or Dutch-processed |
| Large Eggs 🥚 | 2 whole | Room temperature, beaten |
| Milk 🥛 | ½ cup | Room temperature, whole preferred |
| Vanilla Extract 🌸 | 1 tsp | Pure, not imitation |
| Baking Powder 🍞 | 1 ½ tsp | Metal container preferred |
| Salt 🧂 | ½ tsp | Fine sea salt |
| Powdered Sugar 🍚 | 2 cups | For frosting, sifted |
| Butter (for frosting) 🧈 | ½ cup | Room temperature, salted or unsalted |
| Milk (for frosting) 🥛 | 2 tbsp | Room temperature |
| Cocoa Powder (for frosting) 🍫 | 1 tbsp | Optional for richer flavor |
The butter and eggs are non-negotiable—room temperature is key for that tender crumb. Grab Land O'Lakes or Plugrá for reliable room-temp butter that won't seize up. Cocoa powder? Hershey's Special Dark or Ghirardelli 100% deliver the deepest flavor. I always double-check the baking powder's freshness by testing it in water—if it fizzes, it's good. For the flour, King Arthur or Gold Medal brands stay consistent. Pro tip: Sift everything together in one bowl to cut down on cleanup.
No vanilla extract? Vanilla bean paste works too—just use half the amount. Short on powdered sugar? Granulated sugar blended into a fine powder in a food processor gets you close. The frosting milk can be any kind, but whole milk gives the best texture. Want extra chocolate flavor? Add the 1 tbsp cocoa powder to the frosting. The recipe scales perfectly—just adjust the frosting proportionally if you're doubling. And if you're really in a rush, microwave the butter 40 seconds to soften it without waiting.
Store the cake in an airtight container at room temperature for 3 days or in the fridge for 5 days—it actually tastes better the next day. The frosting? Room temperature only—don't refrigerate it or it'll seize. I portion mine into small containers for easy grab-and-go slices. Freeze unfrosted layers for 3 months—just thaw overnight before adding frosting. The frosting itself keeps for 1 week in the fridge, but it's best used fresh.
Why You'll Love This Recipe
- Here’s what sold me: that deep, velvety chocolate flavor comes from just 2 tablespoons of cocoa powder, but it’s ridiculously good. The butter keeps it moist without being greasy, and the sugar balances the bitterness so well my kids ask for seconds before I even cut the first slice.
- No Mixer Needed: I swear by this recipe when I’m too tired to cream butter and sugar by hand. Just melt the butter, whisk it with sugar until smooth—no standing there for 10 minutes like some recipes demand—and you’re golden. The eggs and cocoa powder do all the heavy lifting after that.
- Rich Without Effort: Here’s what sold me: that deep, velvety chocolate flavor comes from just 2 tablespoons of cocoa powder, but it’s ridiculously good. The butter keeps it moist without being greasy, and the sugar balances the bitterness so well my kids ask for seconds before I even cut the first slice.
- Leftovers That Last: Between us, this cake tastes better the next day—seriously. I make a batch on Sunday, slice it up, and it’s gone by Wednesday. The texture holds up perfectly, and it’s the easiest dessert to reheat (just 10 seconds in the microwave if you’re really short on time).
Step-by-step instructions for busy day chocolate cake
Here's how to make a rich, moist chocolate cake with layers that stay tender and a quick 15-minute frosting.
Prep Ingredients and Preheat Oven
Start by preheating your oven to 350°F. While it heats, let all your ingredients sit at room temperature for 10 minutes—this ensures even mixing and better texture. Sift together the 1.5 cups all-purpose flour, 1.5 tsp baking powder, and 0.5 tsp salt in a medium bowl. I like to use a fine-mesh sieve for this because it prevents lumps in the batter later.
In a separate large bowl, beat the 1 cup unsalted butter and 1.5 cups granulated sugar together on medium speed until light and fluffy—about 3-4 minutes. This step is crucial because it incorporates air, which helps create that tender crumb. If your butter isn't softened, the mixture won't blend properly, and you'll end up with dense cake layers.
Mix Wet Ingredients and Combine
Add the 2 whole large eggs, one at a time, beating well after each addition. Then stir in the 0.5 cup milk and 1 tsp vanilla extract until fully combined. The mixture should look smooth and slightly thickened. Next, gradually add the sifted dry ingredients to the wet mixture, mixing on low speed just until combined—about 30 seconds. Overmixing develops gluten, which can make the cake tough.
Finally, fold in the 0.5 cup cocoa powder using a spatula until no streaks remain. The batter should be thick but pourable. If it looks too stiff, add 1-2 tablespoons of milk to loosen it. This cake batter is designed to be rich and moist, so don't worry if it doesn't look like traditional cake batter—it's supposed to be dense!
Bake the Cake Layers
Divide the batter evenly between two 8-inch round cake pans lined with parchment paper. Tap the pans gently on the counter to remove any air bubbles, then smooth the tops with a spatula. Bake for 25-30 minutes, or until a toothpick inserted into the center comes out clean. The edges should be set, but the tops might still look slightly soft—don't overbake, or the cake will dry out.
I always check the cake at the 20-minute mark because ovens vary. If the tops are browning too quickly, tent the pans with foil. Once done, let the cakes cool in the pans for 10 minutes, then transfer them to a wire rack to cool completely. This resting period prevents the cakes from cracking when you remove them from the pans.
Make the 15-Minute Frosting
While the cakes cool, make the frosting by beating the 0.5 cup butter (for frosting) and 2 cups powdered sugar together until smooth. Add the 2 tbsp milk (for frosting) and 1 tbsp cocoa powder (for frosting), mixing until fully incorporated. The frosting should be thick but spreadable—if it's too stiff, add 1 teaspoon of milk at a time until it reaches the right consistency. This frosting comes together in just 3-4 minutes, making it perfect for busy days.
Once the cakes are completely cool, place one layer on a serving plate and spread a thin layer of frosting on top. Repeat with the second layer, then frost the entire cake. For a polished look, I like to use an offset spatula to smooth the frosting and create clean edges. The frosting sets quickly, so work efficiently to avoid messes.
Serve and Enjoy
Slice the cake into 4 equal servings using a sharp knife dipped in hot water and wiped clean between cuts. This ensures clean slices every time. Serve immediately for the most tender, moist texture—this cake is best enjoyed fresh out of the oven. The rich chocolate flavor pairs perfectly with a cup of coffee or a glass of cold milk, making it the ideal treat for a busy day.
Store any leftovers in an airtight container at room temperature for up to 2 days or refrigerate for up to 5 days. To revive the texture, warm slices in the microwave for 10-15 seconds before serving. This cake is designed to be quick, delicious, and foolproof—perfect for when you need something sweet without spending hours in the kitchen.
Pro Tips For Making Busy Day Chocolate Cake
- Melt Butter Slowly: Mixing cold butter into the dry ingredients makes for a lumpy, uneven batter. Microwave the butter in 15-second bursts until it’s just liquid—about 30 seconds total—and let it cool for 30 seconds before adding it to the flour. This keeps the texture smooth without turning the batter greasy.
- Sift the Cocoa: I learned this the hard way—lumpy cocoa powder ruins the whole cake. Sift it directly into the dry ingredients with the flour, then whisk everything together. No clumps, no bitter pockets, just even distribution. (Yes, even if you’re impatient like me, take the 10 seconds.)
- Room-Temp Eggs Matter: Cold eggs from the fridge mix unevenly and can cause the batter to separate. Pop them in a bowl of warm water for 5 minutes while you prep the rest—no fancy gadgets, just patience. Your cake will be lighter, and you won’t spend 10 minutes fixing a broken batter.
- Bake at 350°F—No Higher: I was skeptical until I tried it: 375°F makes the outside set too fast while the middle stays doughy. Stick to 350°F and bake for 25–30 minutes (depending on pan size), then do the toothpick test. Overbaking dries out the cake faster than you can ice it.
Make-ahead tips for leftovers
Prep Ahead
Mix the dry ingredients—flour, baking powder, and salt—the night before and store in an airtight container. The wet ingredients (butter, sugar, eggs, milk) can also be prepped 4 hours ahead and refrigerated.
When ready to bake, simply combine everything at room temperature for a 3-minute assembly. This cuts your active prep time to almost zero! 💫
Batter Storage
Unbaked batter keeps in the fridge for up to 24 hours in a sealed container. When you're ready to bake, let it sit at room temperature for 15 minutes before dividing into pans.
I’ve baked this way on weeknight emergencies—just pop the batter in the oven while you finish dinner prep. The flavor stays rich, and the texture remains perfect.
Frosting Shortcuts
Make the frosting a full day ahead and store it in the fridge. It thickens slightly but whips back to perfection with 30 seconds of mixing and a splash of milk.
For extra richness, add 1 tbsp cocoa powder to the frosting while it’s still soft. This trick saves time and adds depth without extra effort. ✨
Layer Assembly
Assemble the cake 1 hour before serving—this gives the frosting time to set slightly without needing refrigeration. If you’re prepping for a party, wrap the frosted cake in plastic wrap and store at room temperature for up to 4 hours.
The layers stay intact, and the frosting holds its shape beautifully. No one will guess it was made ahead!
Freezing Layers
Freeze unfrosted cake layers on a parchment-lined tray for 1 hour, then transfer to a freezer bag for up to 3 months. Thaw overnight in the fridge, then frost and serve.
This is my go-to strategy for last-minute desserts—just pull the layers out in the morning, and you’re ready to bake by lunchtime. The texture stays moist, and the flavor is just as bold as fresh-baked.
Make-Ahead Serving
Portion the cake into individual slices and wrap tightly in plastic wrap. Store in the fridge for up to 5 days—perfect for office lunches or quick snacks. Reheat slices in the microwave for 10-15 seconds to revive the moisture.
I keep a stack of these in my freezer for impromptu celebrations—no one ever suspects how little effort went into them! 🍫
Nutrition facts
Frequently asked questions
Can I make this cake in a single layer instead of two?
Use a 9-inch round pan or 8-inch square pan and reduce baking time to 20-25 minutes. The frosting quantity stays the same—just spread it evenly over the top. Single-layer cakes are perfect for quick servings or when you're short on time.
What if I don't have powdered sugar for the frosting?
No problem! Blend 1 cup granulated sugar in a food processor or blender until it becomes a fine powder. For extra fluffiness, add 1/4 tsp cream of tartar to prevent clumping. The frosting will be slightly grainier but still delicious.
How do I fix dry cake layers?
Dryness usually happens from overbaking or using cold ingredients. For future bakes, check the cake at 20 minutes and remove it when a toothpick comes out with moist crumbs. To revive slightly dry cake, brush layers with 1 tbsp simple syrup (equal parts sugar + water, heated until dissolved) before frosting. The moisture will restore tenderness in minutes.
Can I substitute butter with oil for a quicker version?
Yes, but with adjustments. Replace the 1 cup butter with 3/4 cup vegetable oil and reduce milk to 1/4 cup. The cake will be slightly denser but still moist. Oil-based cakes bake faster (20 minutes) and are great for one-bowl prep—just mix everything together and bake!
What's the best way to store leftovers?
Keep unfrosted cake layers in an airtight container at room temperature for 3 days or refrigerate for 5 days. For frosted cake, refrigerate for 3 days max—the frosting softens at room temperature. Freeze unfrosted layers for 3 months by wrapping tightly in plastic. Thaw overnight before frosting.