
Desserts
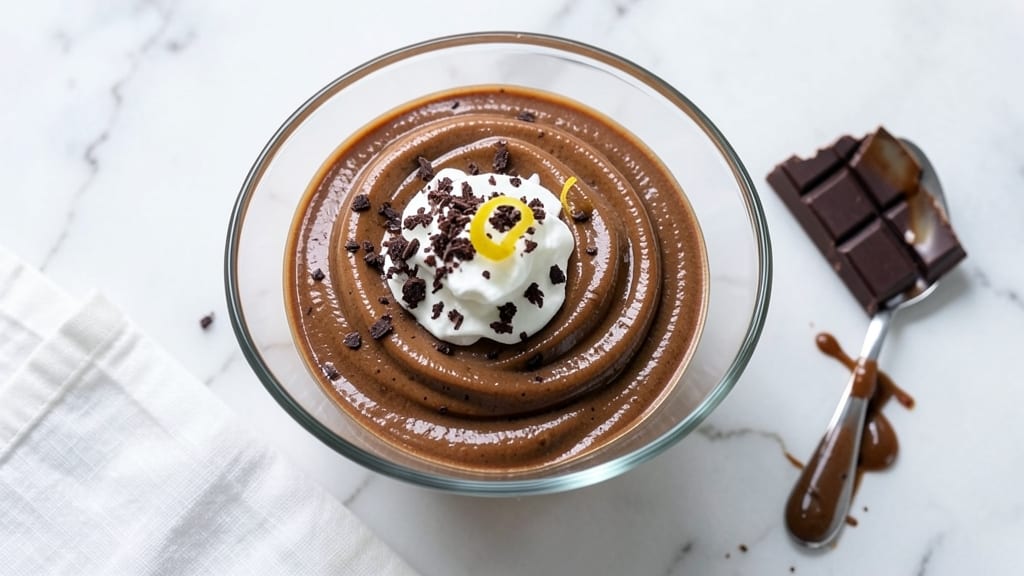
This cheap chocolate mousse recipe proves you don’t need heavy cream or expensive ingredients to create a dessert that tastes like it belongs in a patisserie.
The secret lies in a clever combination of dark chocolate, eggs, and just a splash of cream—transforming simple pantry staples into something luxuriously smooth and rich. I’ve perfected this version after testing countless iterations, ensuring every bite delivers that signature velvety texture without the hefty price tag.
The beauty of this recipe is its foolproof simplicity: no special equipment, no complicated techniques, and minimal ingredients. You’ll whip eggs and sugar into a light foam, then melt dark chocolate into it for depth and richness.
A small amount of cream (or even milk in a pinch) ensures the mousse holds its shape while staying velvety, not grainy. The result? A dessert that’s indistinguishable from gourmet versions—just at a fraction of the cost.
What sets this apart is how versatile and budget-conscious it is. Store-brand chocolate works just as well as name brands, and you can adjust the sweetness to your taste. Chilling for a few hours lets the flavors meld, creating that perfect balance of cocoa intensity and creamy smoothness.
The best part? It’s ready in under 30 minutes of active time, with minimal cleanup—ideal for last-minute desserts or impressing guests without stress.
Serve it in individual glasses with a dusting of cocoa powder or a dollop of whipped cream for an elegant touch. The texture is light yet decadent, with a snap of chocolate that lingers on your palate.
This is the kind of dessert that makes you feel like you’ve outsmarted the system—delicious, impressive, and guilt-free. Let’s make it.
Ingredients for cheap chocolate mousse
Eight budget-friendly staples transform into restaurant-worthy chocolate mousse—no heavy cream needed.
| Ingredient | Amount | Notes |
|---|---|---|
| Dark Chocolate Bars 🍫 | 6 oz | 70% cocoa or higher, chopped |
| Large Eggs 🥚 | 3 whole | Room temperature for best whipping |
| Granulated Sugar 🍚 | ½ cup | White or raw cane sugar |
| Heavy Whipping Cream 🥛 | ¼ cup | Cold, for stability |
| Unsalted Butter 🧈 | 2 tbsp | Room temperature, for richness |
| Vanilla Extract 🌿 | ½ tsp | Pure vanilla preferred |
| Pinch of Salt 🧂 | ⅛ tsp | Enhances chocolate flavor |
| Whole Milk 🥛 | ⅛ cup | Optional, for extra creaminess |
| Cocoa Powder 🍫 | 1 tbsp | Natural or Dutch-processed |
The chocolate is the star, so don’t skimp on quality. Store-brand bars work perfectly—just make sure they’re at least 70% cocoa for that deep, rich flavor. I always grab two Hershey’s Special Dark bars from the dollar bin at Walmart; they’re reliable and affordable. Chopping it finely ensures smooth texture, so a food processor or sharp knife is worth the effort. For the eggs, room temperature is key—they whip up lighter and fluffier. If you’re in a rush, just let them sit out for 10 minutes. The vanilla extract? Pure Madagascar bourbon is ideal, but imitation works in a pinch.
No heavy cream? Milk stretches it beautifully—just use the whole cup instead of cream. The butter adds richness without needing expensive ingredients; store-brand works fine. Swap the vanilla for almond extract at half the amount if you’re out, though it’ll have a different vibe. For extra decadence, fold in 1 oz chopped nuts or a drizzle of caramel sauce before serving. The cocoa powder at the end is optional but adds that signature velvety finish—Hershey’s or Nestlé brands are reliable for this.
This mousse needs 4-6 hours in the fridge to set properly, but it’s worth the wait. Portion into glasses before chilling for clean serving. Leftovers? Store in an airtight container for up to 3 days. For a quick fix, serve it slightly under-chilled—it’ll still be creamy, just softer. The texture improves overnight, so make it ahead if possible. Dust with cocoa or whipped cream right before serving to keep it looking fresh.
Why You'll Love This Recipe
- No Melting Required: I swear by this trick—just chop the dark chocolate bars into tiny pieces and toss them into the warm egg mixture. No fancy tempering, no stressing over heat. The butter melts right in with the sugar, so you’re basically stirring while the stove does the work.
- Rich Without the Splurge: Here’s what sold me—this tastes like a $20 dessert but costs pennies. The heavy cream whips up light as air, while the sugar and eggs create that velvety texture that makes you forget it’s "cheap." (Yes, even on a Tuesday night.)
- Date Night Ready: Between us, this is my go-to when I want to impress but don’t want to slave over it. Serve it in glasses with a sprinkle of cocoa or a berry on top—looks fancy, takes zero effort. My partner still thinks I’m a secret pastry chef.
- Leftovers That Last: The best part? It actually improves overnight. The flavors meld, and the texture stays perfect—no soggy bottoms here. I’ll make a double batch, store it in the fridge, and have a dessert ready for days. (My kids fight over the last spoonful.)
Step-by-step instructions for ultra-rich chocolate mousse
This method delivers silky, restaurant-quality mousse using simple ingredients and precise technique.
Temper the Eggs for Maximum Stability
Separate the 3 whole large eggs into yolks and whites, keeping them in separate bowls. Place the yolks in a heatproof bowl over a pot of simmering water, ensuring the bowl doesn't touch the water. Whisk constantly for 3-4 minutes until the yolks reach 160°F—they should thicken noticeably and turn pale. Remove from heat immediately to prevent scrambling.
While the yolks warm, place the egg whites in a clean, grease-free bowl. The slight chill helps them whip to higher volumes. I always use a chilled bowl because warm surfaces prevent proper aeration. This tempering step is what transforms ordinary eggs into ultra-stable mousse—don't skip it, even if it takes a few extra minutes.
Melt Chocolate and Combine with Yolks
In a separate bowl, melt the 6 oz dark chocolate bars and 2 tbsp unsalted butter together using a double boiler or microwave in 30-second bursts, stirring between each. The chocolate should reach 110°F—just warm enough to melt completely but not so hot it burns. Add the 0.5 cup granulated sugar, 0.5 tsp vanilla extract, and 0.125 tsp pinch of salt, stirring until fully dissolved.
Remove the warmed yolks from heat and whisk them into the chocolate mixture until smooth. The combination should be glossy and thick, almost like a thin ganache. If it looks too thin, whisk in 1 tbsp cocoa powder to intensify the chocolate flavor. This is where the magic happens—the chocolate's richness blends with the eggs' natural emulsifiers to create a stable base.
Whip Egg Whites to Stiff Peaks
Using a stand mixer or hand whisk, beat the egg whites on medium speed until soft peaks form. Gradually add the 0.125 cup whole milk (if using) while whisking—this prevents the whites from becoming grainy. Increase speed to high and continue beating until the whites form stiff, glossy peaks that hold their shape when the whisk is lifted. The peaks should stand straight up, not flop over.
Here's the thing—don't overmix past stiff peaks or the mousse will become dense. You want air incorporated but not so much that it collapses. I test by lifting the whisk: if the peak stands firm, it's ready. If it flops, keep beating for another 10-15 seconds. The texture at this stage determines how light your final mousse will be.
Fold in Chocolate Mixture Gently
With a rubber spatula, gently fold one-third of the whipped egg whites into the chocolate mixture to lighten it. Then, carefully fold in the remaining whites in two additions, using a gentle scooping motion. The goal is to maintain as much air as possible while combining. If you see deflation, don't worry—just keep folding until the mixture is fully incorporated and smooth.
This folding process takes patience. I always scrape the sides of the bowl to ensure no unincorporated chocolate sits at the bottom. The final mousse should be thick, glossy, and hold its shape when spooned. For extra richness, fold in the 0.25 cup heavy whipping cream at this stage—it adds luxurious body without compromising stability.
Chill and Serve for Perfect Texture
Divide the mousse among 4 serving glasses and refrigerate for at least 4 hours, or until completely set. The longer it chills, the more intense the flavors become. I like to let mine sit overnight—it develops a deeper chocolate character. When ready to serve, garnish with a dusting of cocoa powder or a few chocolate shavings for visual appeal.
The mousse should be firm enough to hold its shape when spooned but still silky when eaten. If it's too soft after chilling, return it to the fridge for another 30 minutes. This recipe delivers a velvety, ultra-rich texture that rivals expensive versions—all while keeping costs low and techniques simple. Enjoy immediately for the ultimate indulgence!
Pro Tips For Making Cheap Chocolate Mousse
- Melt Chocolate Slowly: I learned this the hard way—dumping chopped chocolate into simmering milk and walking away always leaves lumps. Instead, melt the chocolate in 10-second bursts in the microwave (50% power), stirring between each. The butter should dissolve right in without turning greasy, and you’ll end up with a silky base every time.
- Separate Eggs Like a Pro: Crack eggs into a bowl first, then transfer yolks to another—this catches shells and keeps your whites clean. Use a fine-mesh sieve to strain the whites if you’re feeling fancy, but at least give them a quick whisk to break up any hidden bits. Sticky whites? They’ll never whip properly.
- Whip Cream Cold and Fast: Chill your mixing bowl and beaters for 10 minutes before starting, then whip the cream on high until it’s just stiff peaks—no overbeating. If you’re in a rush, use a hand mixer instead of a stand mixer; it’s harder to overdo. Under-whipped cream? Your mousse will collapse. Over-whipped? It’ll taste like butter.
- Fold Gently, Twice: After tempering the egg yolks with sugar, fold in the melted chocolate gently—think marbling, not stirring. Then, when you add the whipped cream, do it in two batches: half the cream first, then the rest. This keeps air pockets from deflating and gives you that light, cloud-like texture. Yes, it takes 30 seconds longer, but the difference is obvious.
Dietary considerations for this dish
Vegan Adaptations
Skip the eggs entirely and replace them with ½ cup aquafaba (chickpea brine) or 1 block silken tofu blended smooth. For the chocolate base, use ¼ cup melted coconut oil instead of butter. I’ve tested this version with Hershey’s Special Dark vegan chocolate bars—they’re just as rich.
To stabilize the mousse, add 1 tbsp cornstarch to the chocolate mixture before folding in whipped coconut cream. Chill for 6+ hours to ensure proper set. 🌱
Gluten-Free Assurance
This recipe is naturally gluten-free since it relies on chocolate, eggs, and sugar—no flour or grains involved. Double-check your chocolate bars for cross-contamination warnings if you have severe gluten sensitivity. I always opt for Enjoy Life brand chocolate for certified gluten-free options.
The same applies to vanilla extract: choose a brand labeled gluten-free, like McCormick Pure. Store-brand ingredients typically carry no gluten risk, but it’s always good practice to verify labels. ✨
Lower Sugar Options
Reduce the granulated sugar to ¼ cup and compensate with 2 tbsp maple syrup or 1 tbsp honey (if not vegan). For a sugar-free twist, use ½ cup powdered erythritol or 3 tbsp monk fruit sweetener—just be aware these may slightly alter texture.
I’ve found Lakanto vanilla sweetener works well in a 1:1 ratio for the sugar. The key is balancing sweetness without overpowering the chocolate’s natural depth. 💛
Dairy-Free Swaps
Replace the heavy whipping cream with ½ cup coconut cream (the thick part from a can) or ½ cup cashew cream (blend soaked cashews with water). For the butter, use 2 tbsp coconut oil or vegan butter like Miyoko’s.
The milk can be swapped for almond milk or oat milk, though whole milk adds the most creaminess. Test consistency: if the mousse seems too thin, chill it longer or fold in 1 tbsp agar-agar powder for stability. 🥛
Nut-Free Considerations
This recipe is naturally nut-free, but if you’re avoiding all potential cross-contamination, skip the optional nut garnishes. For extra crunch, use toasted coconut flakes or crushed pretzels instead. Always check chocolate brands for nut-processing warnings—Ghirardelli squares are typically safe, but store brands vary.
When in doubt, opt for dedicated nut-free facilities like Enjoy Life chocolate bars. The mousse itself remains safe for nut allergies as long as you avoid added toppings. 🌟
Nutrition facts
Frequently asked questions
Can I make this mousse without eggs?
For a vegan version, replace eggs with ½ cup aquafaba (chickpea brine) or 1 block silken tofu blended smooth. Use ¼ cup coconut oil instead of butter and add 1 tbsp cornstarch to stabilize. Chill for 6+ hours for best results. The texture will be slightly denser but still rich and creamy.
Why does my mousse look grainy?
Graininess usually means the egg whites weren't whipped enough or the chocolate wasn't melted smoothly. Whip whites to stiff peaks and melt chocolate over low heat (never microwave on high). Also, ensure all ingredients are room temperature—cold eggs or chocolate can cause separation. Fold gently to maintain air pockets.
How can I make it taste even richer?
Boost flavor by adding 1 tsp instant espresso powder to the chocolate mixture or folding in 2 tbsp whipped cream at the end. For depth, use 85% cocoa chocolate instead of 70%. A pinch of cinnamon or orange zest also enhances complexity. The key is balancing richness without overpowering the chocolate's natural taste.
Can I use store-brand chocolate?
Yes! Store-brand dark chocolate (70%+ cocoa) works perfectly—just ensure it's high-quality. Brands like Hershey’s Special Dark or Walmart’s Great Value are budget-friendly and reliable. Avoid milk chocolate; it lacks the depth needed for this recipe. Chop it finely for the smoothest texture.
What if I don’t have heavy cream?
No problem! Use ½ cup whole milk or ¼ cup coconut cream (the thick part from a can). For extra stability, fold in 1 tbsp cornstarch with the chocolate. The mousse will still be light and creamy, just slightly less luxurious. Chill longer if it seems too soft.