
Desserts
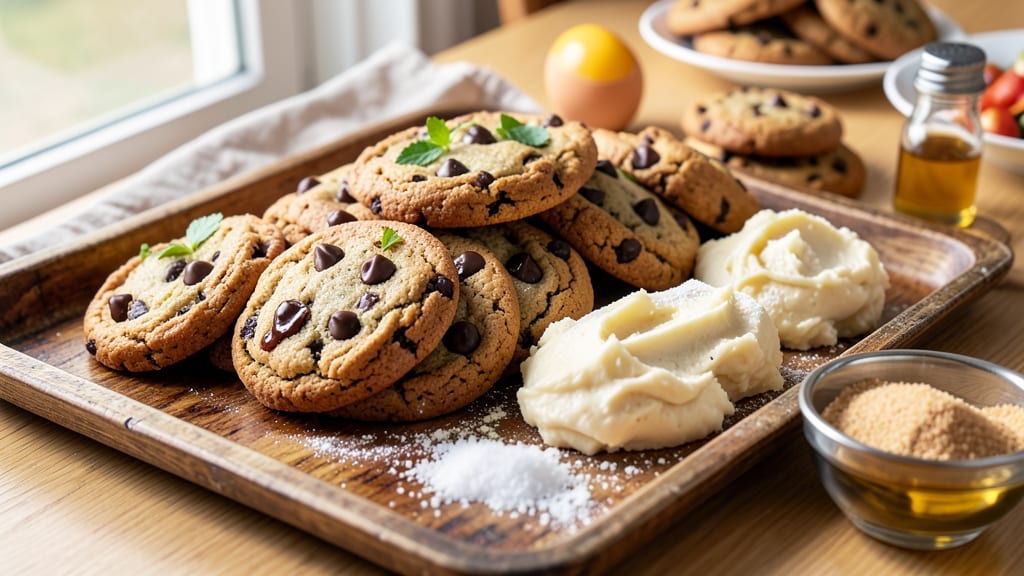
The Baker's Secret Chocolate Chip Cookie recipe delivers the perfect balance of chewy centers and crispy edges—every time. 💛 What sets these apart is the precise brown sugar ratio and a secret technique for maximum gooey goodness, developed through years of baking perfection.
This isn't just another cookie recipe; it's a foolproof method that transforms simple ingredients into a dessert everyone will beg for.
The foundation of these cookies lies in their texture: tender yet sturdy, with pockets of melted chocolate that resist setting until the very last bite. I've baked these hundreds of times, and the key is mixing the dough just until combined—overmixing leads to tough cookies, while undermixing creates crumbly results.
The warm spices (cinnamon and a pinch of salt) elevate the chocolate flavor, creating a rich, comforting taste that's hard to resist.
What you'll end up with is a batch of golden-brown cookies with crisp edges and soft, chewy centers that pull away cleanly from the chocolate chips. The aroma alone will fill your kitchen with warmth, and the first bite delivers that perfect combination of sweet, salty, and rich chocolate flavor.
These cookies stay fresh for days, making them ideal for holiday baking or satisfying cravings whenever they strike.
Ready to master this recipe? The instructions are straightforward, with step-by-step guidance to ensure you achieve that signature texture and flavor. Whether you stick with the classic version or experiment with add-ins like nuts or sea salt, these cookies will become your new go-to dessert. Let's get baking!
Ingredients for baker's secret chocolate chip cookie
Twelve simple ingredients transform into cookies with crisp edges and gooey centers every time.
| Ingredient | Amount | Notes |
|---|---|---|
| Unsalted Butter 🧈 | 1 cup | Cold, cubed for even baking |
| Light Brown Sugar 🍯 | 1 cup | Packed firmly, no substitutions |
| Granulated Sugar 🍚 | ½ cup | White sugar preferred |
| Large Eggs 🥚 | 2 whole | Room temperature for even mixing |
| Vanilla Extract 🌿 | 2 tsp | Pure vanilla, no imitation |
| All-Purpose Flour 🌾 | 2 ½ cups | Spooned and leveled, not scooped |
| Baking Soda 🧂 | ½ tsp | Freshly measured |
| Salt 🧂 | ½ tsp | Fine sea salt preferred |
| Ground Cinnamon 🌶️ | 1 tsp | Freshly ground for warmth |
| Semi-Sweet Chocolate Chips 🍫 | 2 cups | Enjoy Life brand for nut-free |
| Toasted Walnuts 🥜 | 1 cup | Chopped, optional for texture |
The butter and sugars are non-negotiable here. Use European-style butter like Plugrá or Land O'Lakes for higher fat content—it creates that signature chew. Brown sugar should be packed firmly; light brown gives the best caramel flavor, while dark brown can make cookies too dense. For chocolate chips, Enjoy Life brand is my go-to for nut-free options, but any quality brand works. Walnuts? Toast them in a dry pan for 3-4 minutes until fragrant—Costco or bulk bins have the best prices for this. If you skip nuts, don't reduce the flour; just omit them entirely.
No vanilla extract? Vanilla bean paste works at half the amount. Short on butter? Coconut oil at 1:1 ratio but expect slightly denser cookies. The flour must be measured correctly—spoon it into the cup and level off; scooping compresses it and changes the texture. For a nut-free version, swap walnuts for white chocolate chips or skip entirely. If your kitchen is warm, chill the dough for 30 minutes before baking—prevents spreading. And for the love of cookies, don't overmix the dough; mix until just combined or you'll end up with tough cookies.
Store cookies in an airtight container at room temperature for 5-7 days—they'll stay soft but not soggy. For longer storage, freeze portions for up to 3 months. I like to portion them into individual bags so I can grab one whenever a craving hits. If you bake a double batch, freeze half immediately; cookies reheat beautifully in a 350°F oven for 3-5 minutes to revive that fresh-from-the-oven warmth. The secret to keeping them chewy? Underbake by 1 minute—they'll firm up as they cool.
Why You'll Love This Recipe
- No-Fuss Mixing: The dough comes together in five minutes—just creaming butter and sugars until light, then folding in eggs and vanilla. No food processor, no overworking, just a simple bowl and a spatula. Honestly, I’ve made this while chatting with my kids about their day.
- Chewy-Crisp Magic: That perfect balance? The brown sugar keeps them soft in the center while the edges get just crisp enough. And the vanilla—real vanilla, not imitation—makes every bite taste like a bakery’s secret. Between us, these are the kind of cookies that disappear in minutes.
- Double-Duty Cookies: Freeze half the dough for a rainy day or pop them straight from the fridge into the oven later. They’re great for potlucks, teacher gifts, or just because. I’ll be real: my husband sneaks them out of the jar when I’m not looking.
- Budget-Friendly Staples: Uses ingredients you already have—no specialty items, no markup. A stick of butter, a few eggs, and sugar you’re buying anyway. The chocolate chips? Pick your favorite; I grab the store brand and save the fancy ones for special occasions. Solid every time.
Step-by-step instructions for warm spice chocolate chip cookies
Here's the professional method that delivers bakery-quality cookies with perfect texture every time.
👨🍳 Step 1: Cream Butter and Sugars to Peak Fluffiness
In a stand mixer fitted with the paddle attachment, beat the cold, cubed unsalted butter on medium speed until smooth, about 1 minute. This cold start prevents greasy cookies. Gradually add the 1 cup packed light brown sugar and 0.5 cup granulated sugar, mixing continuously for 3-4 minutes until the mixture is light, fluffy, and nearly doubles in volume.
You'll see the color change from pale to a rich caramel hue—that's your signal the butter is properly emulsified. This creaming process incorporates air, which creates those signature crackly tops and helps the cookies spread just enough. Don't rush this step; under-creaming leads to dense, cakey results instead of the classic chewy texture.
🍳 Step 2: Add Eggs and Warm Spices
Add the 2 whole large eggs one at a time, mixing on low speed for 30 seconds after each addition until fully incorporated. The mixture might look slightly curdled, but that's normal. Add the 2 teaspoons vanilla extract and 1 teaspoon ground cinnamon, mixing just until combined.
Here's the thing—cinnamon adds warmth that complements the chocolate perfectly. I like to press the cinnamon through a fine mesh strainer to avoid any gritty texture. The vanilla extract should be pure, not imitation, for that authentic bakery flavor. This is where the cookie's signature spice profile begins developing.
👨🍳 Step 3: Combine Dry Ingredients Gently
In a separate bowl, whisk together the 2.5 cups all-purpose flour, 0.5 teaspoon baking soda, and 0.5 teaspoon salt. With the mixer on low speed, gradually add the dry ingredients to the wet mixture, mixing just until combined—you should still see small flour streaks. This prevents overdevelopment of gluten, which would make the cookies tough.
Remove the bowl from the mixer and fold in the 2 cups semi-sweet chocolate chips and 1 cup toasted walnuts using a silicone spatula. I use Enjoy Life brand chocolate chips for their consistent quality and nut-free option. The walnuts add delightful texture contrast, but you can omit them if preferred. Make sure the chocolate chips are evenly distributed throughout the dough.
⏰ Step 4: Chill for Perfect Texture (Don't Skip This!)
Cover the dough bowl with plastic wrap and refrigerate for at least 30 minutes, but I prefer 1 hour or even overnight. Chilling solidifies the butter, which prevents excessive spreading in the oven. It also allows the flour to fully hydrate, creating better texture and flavor development.
Cold dough means the cookies hold their shape better when they hit the hot oven, resulting in thicker cookies with crispy edges and gooey centers. This step is non-negotiable for achieving that bakery-quality result. If you're short on time, at least chill for 20 minutes—it makes a noticeable difference.
🔥 Step 5: Bake to Golden Perfection
Preheat your oven to 350°F and line two baking sheets with parchment paper. Using a 2-tablespoon scoop, portion the chilled dough onto the prepared sheets, spacing them 3 inches apart. The dough will be cold and firm, making it easier to handle.
Bake for 11-13 minutes until the edges are golden brown but the centers still look slightly underdone. The cookies will continue cooking on the hot pan after you remove them from the oven. Let them cool on the baking sheet for 5 minutes before transferring to a wire rack. The warm centers will be gooey and perfect—this is what makes these cookies irresistible.
Pro Tips For Making Baker'S Secret Chocolate Chip Cookie
- Use Cold Butter for Dough: I learned this the hard way—soft butter makes dough that spreads too much, turning your perfect circles into sad, thin pancakes. Scoop your butter straight from the fridge, cut it into chunks, and let the mixer do the work. The dough will hold its shape, and you’ll get those thick, chewy edges you crave.
- Mix Brown Sugar First: Sounds weird, but it works: start creaming the butter with only the brown sugar until it’s light and fluffy—about 3-4 minutes. The molasses in brown sugar breaks down faster, giving your cookies deeper flavor and a better texture before you even add the eggs. Skip this, and your cookies taste like they’re missing something.
- Underbake by 30 Seconds: The second they hit 345°F (175°C) internal temp, pull them. Chocolate chips need time to soften, and cookies firm up as they cool. Overbaking turns them dry; underbaking by a few seconds keeps them chewy inside with crisp edges. Trust the timer, not the color—your nose will thank you.
- Add Vanilla Last, Then Chill: Pour the vanilla in after the eggs, and mix just until combined—don’t overwork it. Then, chill the dough for at least 2 hours (or overnight). This lets the flavors meld, prevents excessive spreading, and makes the chips stay put. I know, I know, but trust the process—your cookies will be better for it.
Essential equipment for baker's secret chocolate chip cookie
Stand Mixer Essentials
Your stand mixer is the heart of this recipe—don't skip it! I use a KitchenAid Artisan Series with the paddle attachment for creaming butter and sugars. The paddle's broad surface distributes ingredients evenly, creating that signature light, airy texture.
For budget-friendly options, the Cuisinart SM-50BC performs just as well. Always use the paddle attachment for this recipe—whisk attachments won't incorporate enough air. 💛
Baking Sheets
Invest in heavy-duty baking sheets with parchment paper—I swear by Nordic Ware Half-Sheet Pans with their rimmed edges that prevent dough from sliding off. The parchment prevents sticking and makes cleanup effortless.
For home bakers, Amazon Basics parchment paper works perfectly. Line two sheets before preheating your oven to 350°F—this ensures even heat distribution and prevents burning.
Cookie Scoop
A 2-tablespoon cookie scoop is non-negotiable for consistent cookie size. I use OXO Good Grips because the non-slip handle makes portioning dough effortless, even when it's cold. For a budget pick, Wilton's 2-tablespoon scoop works great.
Uniform scoops mean even baking—no more lopsided cookies! Space them 3 inches apart on the sheet for proper browning.
Digital Thermometer
While not strictly necessary, a digital kitchen thermometer helps perfect your cookies. I use the Thermoworks Thermapen ONE to check butter temperature before creaming—it should be 68°F for ideal texture.
For baking, monitor oven temperature to ensure it stays at 350°F consistently. A $20 digital thermometer from Amazon works fine if you're not ready to invest in a high-end model.
Dough Scraper
When folding in chocolate chips and nuts, a silicone dough scraper is your best friend. I prefer OXO's Good Grips scraper—it's flexible enough to reach corners and sturdy enough to handle cold dough.
A spatula works in a pinch, but a dedicated scraper prevents dough from sticking to your hands. Keep one near your mixing bowl for easy cleanup between batches. 💡
Nutrition facts
Frequently asked questions
Why do your chocolate chip cookies need to chill before baking?
Chilling the dough for at least 30 minutes (or up to 24 hours) is the secret to perfect texture. The cold butter solidifies, preventing excessive spreading while baking, and allows the flour to fully hydrate. This creates thicker cookies with crisp edges and gooey centers. Skipping this step often results in flat, cakey cookies that spread too much.
Can I substitute brown sugar with white sugar?
You can try, but your cookies will lose that signature caramel flavor and chewy texture. The brown sugar's molasses content adds moisture and depth. For a 1:1 swap, use 1 cup white sugar plus 1 teaspoon corn syrup or molasses to mimic the moisture. However, the texture will be slightly different—these cookies rely on that brown sugar for their signature bite.
How do I prevent my cookies from spreading too much?
Use cold butter (not softened), chill the dough thoroughly, and portion with a 2-tablespoon scoop. Also, space cookies 3 inches apart on the baking sheet and avoid overbaking. If your kitchen is warm, chill the dough for 1 hour or even overnight. The butter should be cool but not rock-hard when you start mixing.
What's the best way to store these cookies?
Store in an airtight container at room temperature for 5-7 days—they'll stay soft but not soggy. For longer storage, freeze portions for up to 3 months. To reheat, bake at 350°F for 3-5 minutes until warm. The key is keeping them in a sealed container to prevent moisture loss, which is what makes cookies dry out.
Can I make these cookies gluten-free?
Yes, but expect a slightly different texture. Replace the 2.5 cups all-purpose flour with a 1:1 gluten-free baking flour blend like Bob's Red Mill. Add 0.5 teaspoon xanthan gum if your blend doesn't contain it. These cookies will be more crumbly and less chewy, but they'll still taste delicious. For best results, use a gluten-free flour blend specifically designed for baking.