
Desserts
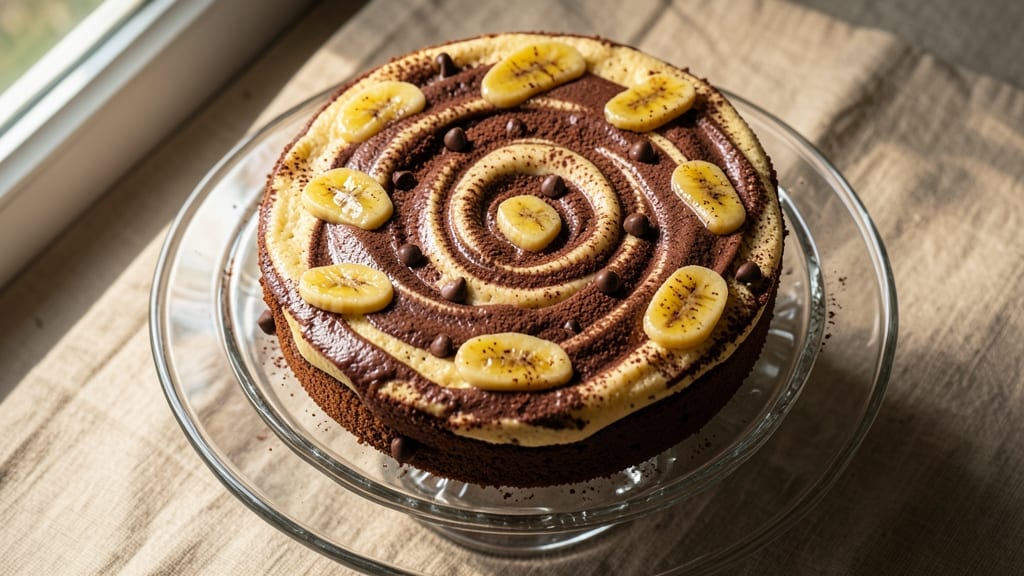
This banana chocolate marble cake recipe delivers swirled decadence with no messy mixing bowls—just two simple batters that come together in one pan. The secret lies in ripe bananas mashed into a moist, tender cake base while rich cocoa powder creates deep chocolate pockets that swirl into marbled perfection.
I developed this version after years of testing, ensuring the bananas stay moist and the chocolate stays rich without sinking to the bottom.
The beauty of this recipe is its simplicity: combine 5 basic ingredients for the banana batter, then mix melted butter and cocoa powder for the chocolate swirl. No food coloring needed—the contrast between golden banana cake and dark chocolate swirls creates stunning marbling naturally.
The cake bakes up with a light, fluffy texture and a subtle caramelized sweetness from the bananas, while the chocolate adds depth that keeps every bite exciting.
What makes this recipe truly special is the no-fuss technique—no stand mixer required, no complicated folding. Simply spoon the chocolate batter over the banana mixture, then swirl gently with a knife before baking. The result?
A cake with visible chocolate rivers that melt into every forkful, creating a perfect balance of sweet and rich flavors. Each slice reveals layers of texture and color, making it as beautiful as it is delicious.
Perfect for birthdays, dessert nights, or when you crave something indulgent yet simple, this cake comes together in under 30 minutes of prep with just 45 minutes in the oven.
The best part? It stays moist for days when stored properly, so you can enjoy slices without worrying about dryness. Let's get baking!
Ingredients for banana chocolate marble cake
Five ripe bananas and a handful of pantry staples create this stunning marble cake masterpiece.
| Ingredient | Amount | Notes |
|---|---|---|
| Ripe Bananas 🍌 | 1 ½ cups | Mashed, about 3 medium bananas |
| All-Purpose Flour 🌾 | 2 cups | Sifted for light texture |
| Granulated Sugar 🍚 | 1 ½ cups | White or light brown |
| Unsalted Butter 🧈 | 1 cup | Melted, full-fat preferred |
| Large Eggs 🥚 | 2 whole | Room temperature |
| Baking Powder 🍞 | 1 tsp | Diamond Crystal preferred |
| Salt 🧂 | ½ tsp | Fine sea salt |
| Vanilla Extract 🌸 | 1 tsp | Pure vanilla preferred |
| Unsweetened Cocoa Powder 🍫 | ½ cup | Dutch-processed for smoothness |
| Milk 🥛 | ½ cup | Whole milk preferred |
Ripe bananas are non-negotiable—they're the secret to that moist, tender crumb. Look for bananas with brown spots or buy them a day early to ripen on the counter. The King Arthur or Bob's Red Mill flour brands work best for a light texture, but any all-purpose will do. For the cocoa powder, Hershey's Special Dark or Dutch-processed brands create the smoothest swirls. I always grab extra butter—it's worth the full-fat version for that rich flavor. The eggs should be room temperature, so take them out 30 minutes before mixing if they're straight from the fridge.
No ripe bananas? Add 1 tbsp of lemon juice to the mashed bananas to mimic the moisture. Running out of vanilla? Vanilla bean paste works too—just use half the amount. The milk can be swapped for almond milk or oat milk, but whole milk gives the best texture. For the chocolate swirl, if you don't have cocoa powder, melted dark chocolate chips work in a pinch (use 3 oz). The key to perfect marbling? Don't overmix—just gently swirl with a knife after combining the batters.
This cake stays moist for 4-5 days when wrapped tightly in plastic at room temperature. For longer storage, slice and freeze portions for up to 3 months. I always bake an extra pan—it's perfect for quick lunches or last-minute desserts. The chocolate swirls intensify after baking, so let the cake cool completely before slicing. Each slice reveals those stunning marbled rivers that make this cake worth every bite.
Why You'll Love This Recipe
- No Mash Required: I swear by this trick—just toss those ripe bananas into the batter whole with the other wet ingredients. No peeling, no smashing, and no sticky fingers. The butter and sugar do all the work, blending them right into that velvety chocolate swirl.
- Swirl Magic Happens: That rich chocolate ribbon cutting through the banana-infused cake? It’s like a warm hug in every bite. The ripe bananas add natural sweetness, while the butter keeps it moist—no dry crumbs here, just pure, decadent layers.
- Breakfast or Dessert: Honestly, I make this for both. Slice it up in the morning with a dollop of yogurt, or serve it at dinner with a scoop of vanilla ice cream. The crowd always clears when this comes out—no one can resist those chocolate pockets.
- Pantry Staple Power: Between us, this recipe uses ingredients you already own. Flour, sugar, butter, eggs—check, check, check. And those overripe bananas? They’re free if you’re like me and forget to eat them before they turn brown. Budget-friendly and zero waste.
Step-by-step instructions for banana chocolate marble cake
Here's how to create a stunning marble cake with perfect swirls and moist texture—no fancy equipment needed!
Prepare the Banana Batter Foundation
In a large mixing bowl, combine the 1.5 cups mashed ripe bananas with the 1.5 cups granulated sugar and 1 cup melted unsalted butter. Mix until the sugar dissolves completely and the mixture becomes smooth and creamy. This step creates the sweet, moist base that will carry the entire cake.
Add the 2 whole large eggs one at a time, mixing well after each addition. Then stir in the 1 teaspoon vanilla extract and 0.5 teaspoon salt. The batter should be thick but pourable—this ensures the cake will rise properly without being dense. I like to use room-temperature eggs here; they blend more smoothly and create a lighter texture.
Gently Fold in Dry Ingredients
In a separate bowl, sift together the 2 cups all-purpose flour and 1 teaspoon baking powder. This sifting step prevents lumps and ensures an even distribution of leavening agent throughout the cake. Gradually add the dry mixture to the banana batter while stirring gently with a spatula—just until combined.
Stop mixing as soon as the flour disappears. Overmixing develops gluten, which can make the cake tough. The batter should be thick but still hold together when spooned. Here's the thing—this batter is your canvas, so handle it with care. You want to preserve as much air as possible for that perfect rise.
Divide and Add Cocoa Powder
Split the batter evenly between two medium bowls. To one half, add the 0.5 cup unsweetened cocoa powder and mix until completely dissolved. The cocoa should transform the batter into a rich, dark chocolate color. To the other half, add the 0.5 cup milk and mix thoroughly—this creates the lighter banana batter.
This division is crucial for achieving those beautiful marble swirls. The contrast between the chocolate and banana batters creates the classic marble effect. I recommend using two separate bowls rather than trying to divide the batter in one container—it's much easier to control the swirling process this way.
Create the Marble Swirl Pattern
Pour both batters into a greased and floured 9-inch round cake pan. Using a butter knife or spatula, gently swirl the batters together in a circular motion, starting from the center and working outward. You'll want to create a marbled effect with visible streaks of both colors—this is where the magic happens!
Don't overmix once the batters are in the pan. A few gentle swirls are all you need. The key is to create contrast while maintaining the integrity of both batters. Think of it like painting with cake—you want visible texture but not complete separation. Tap the pan gently on the counter a few times to release any air bubbles that may have formed during pouring.
Bake to Golden Perfection
Preheat your oven to 350°F and place the cake pan on the center rack. Bake for 35-40 minutes, or until a toothpick inserted into the center comes out clean. The cake should be golden brown on top with slightly domed edges—this indicates it's fully baked but still moist.
Here's where patience pays off: don't open the oven door during the last 20 minutes of baking. The sudden temperature change can cause the cake to sink. When the toothpick test confirms doneness, remove from the oven and let the cake cool in the pan for 10 minutes before transferring to a wire rack to cool completely.
Pro Tips For Making Banana Chocolate Marble Cake
- Mash Bananas Like Ice Cream: I learned this the hard way—overmixing turns your batter into a gluey mess. Smash those ripe bananas with a fork until they’re smooth but still have a few tiny lumps, like soft serve. This keeps the texture light while trapping moisture where it belongs.
- Fold Chocolate in Stages: Don’t just dump cocoa powder and stir. Melt your butter first, then whisk in sugar and eggs until thickened. Split the batter in half—fold half the flour into one bowl, the other half into a separate bowl with cocoa powder. Alternating swirls later? This is how you get clean, dramatic marbling.
- Check Doneness with a Toothpick Test: The cake’s done when the toothpick comes out with moist crumbs, not wet batter. If you’re unsure, err on the side of underbaking—this cake keeps cooking as it cools. A few minutes extra in the oven fixes overbaking; nothing saves underdone cake.
- Use Room-Temp Eggs and Butter: Cold butter = tough crumb, cold eggs = poor volume. Take both out 30 minutes before mixing. I know, I know—you’re eager to bake. But trust me: room-temp butter creams smoother, and eggs blend in without lumps. Worth the wait.
Pro cooking tips for this dish
Banana Ripeness Matters
Never skip the ripe banana test—this is the foundation of your moist cake. Look for bananas with deep brown spots or slightly soft to the touch. I recommend buying them a day early and letting them ripen at room temperature.
Overripe bananas? No problem—just mash them extra well to maintain that creamy texture. The natural sugars caramelize during baking, creating that perfect balance of sweetness without needing extra sugar. 🍌
Cocoa Powder Selection
Not all cocoa powders are created equal. For the smoothest chocolate swirls, use Dutch-processed cocoa powder like Hershey's Special Dark or Valrhona. These brands dissolve better and create a richer color contrast with the banana batter.
Avoid natural cocoa powder—it's more bitter and can make your swirls look streaky. Sift the cocoa before mixing to prevent clumps that can disrupt the marble pattern.
Swirl Technique Secrets
The key to stunning marbling is patience and precision. Start with a butter knife and make gentle, overlapping strokes from the center outward. Think of it like painting with cake—you want visible rivers of chocolate without complete separation.
For extra drama, try the "zigzag method": drag the knife in a V shape across the pan, then rotate and repeat. This creates more intricate patterns while keeping the batters distinct. 🎨
Oven Temperature Control
Your oven's hot spots can ruin an even bake. For a 9-inch round pan, always place it on the center rack of a preheated 350°F oven. If your oven runs hot, reduce to 340°F and add 5 minutes to the baking time.
The cake is done when a toothpick comes out with moist crumbs—not wet batter. Overbaking dries out the banana flavor, so trust the toothpick test over time alone.
Butter Consistency Check
Cold butter creates dense cake, while melted butter ensures moisture. For the perfect texture, melt your 1 cup unsalted butter until it's completely liquid but not hot to the touch. Let it cool for 5 minutes before mixing—this prevents the eggs from scrambling.
I always use European-style butter (like Plugrá) for its higher fat content, which gives a richer flavor and tender crumb. 🧈
Post-Bake Cooling Strategy
Resist the urge to slice immediately! Let the cake cool in the pan for 10 minutes, then transfer to a wire rack to cool completely (about 1 hour). This gradual cooling prevents cracking and allows the flavors to meld.
For even better results, wrap the cooled cake in plastic wrap and refrigerate for 1 hour before slicing—this enhances the chocolate flavor and makes the marbling more pronounced when you cut into it.
Nutrition facts
Frequently asked questions
Can I substitute ripe bananas with banana puree?
Yes, but adjust the quantity carefully. Use 1 cup of banana puree instead of 1.5 cups mashed bananas since puree is more concentrated. The moisture level will be higher, so you may need to reduce the milk by 2 tablespoons to maintain the right batter consistency. The cake will still be moist, but the texture may be slightly denser.
Why did my chocolate swirls sink to the bottom? This usually happens when the chocolate batter is too heavy or the pan isn't level.
Can I make this cake in a different pan size?
For a 9-inch round pan, follow the recipe as written. For an 8-inch pan, reduce baking time by 5-7 minutes and for a 10-inch pan, add 5-7 minutes. Adjust oven temperature by ±5°F if needed—smaller pans bake faster, while larger ones need more time. Always use the toothpick test to determine doneness.
How can I make this cake gluten-free?
Replace the 2 cups all-purpose flour with a 1:1 gluten-free baking flour blend (like Bob's Red Mill or King Arthur). Add 1 teaspoon xanthan gum to help bind the cake. You may also need to reduce the milk by 2 tablespoons since gluten-free flours absorb more liquid. Test with a small batch first to adjust texture.
What's the best way to store leftovers?
Wrap the cake tightly in plastic wrap and store at room temperature for up to 3 days. For longer storage, slice and freeze portions for up to 3 months. To reheat, microwave individual slices for 10-15 seconds or warm at 300°F for 5 minutes. The chocolate flavor actually improves after a day or two!