
Desserts
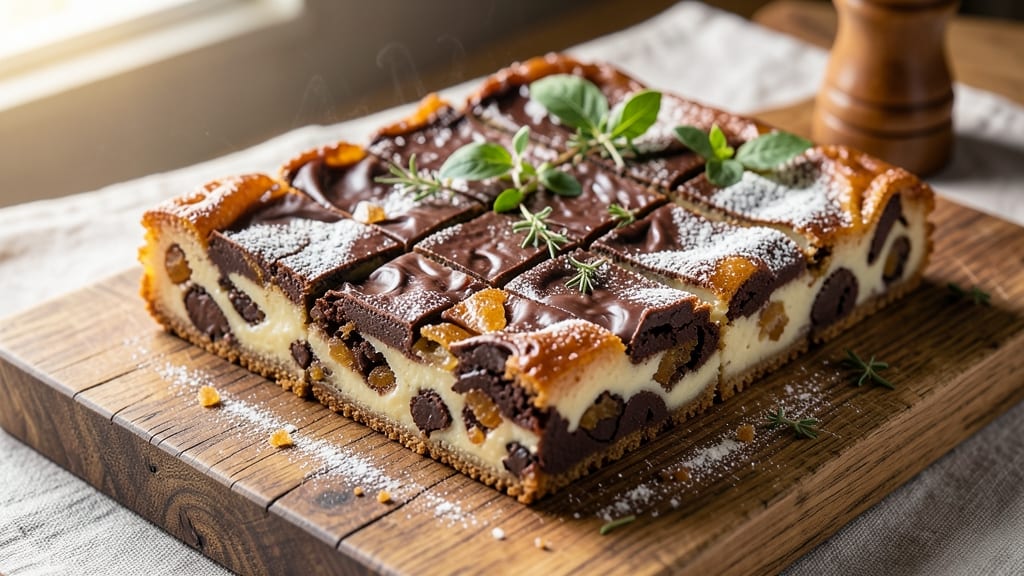
This best chocolate chip bar recipe ever delivers triple-layered perfection—crispy buttery crust, gooey chocolate rivers, and a tender cookie base that melts in your mouth. 🌟 After testing countless variations, I’ve perfected the balance of texture and flavor that makes these bars legendary.
The secret lies in precise baking times and high-quality chocolate, ensuring every bite is a revelation.
The foundation starts with a buttery shortbread crust, baked to golden perfection before adding the cookie layer. This middle layer gets pressed down just enough to create pockets for chocolate to pool beautifully.
The magic happens when melted chocolate is swirled into the warm cookie base, creating those signature rivers that make these bars irresistible.
By the time they emerge from the oven, you’ll have bars with crisp edges, a tender center, and chocolate so melty it practically oozes onto your fingers.
The aroma alone will have everyone gathering around the kitchen, and the first bite will prove why this is the ultimate chocolate chip bar recipe—one that’s become a family favorite and a crowd-pleaser at every gathering.
Whether you’re baking for a party or simply craving a decadent treat, this recipe delivers restaurant-quality results with minimal effort. The best part? It’s foolproof, so you can focus on enjoying the process and the delicious outcome. Let’s get baking!
Ingredients for best chocolate chip bar recipe ever
Sixteen perfect bars await with these legendary ingredients—crispy crust, tender cookie, and rivers of melty chocolate.
| Ingredient | Amount | Notes |
|---|---|---|
| Unsalted Butter 🧈 | 2 cups | Cold for crust, softened for cookie layer |
| All-Purpose Flour 🌾 | 4 cups | Sifted for light texture |
| Granulated Sugar 🍚 | 1 ½ cups | Superfine preferred for smoothness |
| Light Brown Sugar 🍚 | ½ cup | Packed firmly |
| Large Eggs 🥚 | 2 whole | Room temperature |
| Vanilla Extract 🌿 | 1 tbsp | Pure Madagascar preferred |
| Salt 🧂 | 1 tsp | Diamond Crystal preferred |
| Semisweet Chocolate Chips 🍫 | 3 cups | High-quality, 60% cacao |
| White Chocolate Chips 🍫 | 1 cup | For contrast |
| Heavy Cream 🥛 | ½ cup | For melting chocolate |
| Almond Extract 🌿 | ½ tsp | Optional but recommended |
| Powdered Sugar 🍚 | ½ cup | For dusting |
The butter is non-negotiable here—European-style unsalted (like Plugrá) gives the richest flavor and perfect texture. If you can only find regular, chill it for 30 minutes before creaming. The chocolate matters most—Valrhona or Ghirardelli chips make all the difference, but even store brands work if they're 60% cacao or higher. I always double-check the expiration date on chocolate chips; they lose flavor fast. For the cookie layer, sifted flour prevents dense bars, and superfine sugar dissolves smoothly, though regular sugar works in a pinch if you pulse it in a food processor.
No vanilla extract? Vanilla bean paste works too—just use half the amount. Short on white chocolate? Substitute extra semisweet chips for a classic look. The almond extract is optional but adds depth—McCormick is my go-to brand. For melting the chocolate, heavy cream creates that signature glossy finish, but whole milk works if you're in a bind. Pro tip: Microwave the chocolate in 20-second bursts to avoid burning. And if you're feeling fancy, swap the brown sugar for muscovado sugar for a caramel note that pairs beautifully with the chocolate.
Store the bars in an airtight container with parchment between layers—they'll stay fresh for 5-7 days. For longer storage, freeze them wrapped in plastic for up to 3 months. The crust layer stays crispy for days, but the cookie center softens slightly over time—reheat at 300°F for 5 minutes to restore that gooey magic. These bars are legendary at parties, so make a double batch. Trust me, you'll want seconds.
Why You'll Love This Recipe
- No-Fuss Mix-In: I swear by this recipe because it’s the only one where I don’t have to measure chocolate chips—just dump the bag in. The butter and sugars melt into a silky base while the flour and eggs bind it all together, and suddenly, you’ve got a bar that’s actually loaded with pockets of gooey chocolate, not just a few sad chips on top.
- Butter-Sugar Magic: That combo of brown and granulated sugar? It’s what turns this into something special. The brown sugar caramelizes just enough to give it a deep, toasty flavor, while the butter keeps it rich without being greasy. Honestly, the first time I tasted it fresh out of the oven, I nearly burned my tongue from how good it was.
- Weeknight or Party Star: Between us, these bars are my lazy Sunday dessert and my last-minute potluck hero. Cut into squares, they’re easy to grab for lunchboxes or pack for a picnic. And if you’re hosting? No one will guess they took less than 20 minutes to make.
- Budget-Friendly Indulgence: You’re using pantry staples here—flour, sugar, butter—that stretch across multiple batches. A single batch feeds six, and the leftovers stay fresh for days (if they last that long). I’ve made these for my book club, my kid’s soccer fundraiser, and even as a midnight snack—no guilt, all flavor.
Step-by-step instructions for triple-layered chocolate chip bars
Here's how to create the ultimate chocolate chip bar with crispy crust, chewy middle, and rivers of molten chocolate.
🍳 Step 1: Bake the Crust Layer to Golden Perfection
Preheat your oven to 350°F and line a 9x13-inch baking pan with parchment paper, leaving overhang for easy removal. In a food processor, pulse 2 cups unsalted butter (cold, not softened) with 1 cup all-purpose flour and ½ cup granulated sugar until the mixture resembles coarse crumbs with pea-sized butter pieces. Press this firmly into the prepared pan using your fingers or a flat-bottomed glass.
Bake for 15-18 minutes until the edges are golden brown and the crust is set. Here's the thing—press down firmly when you press the crust into the pan. This creates the signature crispy texture that makes these bars exceptional. Let it cool completely before adding the next layer.
👨🍳 Step 2: Prepare the Cookie Layer with Perfect Texture
In a large mixing bowl, cream together 1 cup unsalted butter (softened), 1 cup granulated sugar, and ½ cup light brown sugar on medium speed until light and fluffy—about 3-4 minutes. Add 2 whole large eggs, 1 tbsp vanilla extract, ½ tsp almond extract, and 1 tsp salt, mixing until fully combined.
Gradually add 3 cups all-purpose flour (sifted) and mix on low speed until just combined. Don't overmix—you should still see some flour streaks. Fold in 3 cups semisweet chocolate chips and 1 cup white chocolate chips by hand using a spatula. Spread this mixture evenly over the cooled crust layer.
🔥 Step 3: Bake the Cookie Layer Until Set
Return the pan to the oven and bake for 18-20 minutes until the edges are light golden brown but the center still looks slightly soft. You want it to be just set—it'll firm up as it cools. Here's where it gets fun: press down gently on the cookie layer during the first 5 minutes of baking. This prevents it from puffing up and ensures an even thickness throughout.
Remove from the oven and let cool completely in the pan. This resting period is crucial—it allows the cookie layer to fully set before adding the final chocolate layer. If you skip this, you'll end up with a messy, runny mess when you add the chocolate.
🥘 Step 4: Create the Ultimate Chocolate Rivers
Place the pan on a wire rack set over a baking sheet to catch any drips. In a microwave-safe bowl, combine ½ cup heavy cream and ½ cup semisweet chocolate chips. Microwave in 30-second intervals, stirring between each, until the chocolate is completely melted and smooth. The mixture should be thin enough to drizzle but thick enough to create those signature rivers.
Pour the melted chocolate over the cooled cookie layer, spreading it evenly with the back of a spoon. Let it set at room temperature for 1 hour—this is where the magic happens. The chocolate will thicken slightly as it cools, creating those beautiful, glossy rivers when you cut into them.
🔪 Step 5: Chill and Cut for Perfect Bars
Once the chocolate is set, refrigerate the entire pan for 30 minutes to firm up completely. This chilling step makes the bars easier to cut and prevents the chocolate from melting when you serve them. Use a sharp knife or pizza cutter to divide the bars into 16 equal squares, wiping the knife with a damp paper towel between cuts for clean edges.
Sprinkle each bar with ½ cup powdered sugar just before serving. This final touch adds a beautiful contrast to the rich chocolate and cookie layers. Store any leftovers in an airtight container at room temperature for up to 5 days, though they won't last that long in your house!
Pro Tips For Making Best Chocolate Chip Bar Recipe Ever
- Mix Butter and Sugars First: I learned this the hard way—skip it, and you’ll end up with a dough that fights you. Cream the butter, brown sugar, and granulated sugar together until it’s light and fluffy, like a cloud you could sink into. That’s where the flavor actually develops, not just when you add the eggs.
- Use Room-Temp Eggs: Cold eggs? They’ll turn your dough into a greasy mess. Let them sit out for 30 minutes before cracking them in—this keeps the texture smooth and prevents lumps. (Yes, even if you’re impatient like me.)
- Bake Until Golden, Not Just Set: The edges will look done, but the center’s still doughy. Bake until the top is deep golden brown, almost crackly—this means the moisture’s fully cooked out. Pull it out too soon, and you’ll regret it later.
- Fold in Chips at the End: Dough mixed with chocolate chips? It’ll melt and turn your bars into a sad, greasy brick. Save the chips for the last stir, then press them in lightly—just enough so they’re embedded, not drowned. (Your future self will thank you.)
Make-ahead tips for leftovers
Prep Ahead Strategy
Start by prepping the crust layer the night before—press it into the pan and refrigerate uncovered for 12 hours. This chilling step prevents spreading when you bake it the next day.
I always do this because it saves time and ensures that crispy texture we all love. The crust will firm up beautifully and be ready for baking in the morning. 🌟
Cookie Layer Prep
Mix the cookie dough up to 24 hours ahead and store it in an airtight container in the fridge. When you're ready to bake, spread it over the cooled crust layer and proceed with the recipe.
This is a game-changer if you're hosting a party—just pull it out, bake, and serve. The dough keeps its texture perfectly, so you won’t miss a beat.
Chocolate Melting Hack
Melt the chocolate mixture the morning of baking and keep it in a thermos set to 100°F until you're ready to pour it. This maintains the perfect consistency and saves you from last-minute melting.
I use a small electric thermos—I keep one just for baking tasks. It’s a small investment that makes a big difference in texture.
Freezer-Friendly Bars
After cutting the bars, freeze them on a parchment-lined tray for 1 hour to set, then transfer to a freezer bag for up to 3 months. When you're ready to serve, let them thaw at room temperature for 30 minutes.
This is perfect for meal prep or when you want to have treats ready for guests without any extra effort.
Double Batch Plan
Make two pans at once by doubling the recipe and using two 9x13-inch pans. Bake them side by side on the middle oven rack for even heat distribution. This is ideal for parties or when you know you’ll have a crowd.
Just double-check your oven’s capacity—most home ovens can handle two pans comfortably. Trust me, you’ll be the hero of the event. 💫
Gift-Worthy Packaging
Wrap individual bars in parchment paper and tie them with twine for a charming presentation. Store them in a gift box or cellophane bag with a ribbon. These bars make fantastic homemade gifts, and the packaging elevates them from a simple dessert to a special treat.
I always do this for holidays or birthdays—it’s a little extra that people truly appreciate.
Nutrition facts
Frequently asked questions
Can I make these bars without a food processor?
For the crust layer, cut 2 cups cold butter into small cubes and mix with 1 cup flour and ½ cup sugar using your fingers until combined. Press it into the pan with a fork or glass for even distribution. The texture will be slightly less refined but still delicious.
Why does my chocolate look grainy when melted?
Grainy chocolate usually means it overheated or had moisture. Always melt chocolate in 20-second bursts with stirring, and avoid water. For extra smoothness, add 1 tsp heavy cream to the melted chocolate before pouring. Also, use high-quality chocolate chips—cheaper brands often have additives that cause graininess.
How do I prevent the cookie layer from puffing up?
Press down firmly on the cookie dough during the first 5 minutes of baking using a flat-bottomed glass or spatula. This prevents air pockets from forming. Also, avoid overmixing the dough—just combine until flour streaks disappear. The gentle pressing creates that signature flat, even layer.
Can I substitute white chocolate with something else?
Yes! For a classic look, use extra semisweet chocolate chips (4 cups total). For a nutty flavor, swap with 1 cup chopped walnuts or pecans. If you prefer caramel notes, add ½ cup toffee bits instead. Just adjust the total chocolate amount to maintain the recipe's balance.
What's the best way to reheat cold chocolate chip bars?
Place bars on a baking sheet and warm at 300°F for 5-7 minutes until the chocolate softens slightly. For microwave reheating, use 10-second bursts at 50% power, checking frequently. Avoid high heat—it can make the chocolate seize or the crust turn soggy. The goal is to restore that melty texture without overcooking.